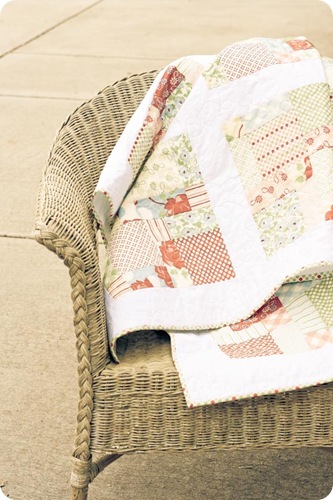
Binding Tutorial Part 3
Warning :: Very long and detailed post!
Now comes the fun part – curling up on your sofa in front of the TV, with your quilt, and attaching the binding. Of course you can always stitch in the ditch on the front of your quilt to hold the backside of the binding down, but I think it looks so much nicer to hand stitch it down – and it’s really not that hard! I can usually finish it in one sitting. Which is usually a short sitting since I have a short attention span.
 |
 |
Getting Ready :: Tying the Knot
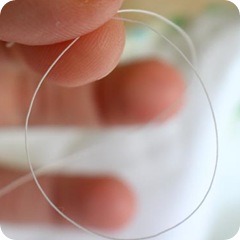
First I start by cutting a long length of hand stitching thread. I use hand quilting thread because of it’s higher tension strength. When you hand sew, your tension is much greater than a machine, and if you don’t want your thread breaking on you when you sometimes have to tug tight, it’s a good idea to use hand quilting threads. But not necessary. Just go gently if using regular machine thread.
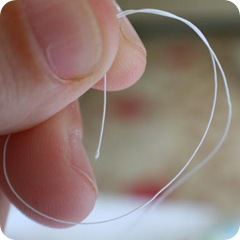
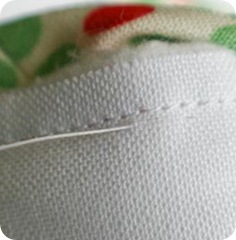
1. Loop thread towards end of length.
2. Wrap the end around your loop (going into the hole you’ve created) two or three times. Pull end to tighten and form knot. You are essentially creating a double knot without having to knot it two individual times, hoping that the second time around lands over the first time around.
 |
 |
 |
 |
Sewing It Down :: First Stitches
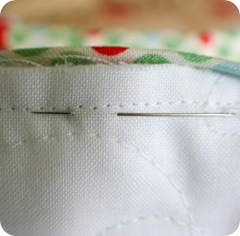
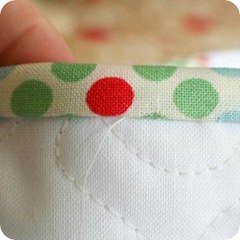
1. Beginning somewhere in the middle of one side of your quilt (I like to start with one of the long sides) insert your needle just beyond the seam allowance from where you stitched your binding onto the front of your quilt, making sure to go through not only the backing, but also the binding. Don’t go through the quilt top!
2. Draw the needle and thread through, gently tugging when the knot reaches the backing, so as to nestle the knot into the inside of the quilt. This will help keep your thread in place once the knot is nestled inside the batting.
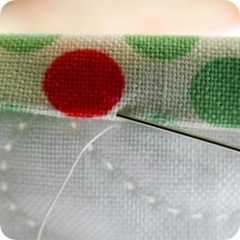
3. Fold over your binding so that it just barley covers where your thread is leaving the backing. This is important, as it will hide your stitches from view when complete.
**Note** You may choose to use clips to help you hold your binding in place, but it is not necessary. I now find that it is much faster to just hold it in place with my left hand as I go (I’m a righty).
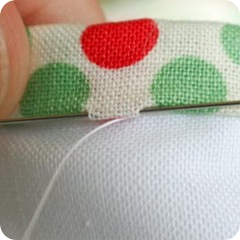
4. Insert your needle into the fold of your binding at the spot right above where your thread has exited the backing. Make sure the needle is going into the fold and not all the way through it. You want your needle to be inside that fold.
**Note** To visualize this stitch, you will be creating a straight stitch from where it exits the backing to where it enters the binding.
 |
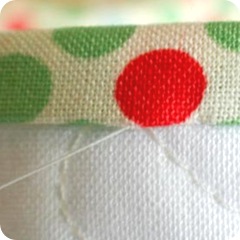 |
5. Leaving your needle inside the fold of the fabric, move it along a small distance (1/4” to 1/2” should work nicely) and exit the folded fabric at the fold.
6. Gently pull the thread taunt. This brings the binding down against the quilt. Don’t pull it too tight or it will pucker your binding. Although, once washed, all mistakes will most likely disappear. So don’t stress over this part.
Now that the first stitch is complete, we generally work the rest of the stitches the same, but it can be done in a more fluid movement now.
Going At It :: Blind Stitch Dissected
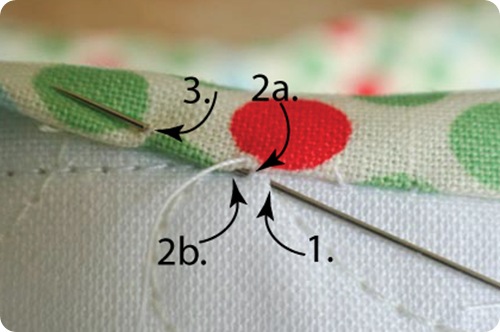
1. Insert needle into quilt below where you exited the binding from pervious stitch (it looks a little off here because the fabric is slightly twisted to show you every part of this stitch.)
2a. Rock your needle back up through the batting and come out of the backing very close to where you inserted your needle in the previous step.
2b. Have your needle enter the fold of the binding and travel along the fold approximately 1/2” (or what you feel is a comfortable stitch length to secure the binding to the quilt).
3. Exit the binding on the fold and pull gently until thread is taunt.
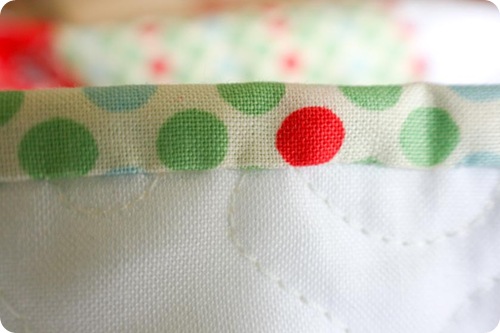
That’s it, that’s a blind stitch. It’s kind of like a ladder stitch if you are familiar with that. It’s the same basic idea. This stitch truly is a “blind” stitch. I love that it hides all of my thread and all you see is binding connected to backing with out a thread showing. There are many ways to attach your binding to your backing and they all work beautifully, this just happen to be the way I like to do mine! It is neither the right way nor the best way, just my way. See how the binding pulls in a little bit at even intervals? This is where I’ve stitched it down to the quilt. But if you click and make this image larger, you will notice that you see no thread (or very, very little of it).
Corners
 |
 |
 |
 |
**An additional post with more detailed information on forming perfectly mitered corners can be found in here.**
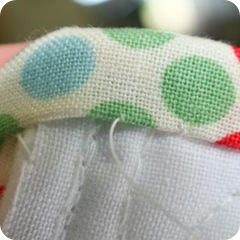
1. Continue your blind stitch along the length until you reach your seam allowance on the other side of the quilt. Stitch right up to that point.
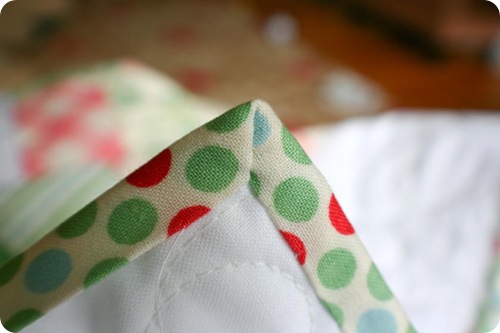
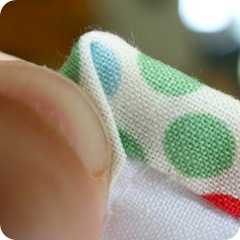
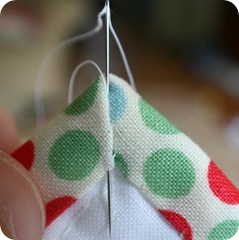
2. Open out your binding on the left (since I sew right handed) and have the angled corner lay as flat as possible. Then keeping it in place as best you can with your thumb over the angled part that hangs to the left, fold in the binding. That is hard to explain. The gist of it is to make sure your fabric comes over straight without bunching of fabric in your fold. It’s easier done than said. When you fold over, make sure the interior edges of the miter meet up, forming a nice right angle. You might have to mess with it a little to match up. Sometimes I put a clip on the left side of the binding, as close as I can get to that 90 degree angle, to help hold this in place while I stitch.
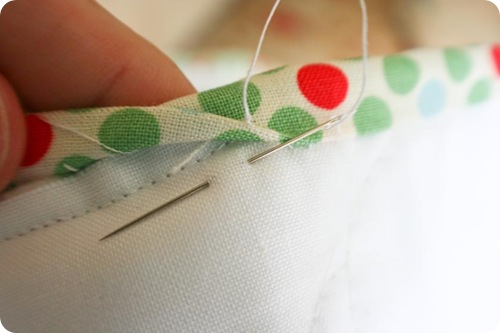
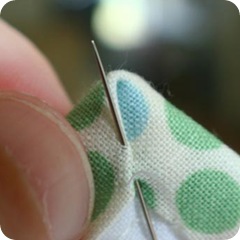
3. Holding firmly in place (with thumb or clip or pins) stitch up the length of the miter. I can usually get three stitches in there. Take your time. Make little stitches. I also start my first stitch going from the backing up through the binding I was working on, through to the new section of binding, catching all three layers together. Then I continue to work up the miter going into the binding on the top (the binding I was originally working with) through the new binding to the left.
4. When I have gone as high as I can, I tug my thread to make sure my stitches are tight and my miter is held in place (and that my stitches aren’t showing) and I insert the needle from the top straight down through the binding on the left, right at the 90 degree angle.
**Note** You may choose to stitch back down through the miter as you went up it to help hold it in place even better. I don’t usually do this and don’t feel it’ matters either way. Also, you can insert your needle all the way through to the front when you reach the top and come back through the miter on the front side if you would like to tack that down as well, then when your each the bottom 90 degree corner of the miter, just push all the way through your quilt again to bring your needle back to the back.
Now you just continue on as you were with your blind stitching until you reach another corner. I try and keep my stitch length very short around the miters to have the best hold possible. Lots of small stitches means more staying power. I think I made it sound like a lot more work than it is. If you would actually like to see me do this on video, I can do that. But you might also like to go to You Tube and search for videos on binding, there might be something on there that works for you better than this tutorial. We all teach differently, and learn differently. I know when I’m learning something new I watch lots of videos and read lots of tutorials until I find what works best for me.
Need More Thread! :: Tying Off
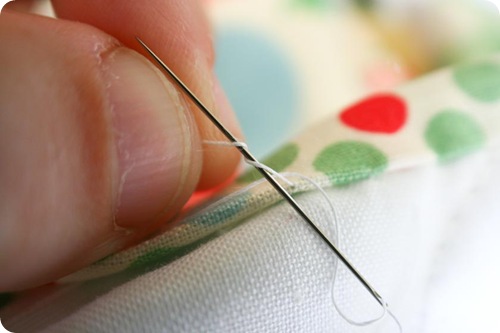
When I get to a few inches from the end of my thread, I tie off and nestle my knot in the backing. To do this I make a loop and wrap the thread around my needle twice and pull the needle through those twists and try and draw the knot as close to the binding as possible. I usually hold the loop in place with my left thumb close to the binding where the thread exited and pull. This helps the knot to stay in that vicinity.
Then I insert it close to the seam allowance stitch (closer than this usually) and make sure my needle exits just beyond where the knot would lay if stretched to the left (hard to explain). I do this so that I can pull my thread back through the backing and have it hold the binding that I stitched down stay in place. I don’t want it to gap up at that spot. I want it to be held nice and tight to the backing.
Now I thread my needled and begin again. I always begin stitching back a few stitches in my binding to help secure that end. Also, when I get back to the beginning, I stitch beyond where I started a few stitches. When I tie off, I make sure that my ending knot will firmly hold the binding in place, but since I am stitching beyond my starting point a few stitches, this really shouldn’t be a problem. Just insurance.
Questions? Leave a comment with your questions and I’ll answer them in the comments as well as try and respond personally to your email. Remember, there is no right or wrong way to do binding, this is just what works best for me and I like to share that with you. Google and search You Tube to find other ways that might be more useful to you, or help you to better understand a certain aspect of binding. I’m always here if you have questions – just email!

