
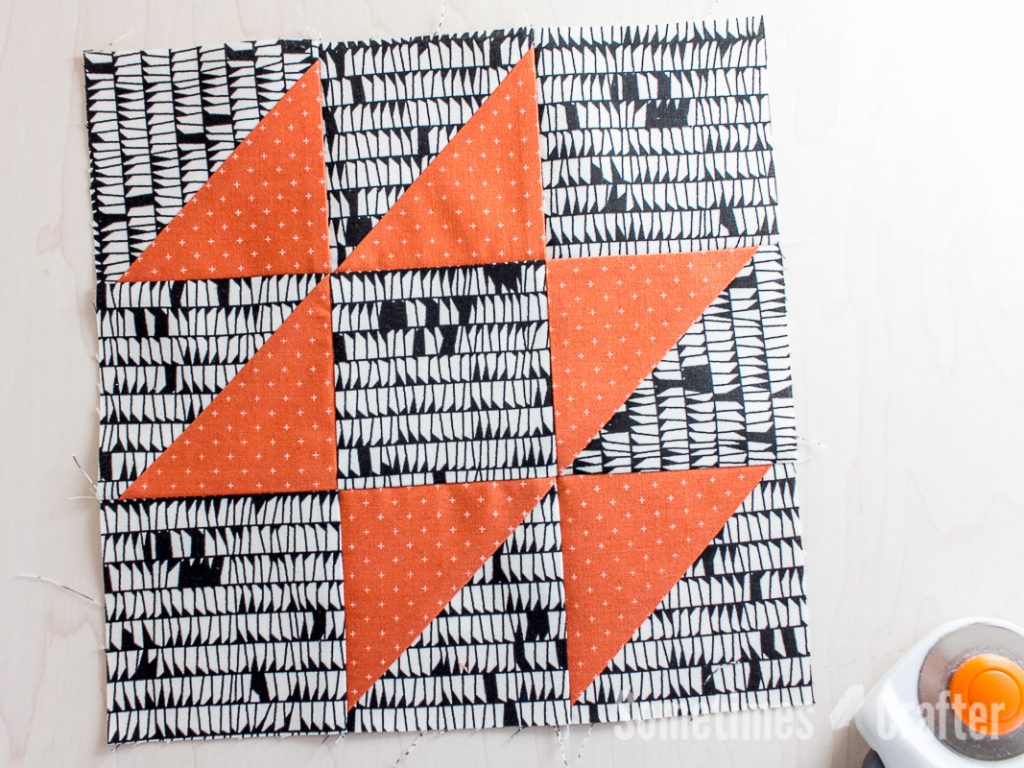
Batwings + Bowties Block
Hello everyone! Today I have long asked for tutorial for the block I used in my Halloween quilt a few years ago. Not only that, but I made a YouTube video tutorial for it as well. It’s such a simple block and so much fun to put together with scraps or small amounts of fabric you have on hand. It’s the perfect block for a scrappy quilt.
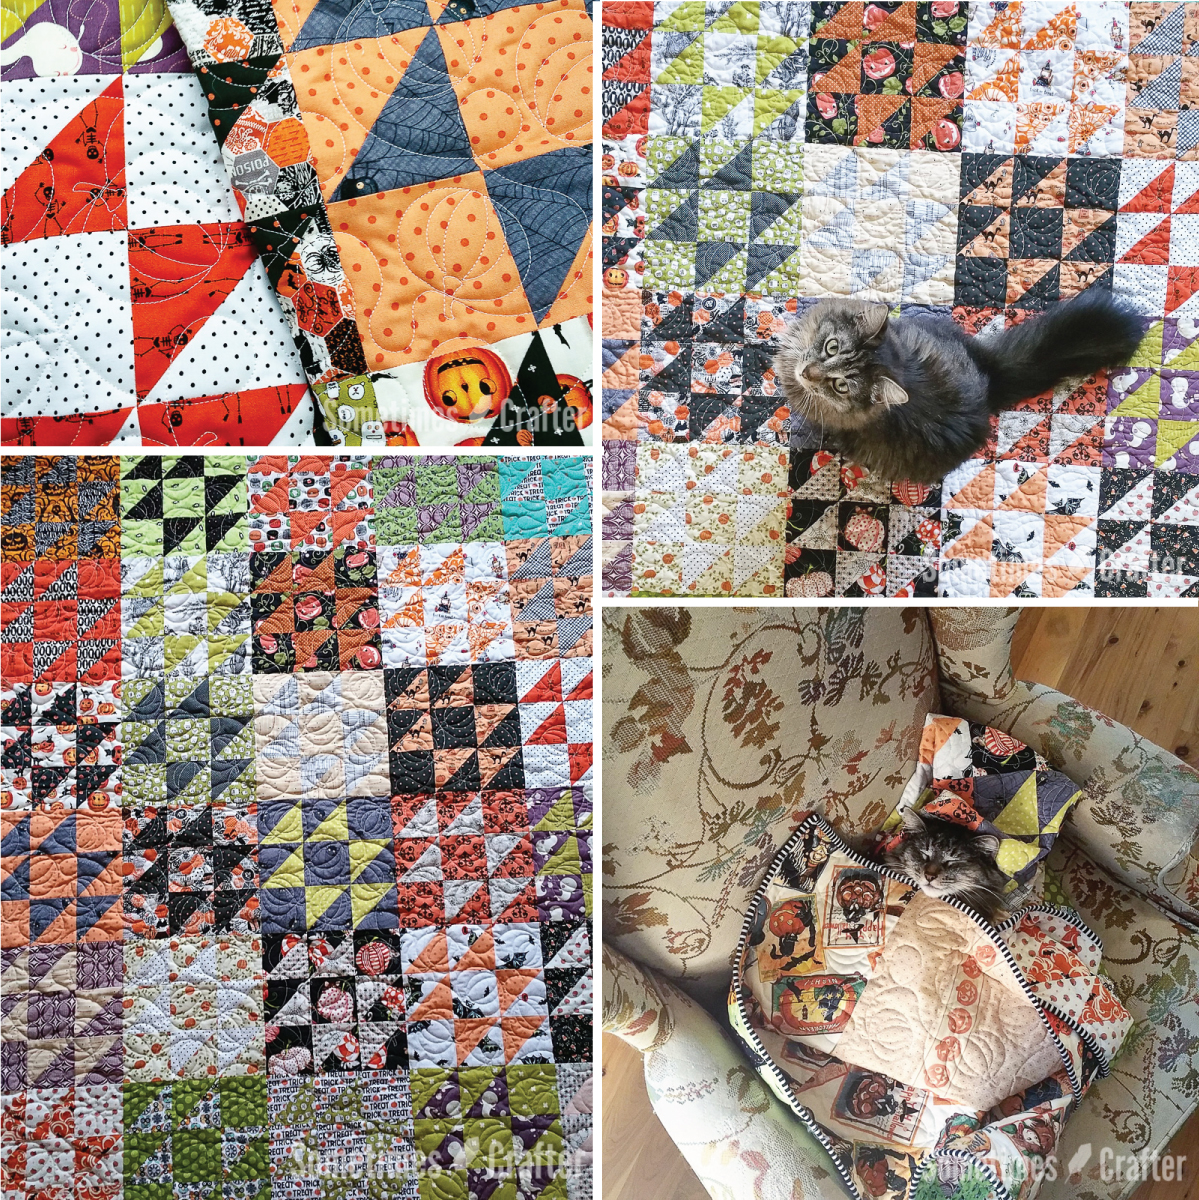
I had so much fun making this quilt, and using all of my hoarded Halloween fabrics. Halloween is my favorite holiday and I can’t believe it took me so many years to finally make a quilt for the occasion. I just love pulling this quilt out in the fall and have such a hard time putting it away. Obviously JoJo thinks its her quilt! I don’t often make quilts from a block I’ve already done before, but I know I will be making another quilt like this soon with fabrics that will work all year long. Let’s get into the tutorial!
Batwings + Bowties Block Tutorial
For this block you don’t need very much fabric. Two fat quarters in complimenting, but contrasting fabric, will make you a few blocks, so I suggest digging through your scraps for large pieces. The finished block measures 9½” x 9½”. I didn’t include full quilt amounts because I just grabbed and used fabrics as I went to “build” the quilt until I was happy with how it looked. My final quilt ended up being 5 blocks wide by 6 blocks long and is the perfect lap sized quilt for hanging out on the couch.
Supplies
- 2 fat quarters (or scraps large enough to get the pieces you need from them)
- 6½” ruler (or larger) with a diagonal line marked across the ruler (I use Ominigrid rulers)
- Rotary cutter and cutting mat
- Sewing Machine (or you could stitch by hand if you like that sort of thing)
- Hot steam iron for pressing
- Pins for pinning those seam allowances! Yes, that’s important!
Lets begin!
1. To start, iron out the fabric you’ll be using and then cut the following:
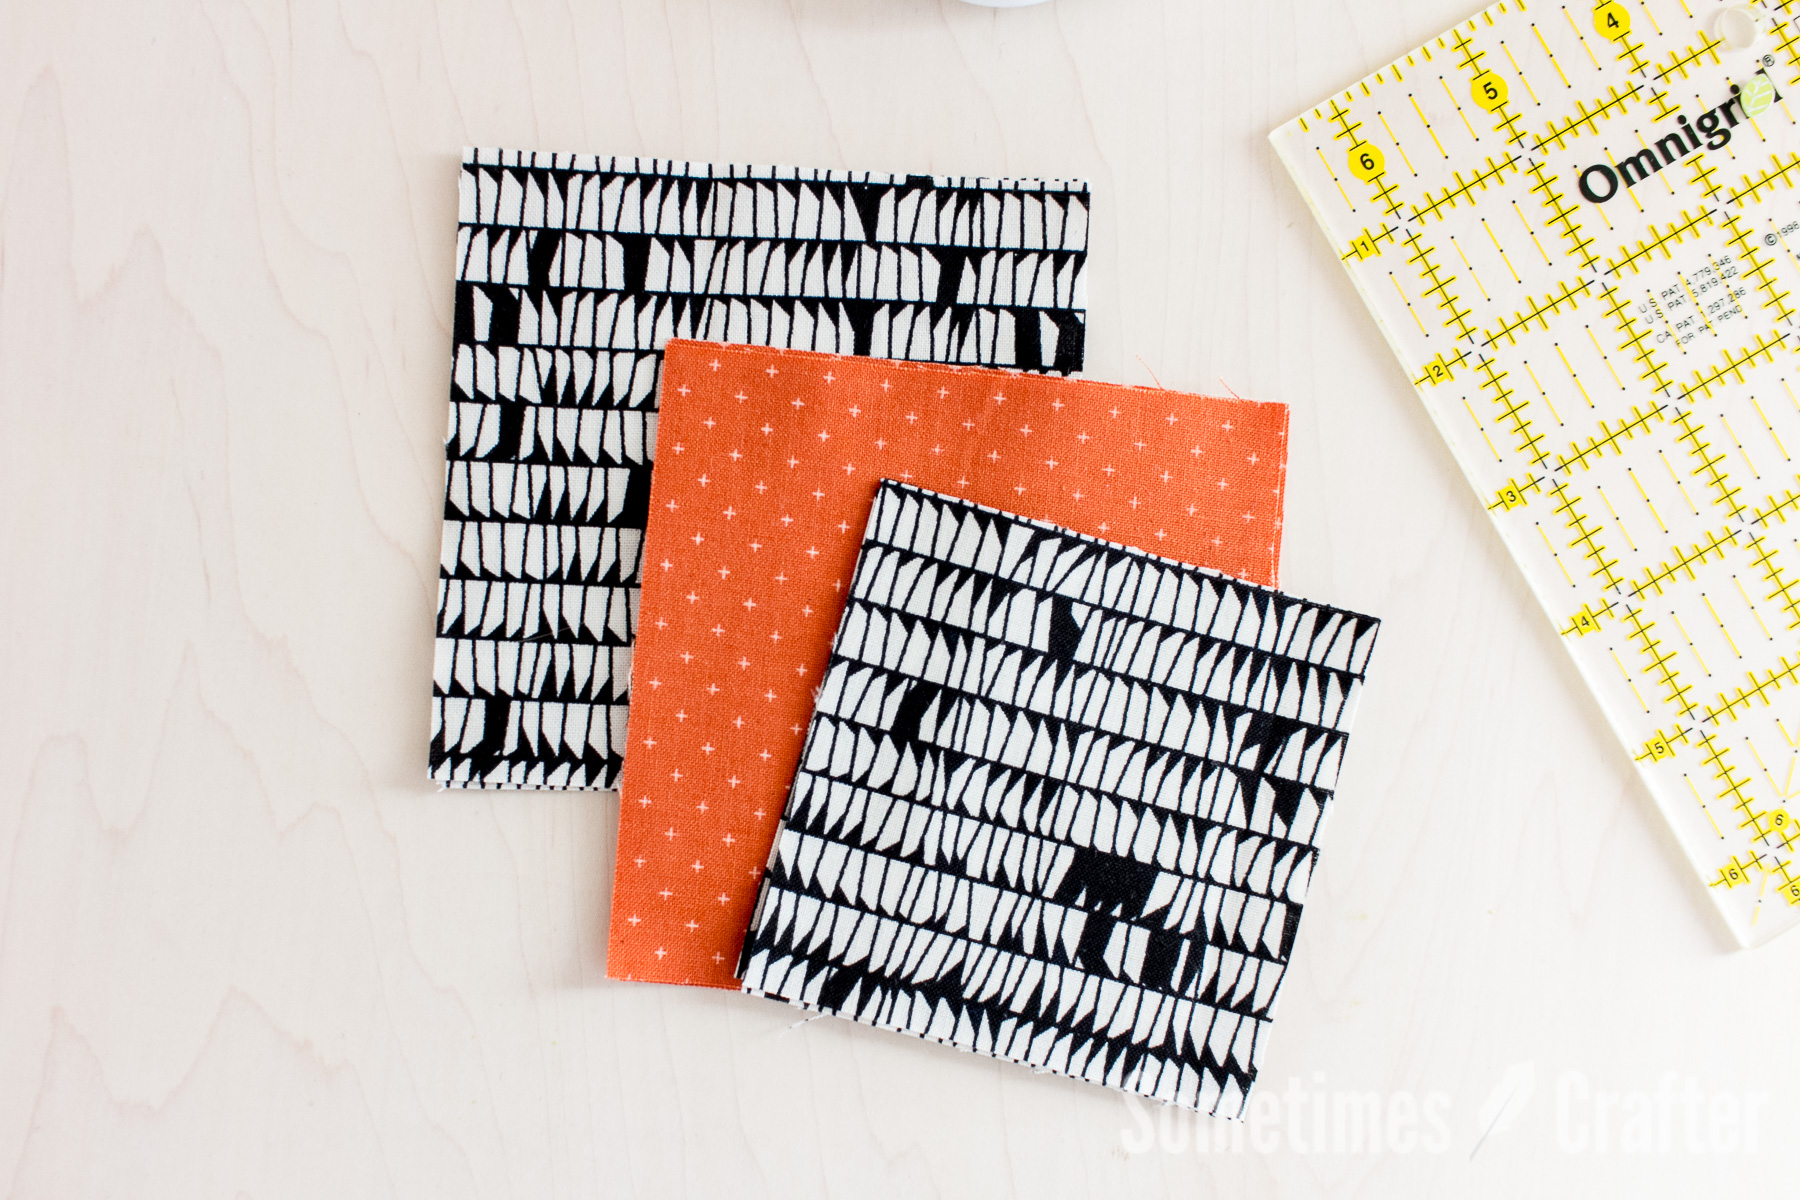
Background Fabric:
• (3) 3½” x 3½” squares
• (3) 4¼” x 4¼” squares
Main Fabric:
• (3) 4¼” x 4¼” squares
**Set aside your 3½” squares, we’ll be working with your 4¼” squares for now.**
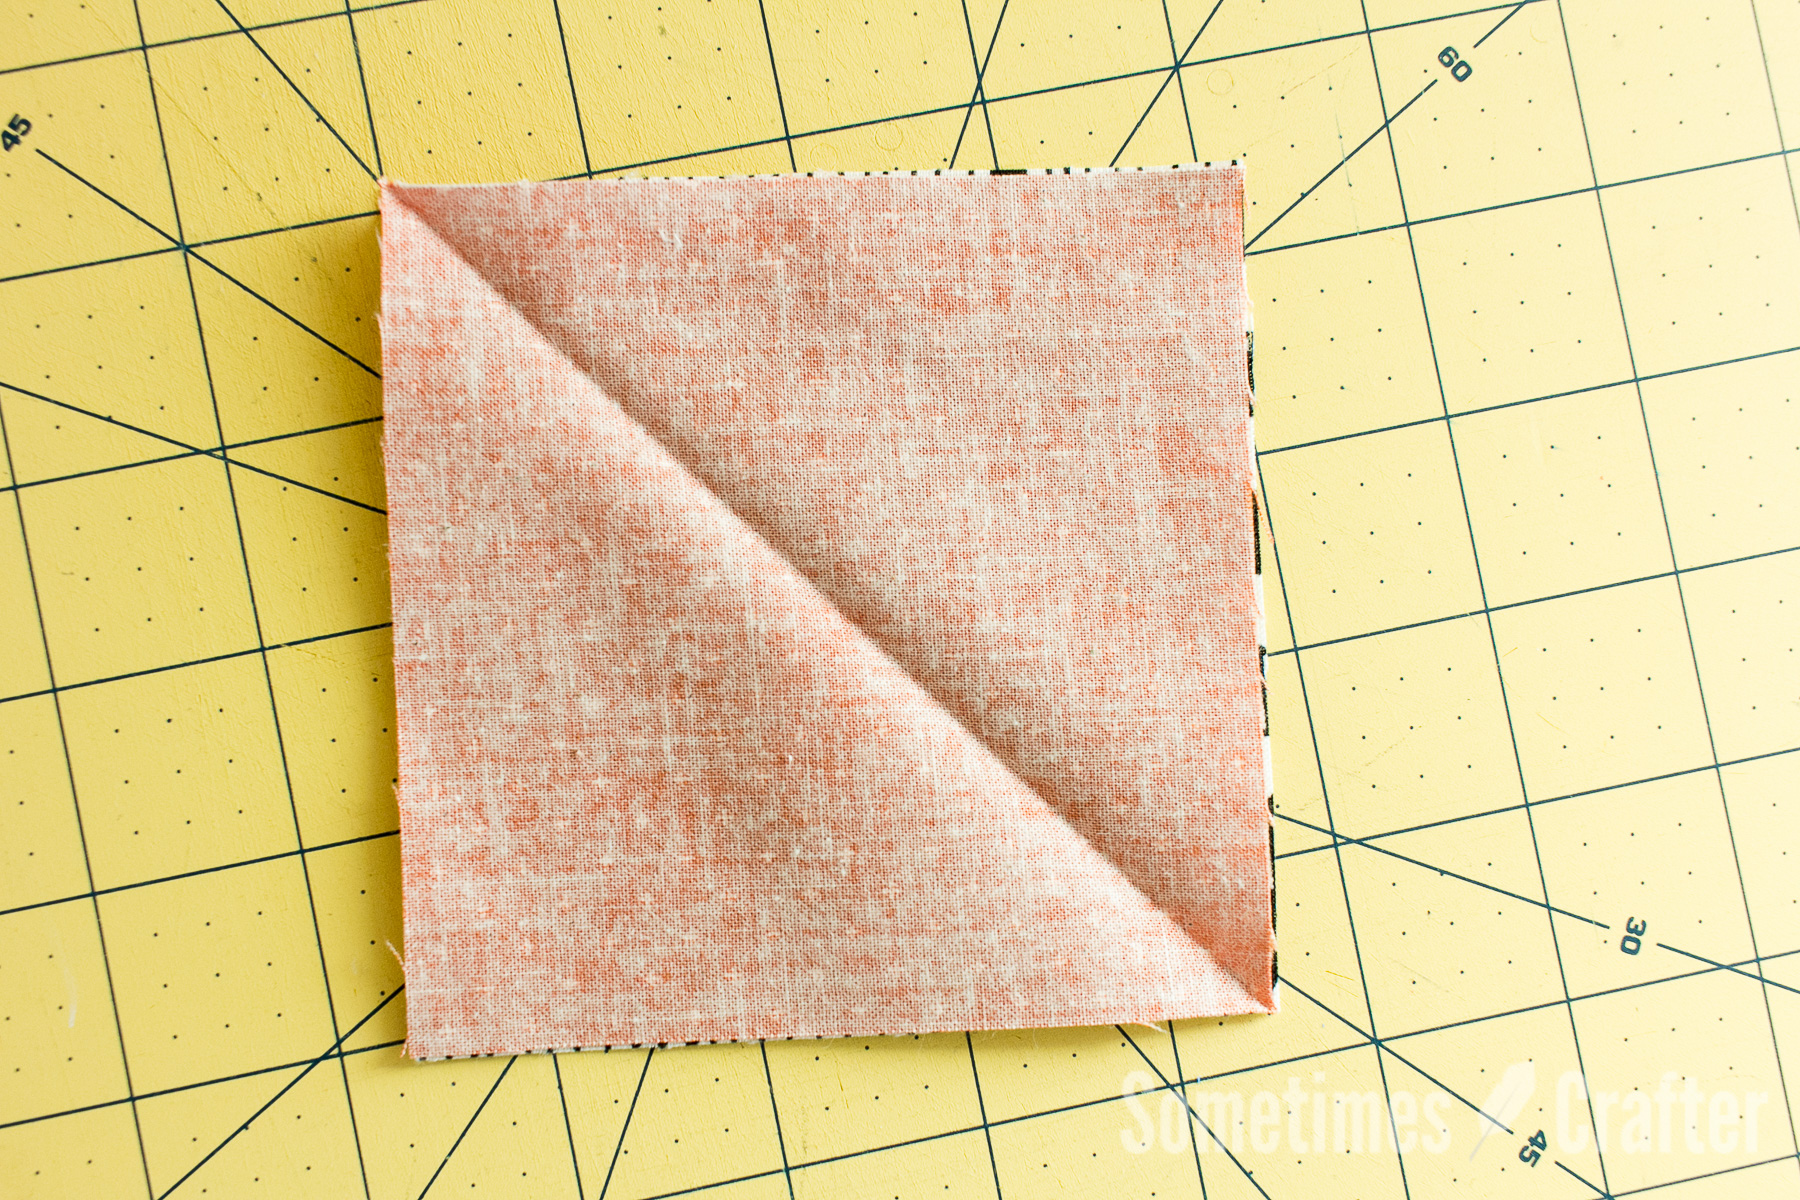
2. You are going to make half square triangles (HST) with the 4¼” squares using the 2-HST method (meaning we make two from each set of squares). Choose which ever fabric is easiest (your background or main fabric) and mark a diagonal line across your square on the backside. Use either a pen, Hera marker or press them in half with an iron, wrong sides together (my preferred method).
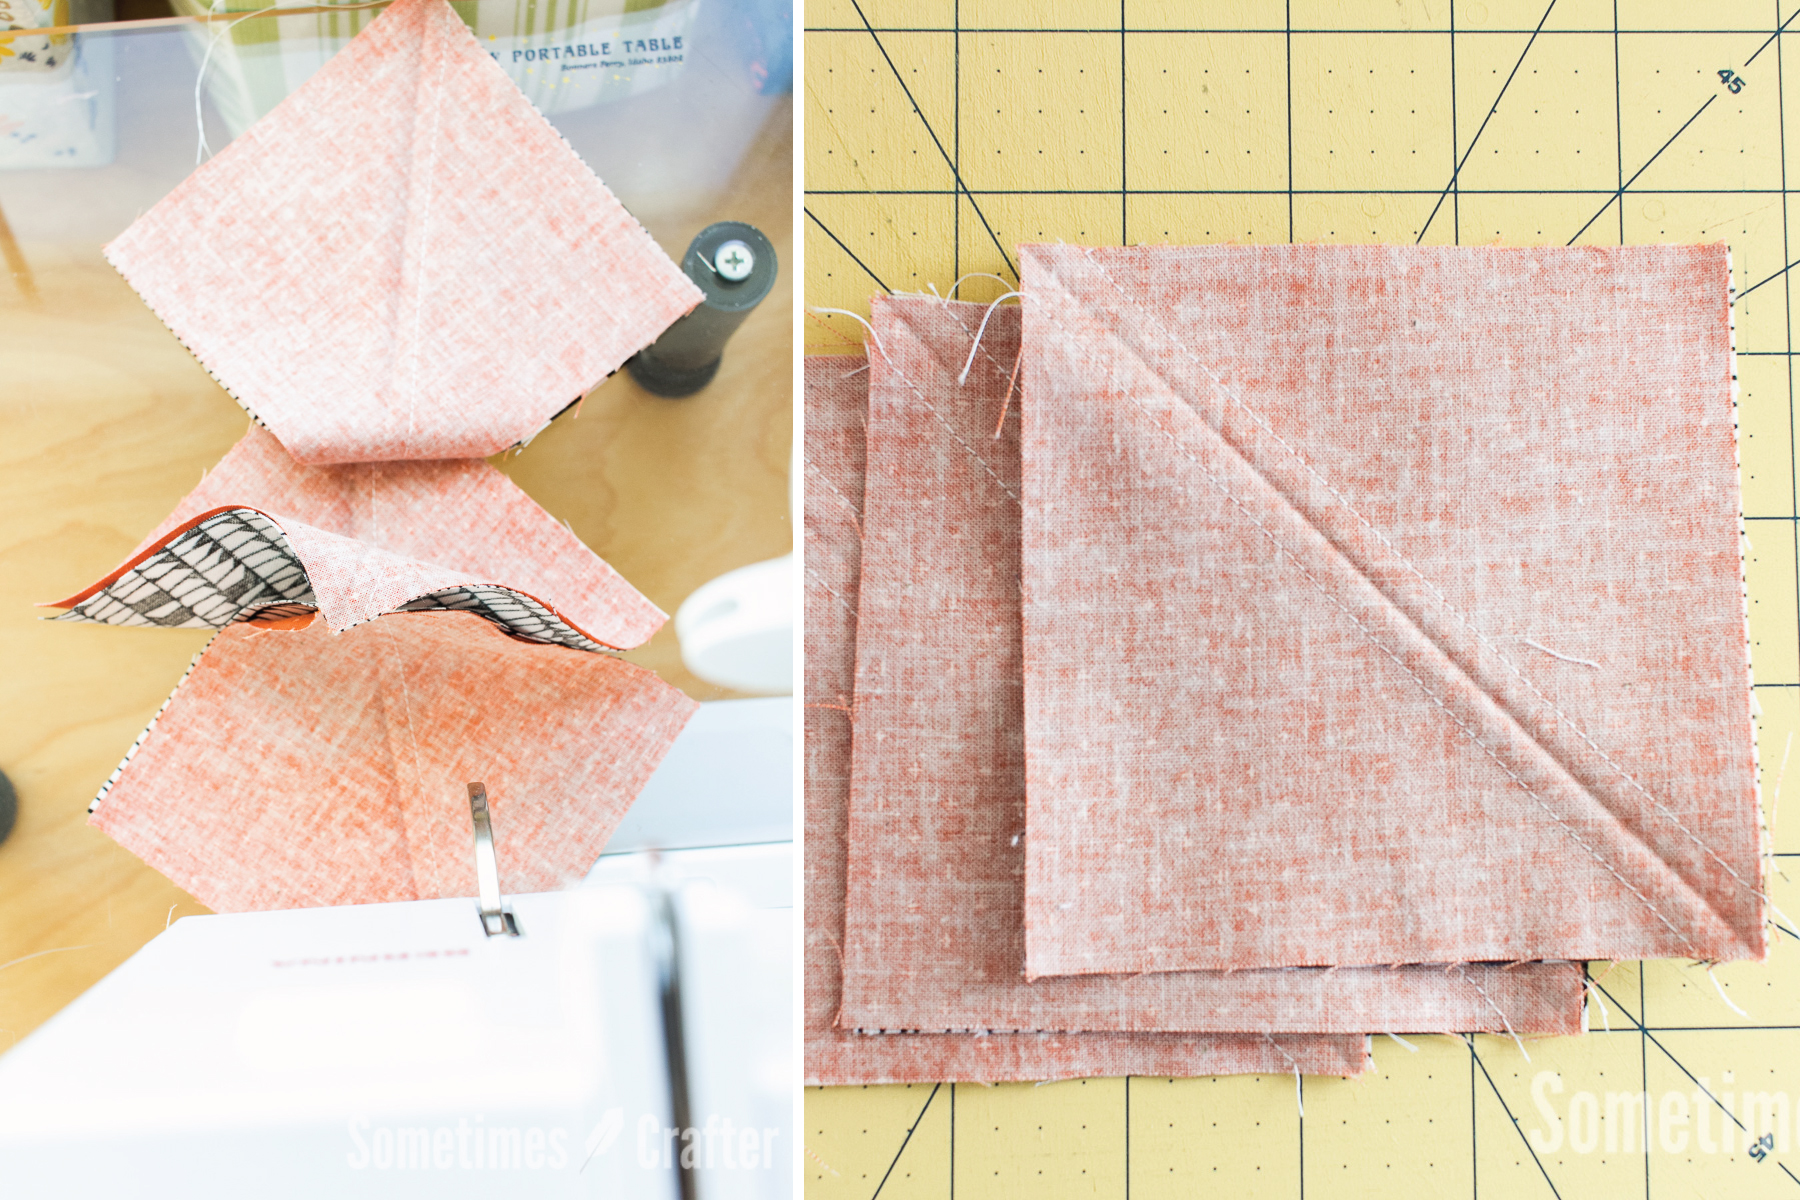
3. Now you will sew ¼” on either side of your diagonal line. I suggest chain piecing them at your machine to speed this step along!

4. Using a ruler cut your sewn square apart on the diagonal line between your two lines of stitching. Repeat for all three squares. Open these out and press your seam allowance. I like to press them to the side and I make sure to press all of them the same way. For this block I pressed my seam allowance towards the orange fabric.
5. Your HSTs will be larger than you need so we’re going to have to trim them up. We’ll be trimming them to 3½” square, so go ahead and do that for all 6 blocks and skip to the next step if you’re already familiar with how to do this. If not, keep reading!
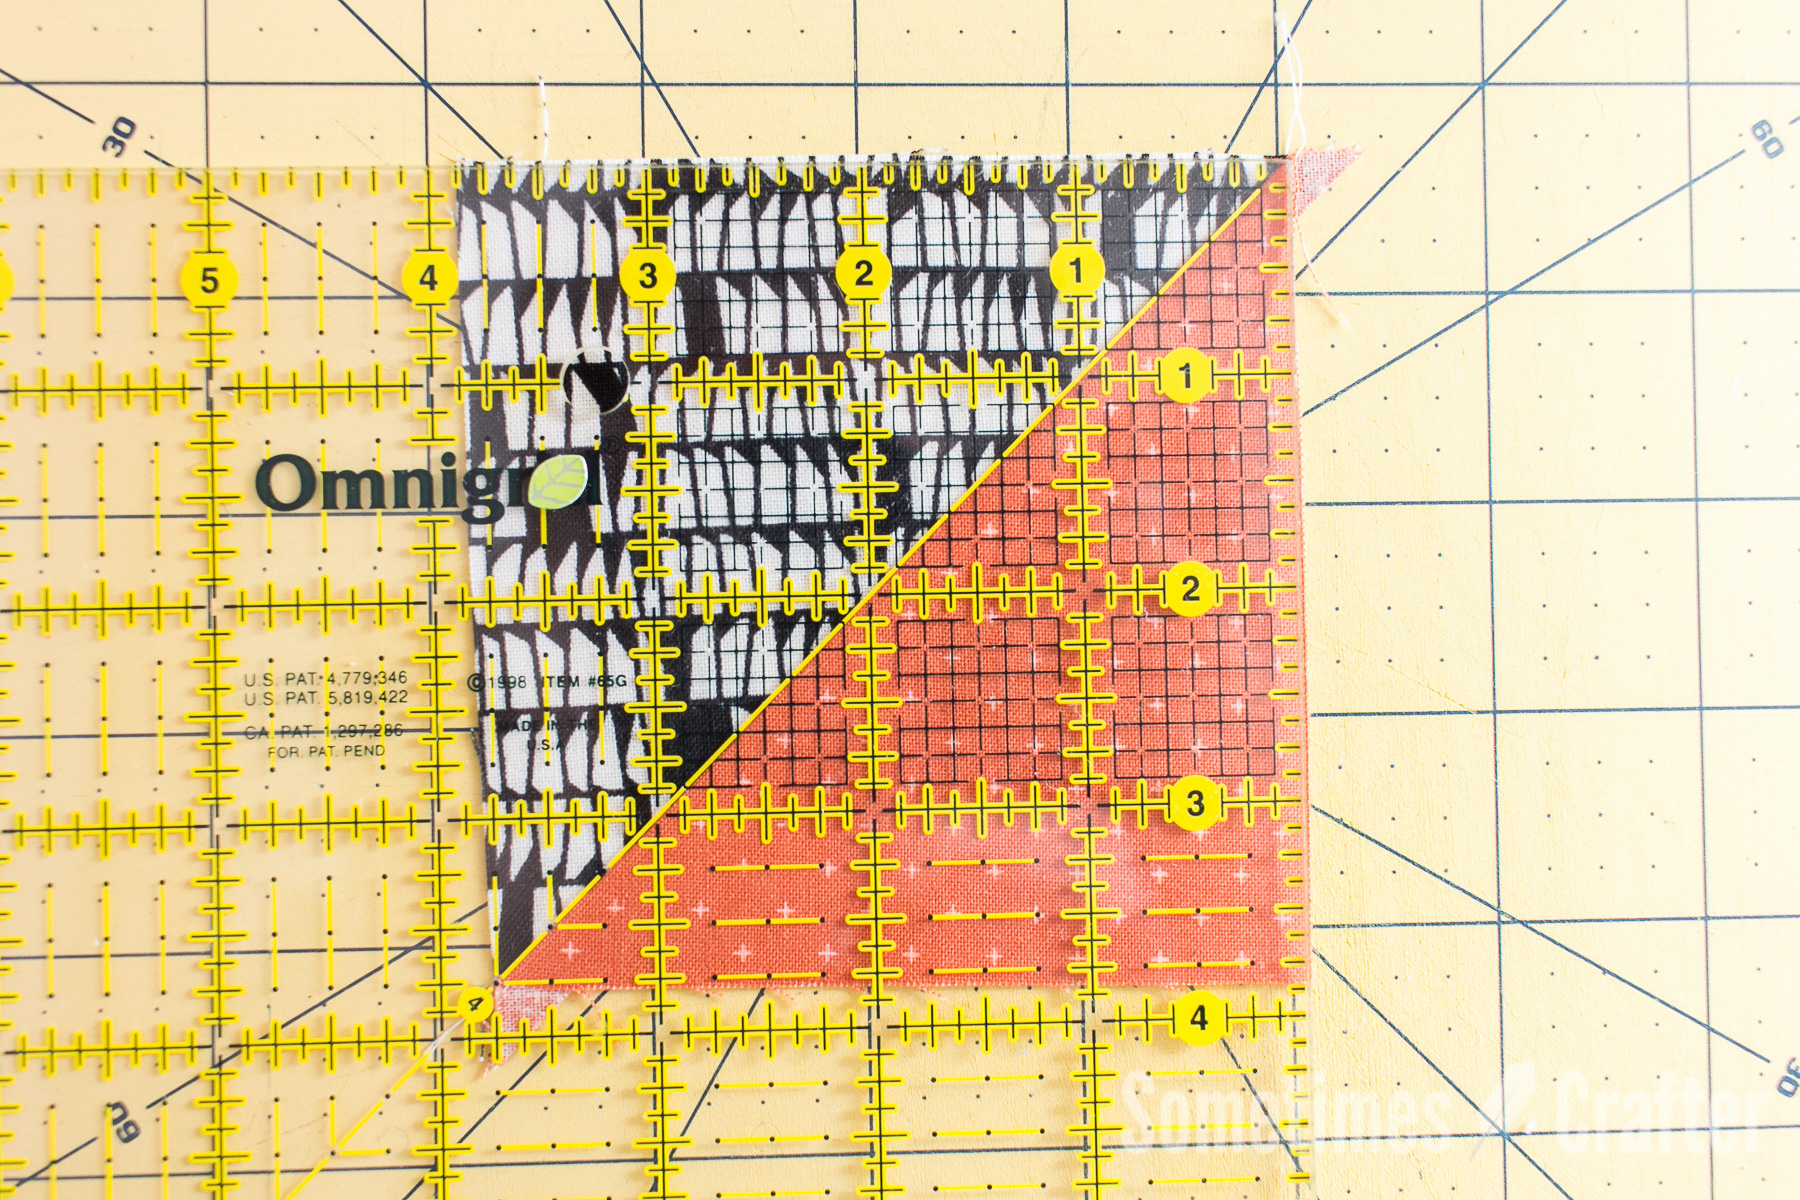
Begin by laying the diagonal line on your ruler along the diagonal line of your block (as shown). You want to be sure it’s up towards the top of the HST and close to the side. You’re going to trim off the top and and right side, but you just want to take enough off to square up the two sides.

Next, rotate your HST 180° (your trimmed sides will now be on the bottom and left). Line up the 3½” marks on your ruler on the left side of the block and the bottom (as shown). Trim the top and right side of your block. Repeat for all 6 HSTs. You’ll notice on this cut your taking off quite a bit, that’s okay. For this quilt I gave you enough room for errors in trimming, but when using this method on other blocks you might not have as much to cut off, so it’s always good to start by cutting the smallest amounts off in the first step of trimming.

Tip: When cutting I like to have a firm hold on my ruler so that it doesn’t shift around as i’m cutting. This is how I like to hold my ruler. I just apply a little firm pressure at those three points where my fingers are. If you’d like to get fancy, Block_Loc sells rulers that have a groove in them that slides right over that seam and stays in place. I don’t own one myself, but they sound like a great ruler to have!
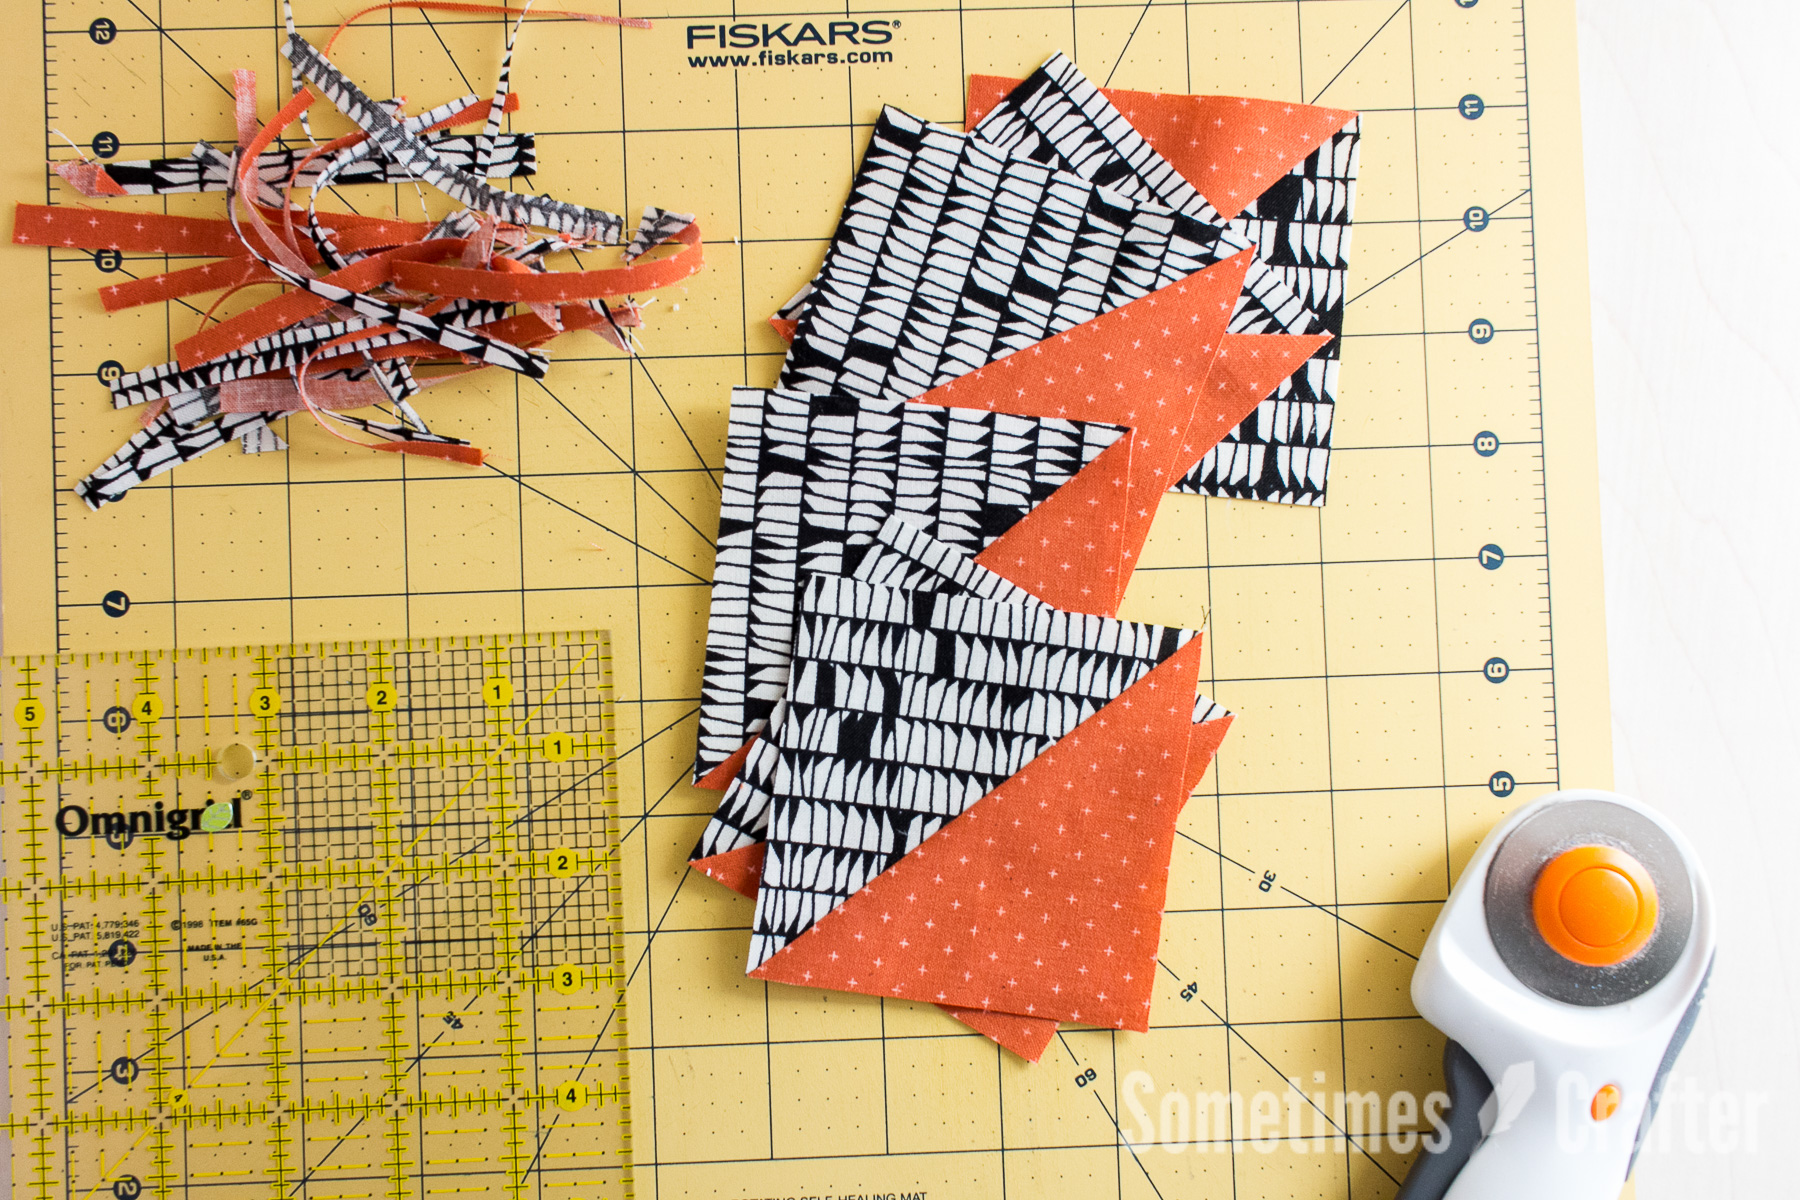
After all of your HSTs are squared to 3½” x 3½” you’re ready to start assembling the block!
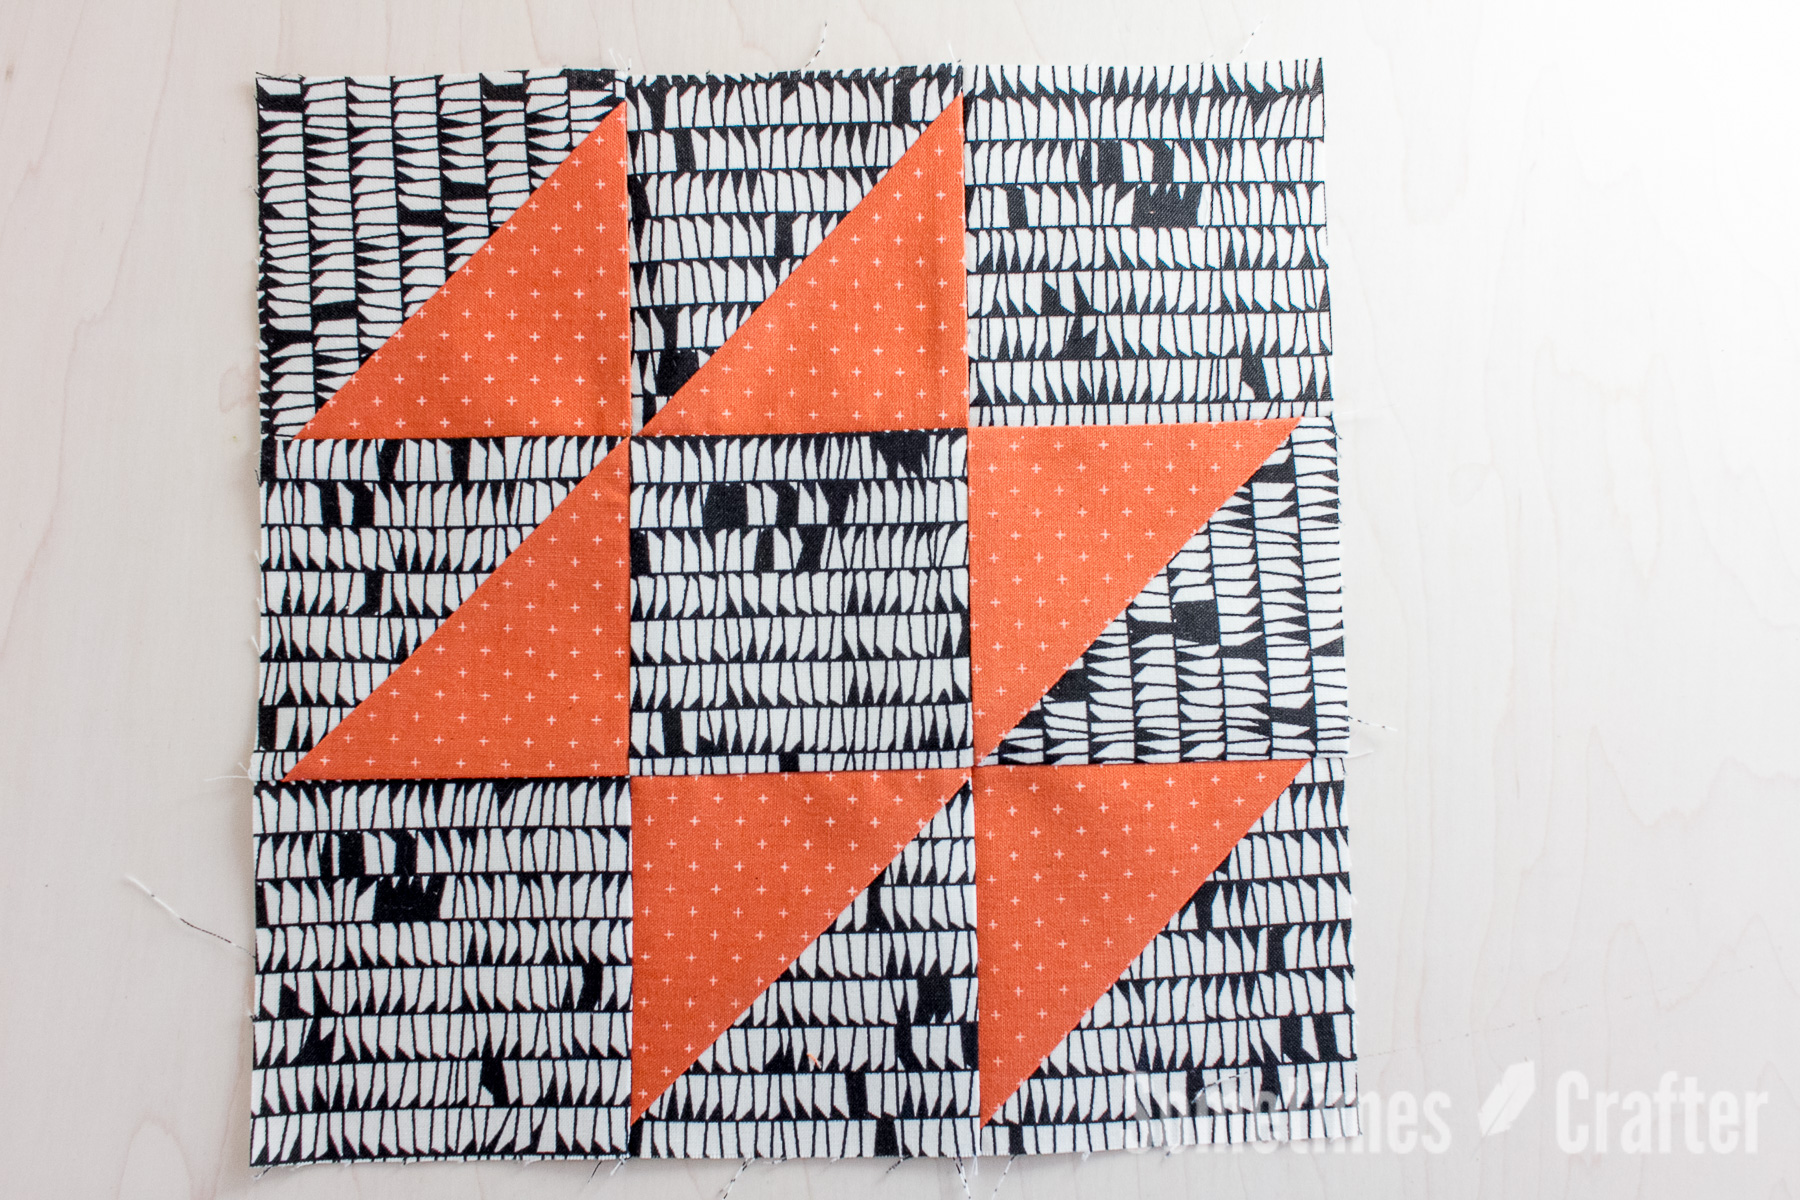
6. I like to lay out my block before I start sewing the rows together. This ensures all my squares are facing the right direction before I sew.
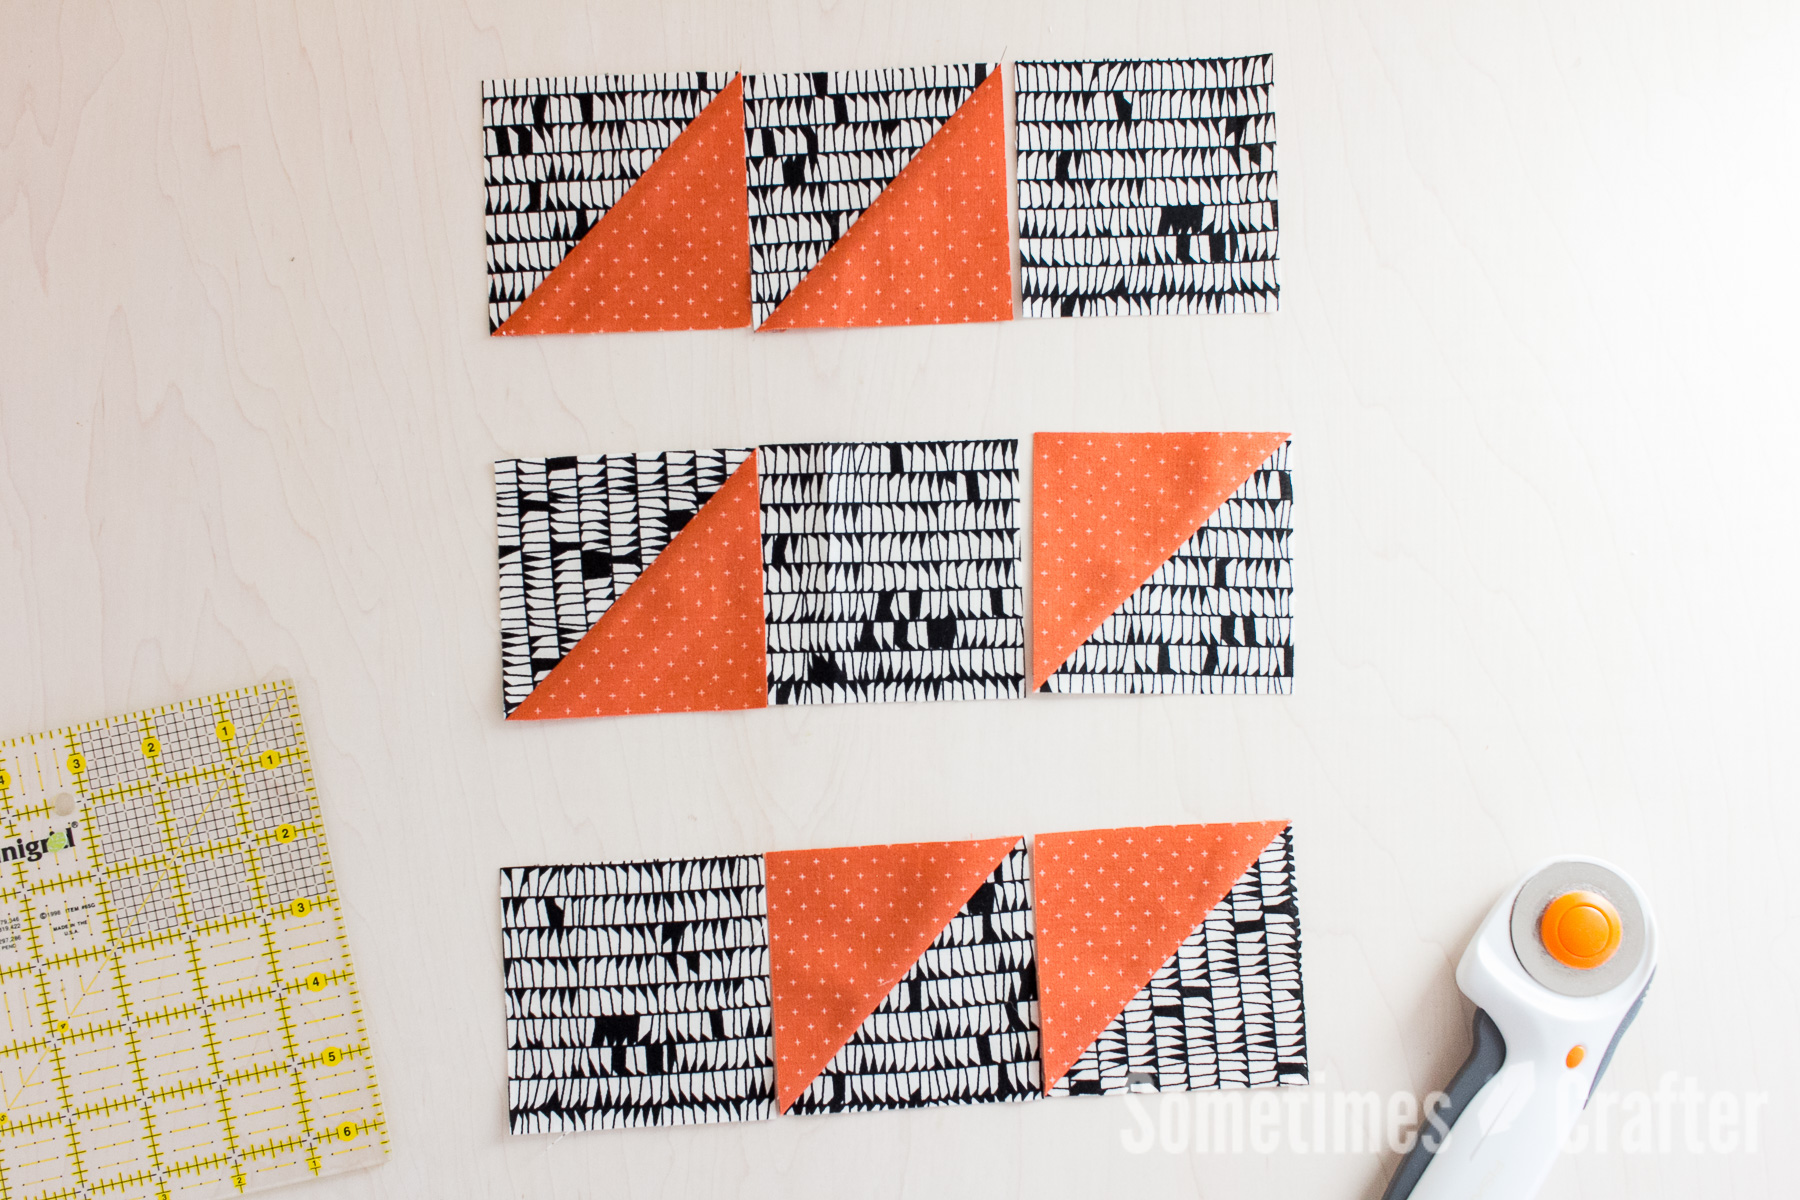
We’ll be sewing these square together in rows. Once I have it laid out like this I just stack each row up and carry it to my machine to sew.
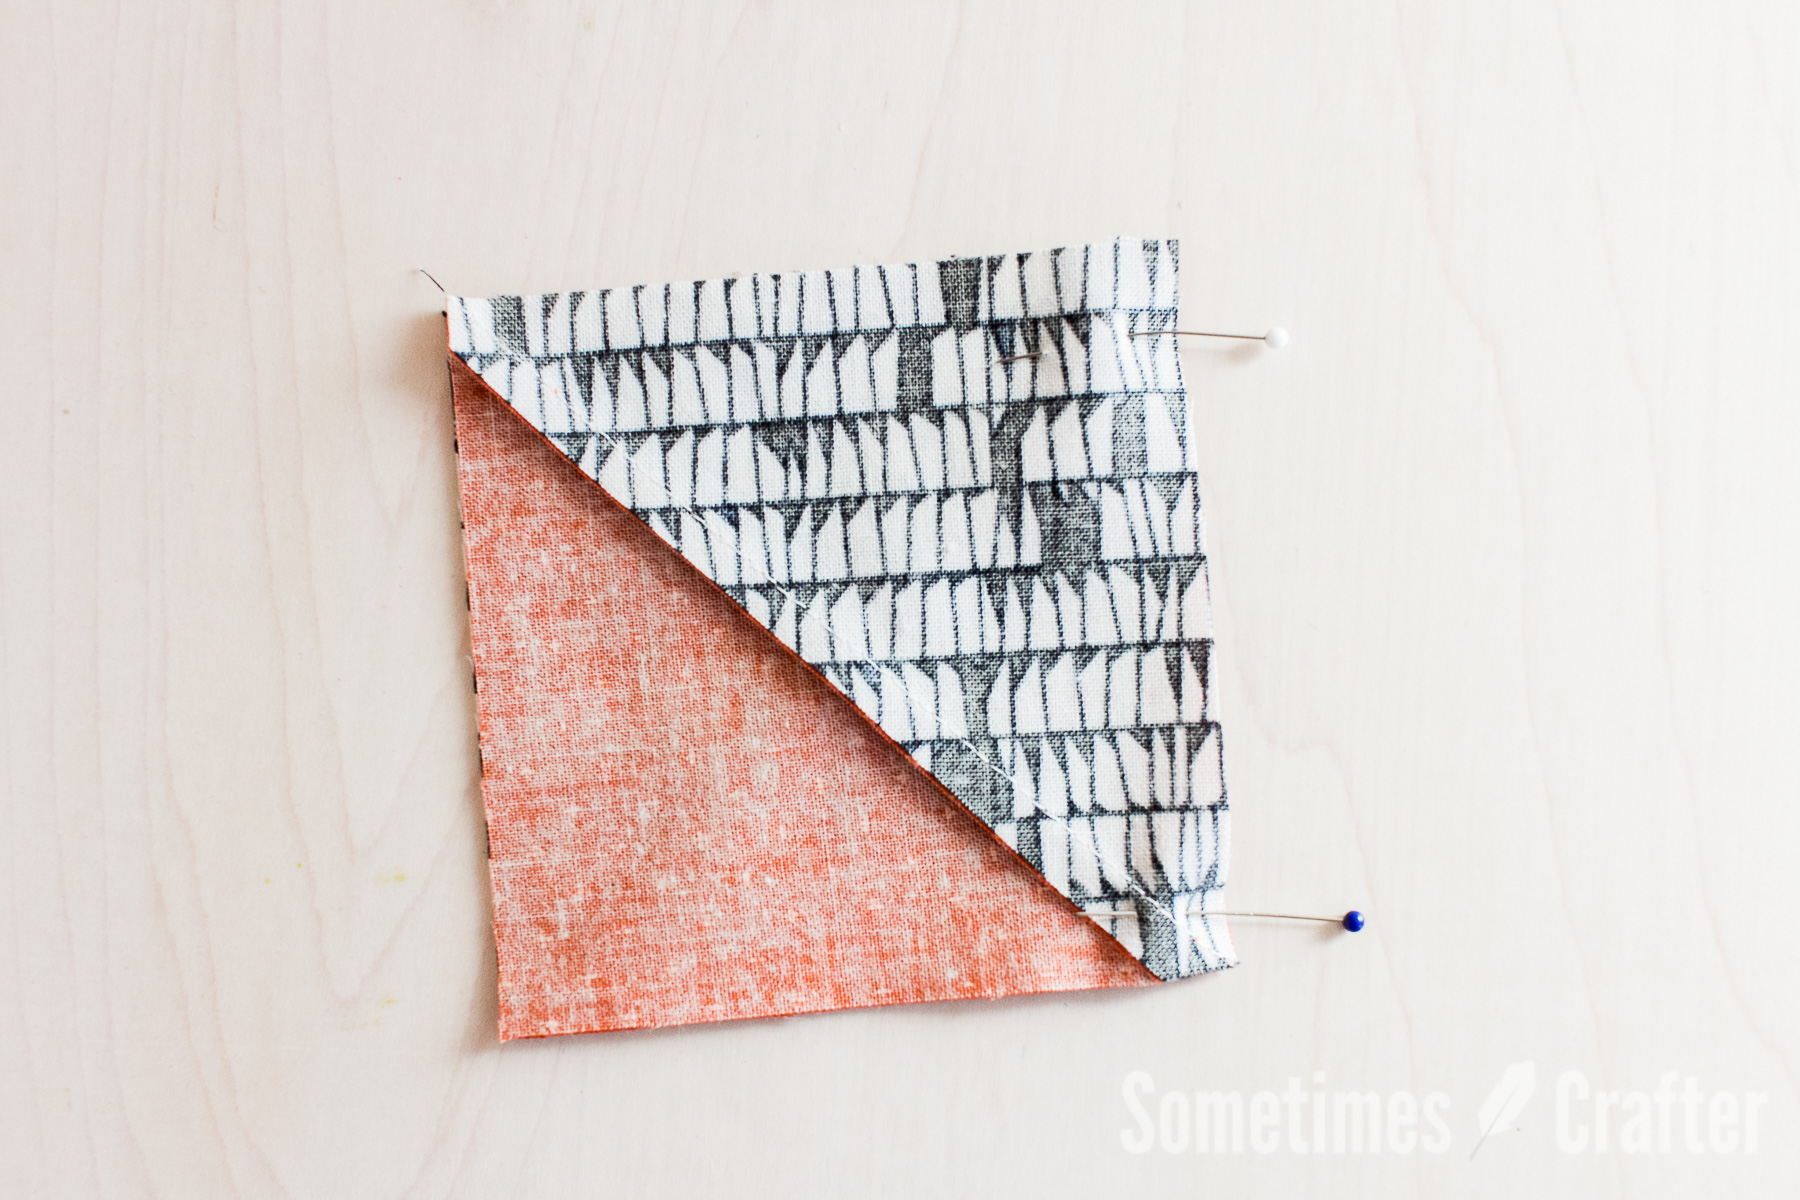
I highly recommend pinning before sewing. I know it seems like a lot of work and an unnecessary step, but you have to remember your sewing machine doesn’t feed the top and bottom evenly. Even though it’s only a small amount, it can make the difference in a perfectly pieced block. So I recommend pinning at the start and end of these squares. This can be especially helpful if you need to keep a seam allowance in place (i.e. it’s facing the opposite direction you’re sewing and thus might flip itself up).

After all of you’ve sewn each of the 3 rows together press your seam allowances as desired. I pressed mine to the side, and when doing this you want to make sure to alternate the direction you press them for each row so you can nest your seams together in the next step. As you can see in the photo my first and last row are pressed to the left and the center row is pressed to the right.
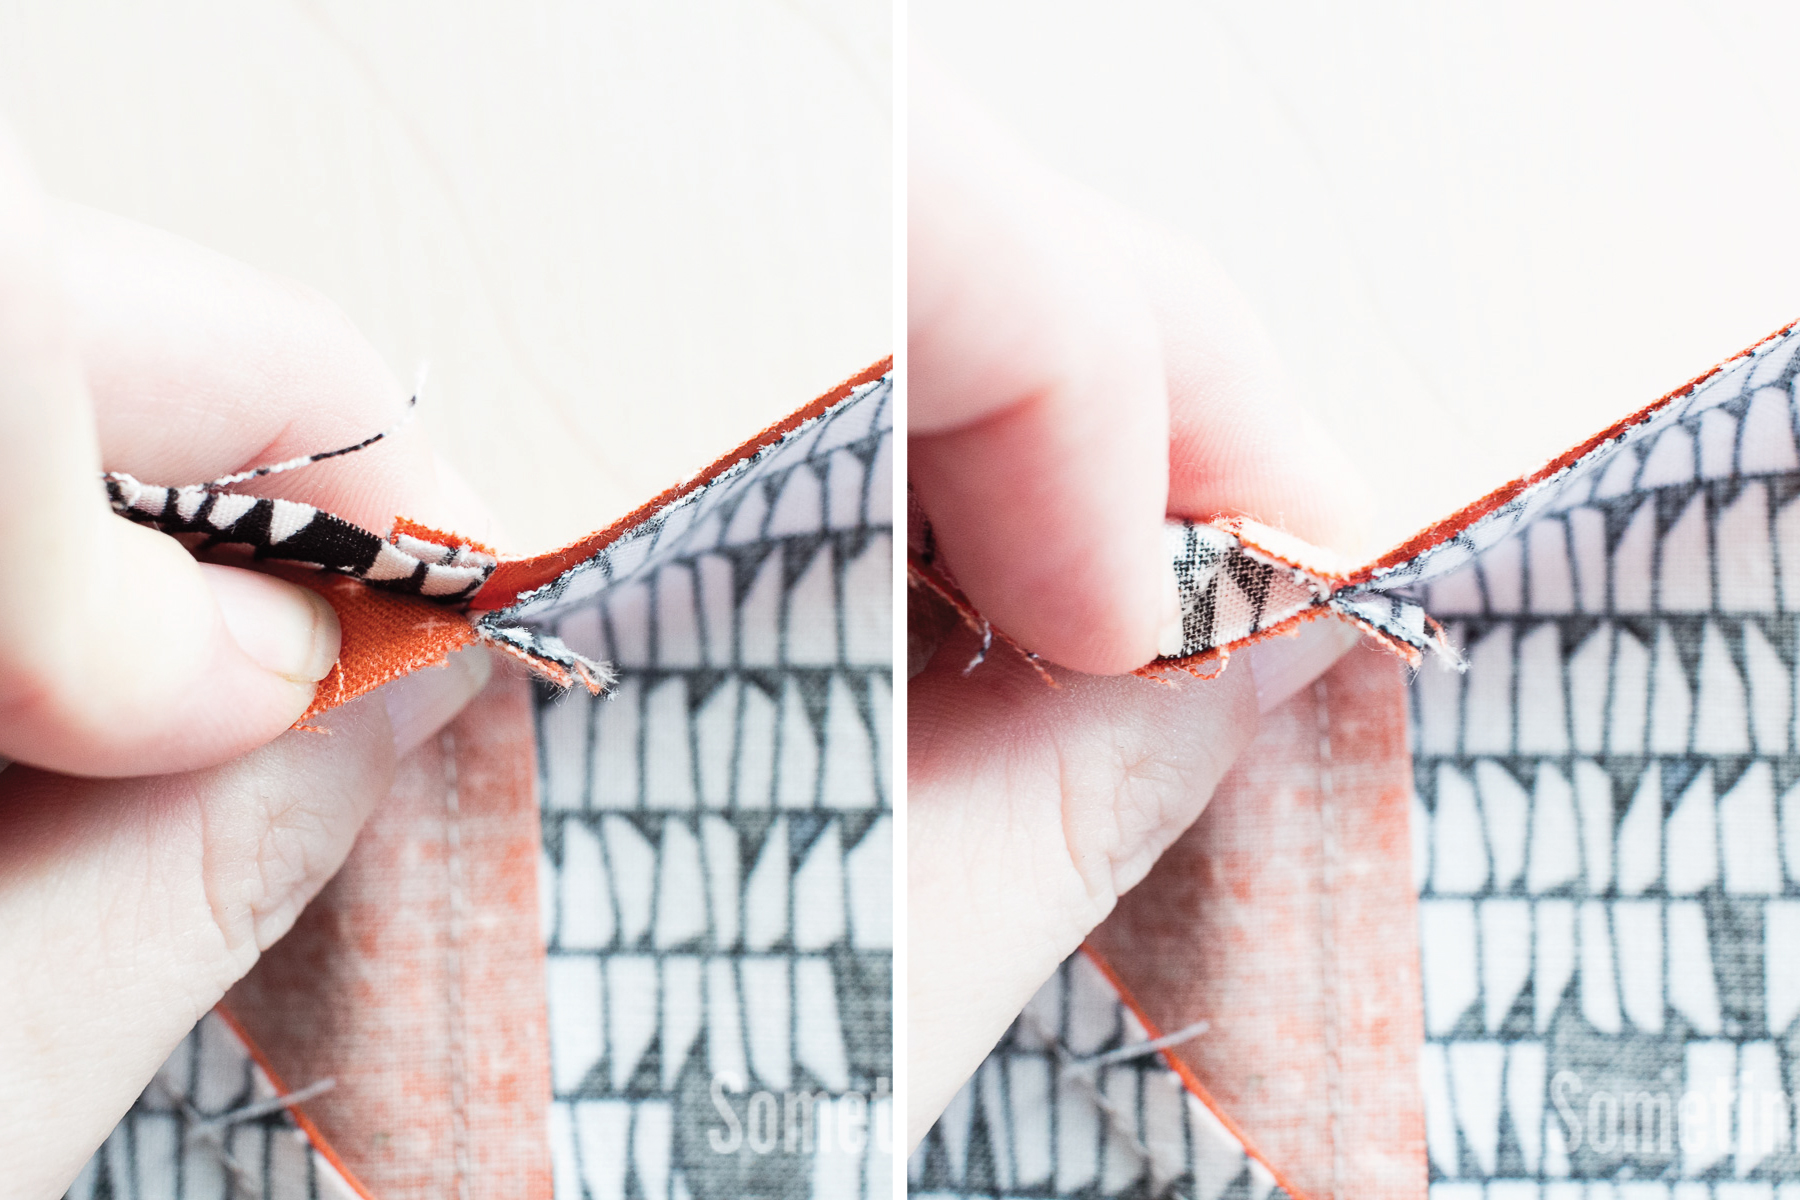
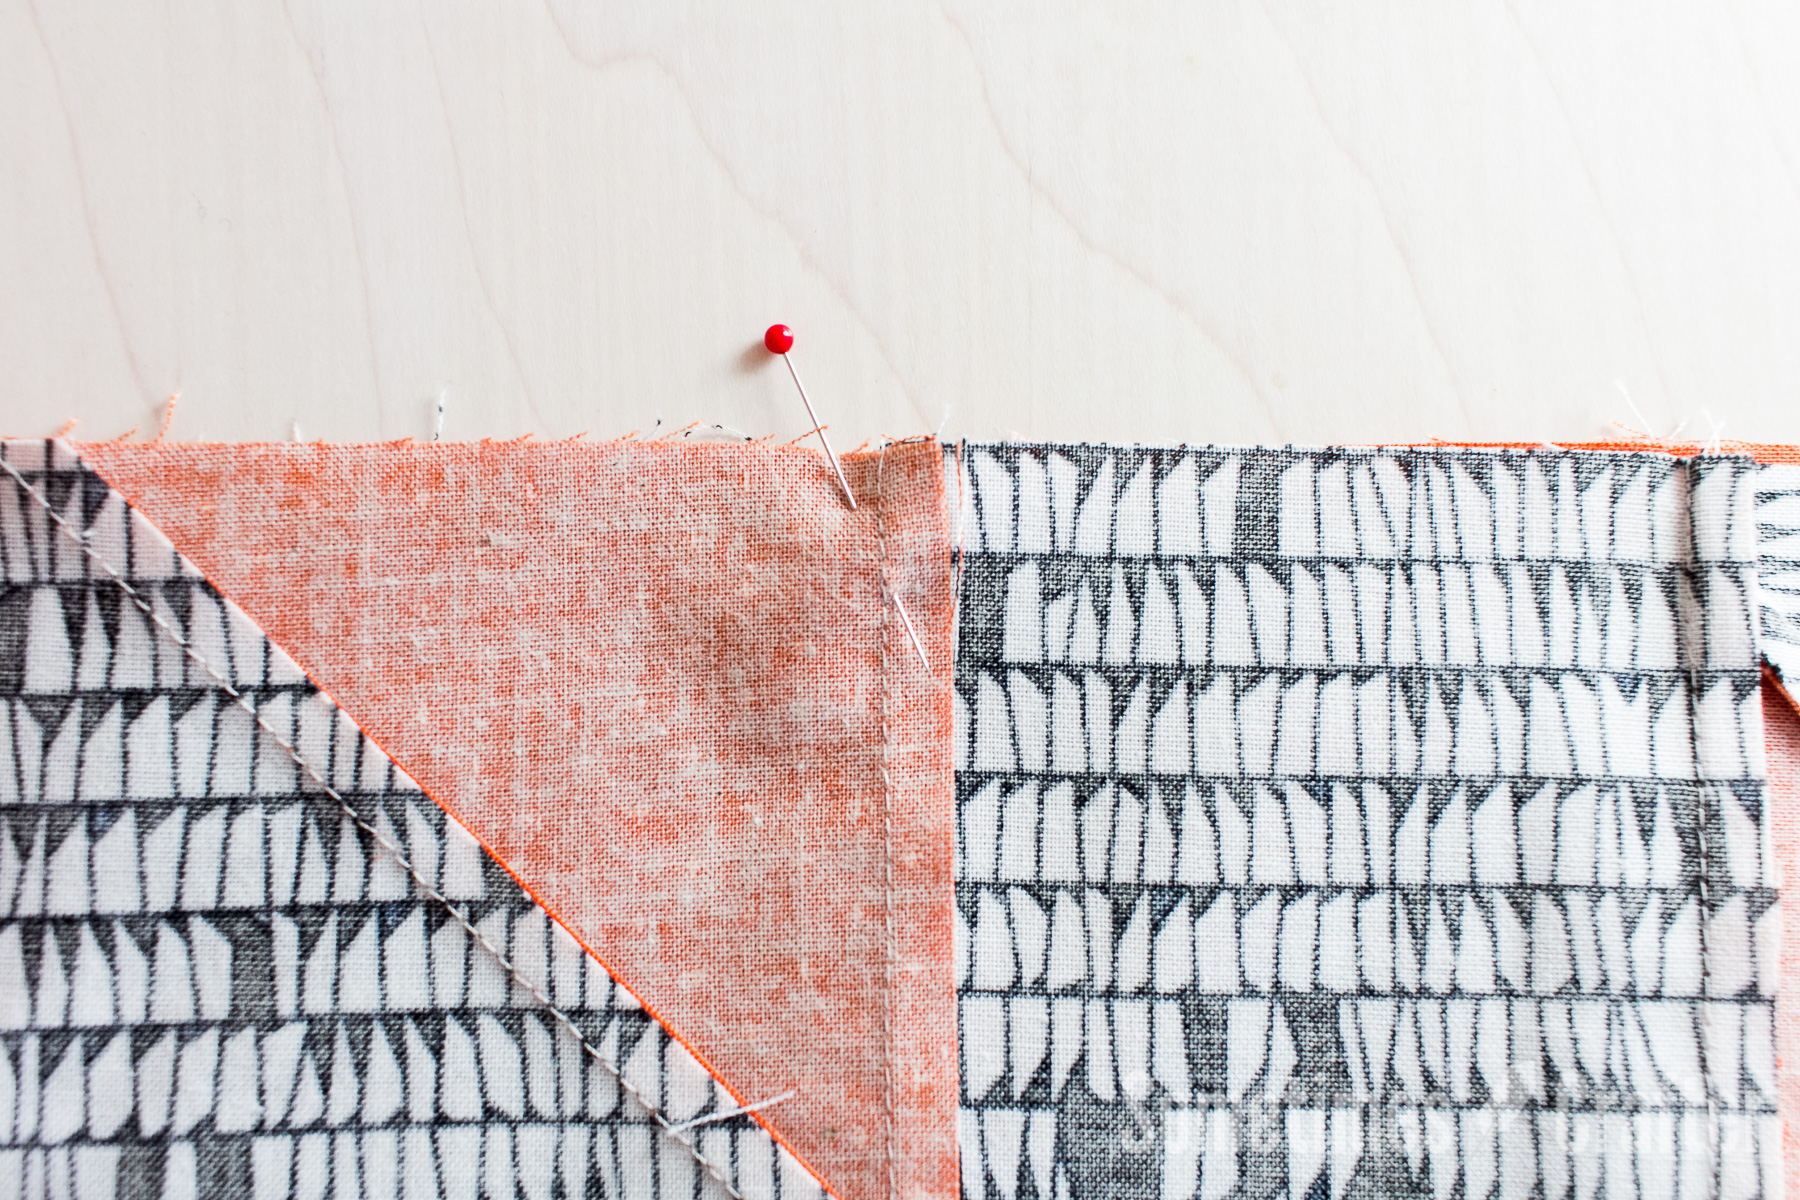
7. Now it’s time to sew the rows together and complete our block. Assuming you pressed your seams to the side, you will want to nest the seams together when sewing the rows together. Just make sure they butt up to each other and then pin. I usually slide them back and forth a little to make sure the seam allowances are bumping into each other (i.e. nesting).

Do be sure to pin at this step. This is crucial to keeping your seams lined up when you sew. If you don’t you may find that your seams don’t match up after you are done sewing. Remember we talked about our machines feeding the top and bottom at an uneven rate? This is where you might really notice it. Not only do I pin the seams, but I also pin at the start and end, just to be sure one row doesn’t hang out past another.
When I pin my seams I usually just use one pin and pin it at an angle so it grabs both seams. I typically slide the pin into the side that has the seam going the opposite direction i’m sewing first. This ensures I don’t grab it and sew it back on itself. But if you aren’t sure about the one pin method, just put a pin in each side of the seam allowance.
After you’re done sewing the rows together give your seams a press (I alternate pressing to the center and away from it with each block so I can next seams later). And that’s it! This block is so easy and so enjoyable to make – I hope you think so, too! Below is the video tutorial I did for YouTube – Enjoy!