
Quilting Up and Down

Today I wanted to share with you the quilting I did on Anna Graham’s “Up and Down” quilt in her newly released book – Handmade Style: 23 Must-Have Basics to Stitch, Use and Wear. Without a doubt, I knew this quilt had to have a custom quilting, not just in style but the designs as well. Every bit of quilting was designed by me and drawn up in AutoSketch (which is a CAD program I use to draft my quilting designs). Since I know Anna’s style so well, it was easy to think of patterns that would go with the quilt top.
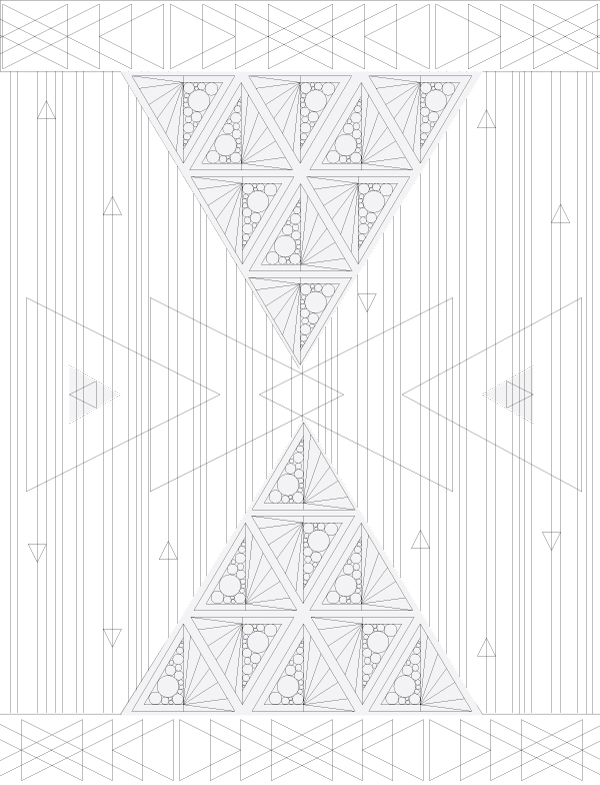
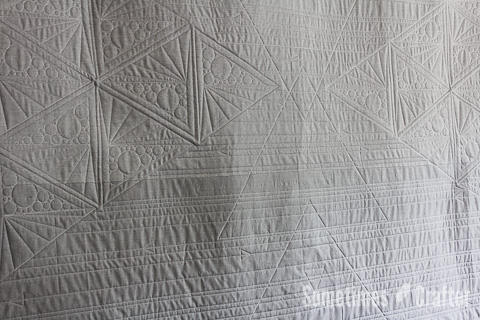
For all of my custom quilting jobs I start with a digital layout of the quilt top that I mockup in Illustrator, and then I usually draw over that image with a pen trying out all sorts of different designs. After I have a good idea of how I want to proceed, I draft the quilting design in Illustrator and send it off to get approval. It is very helpful to have this step done when the Statler will be stitching the designs for me, as I can import parts of the pattern that need to be drawn up in AutoSketch and easily trace over it. This was especially helpful with the triangle units. I took measurements of the triangles in the top and then drew to those dimentions, this way I know everything is proportioned correctly once it stitches out. When circles stitch through the computer, you want to set them up so they stitch just a portion of the circle before going to the next, and then the system comes back along the unstitched part of the circles so there is little to no backtracking done.
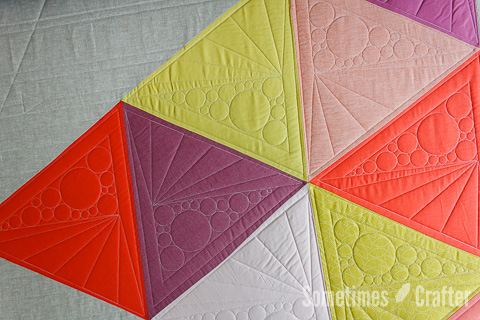
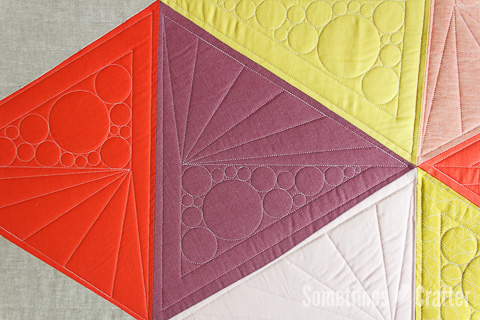
Confused yet? Here’s a video showing a little of these circles being stitched so you get a better idea. Here are some close ups of those triangles quilted:


For the two end borders I did a simple geometric line “drawing” with overlapping triangles. Triangles kept with the theme of the quilt, but created a new pattern when brought together.

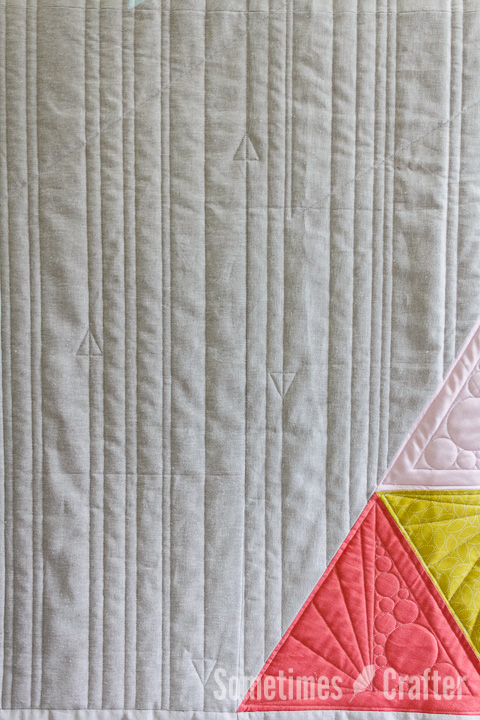
For the background around the triangles I put in some simple lines to add texture, but not overwhelm the top. With a few little triangles along the lines, it was again keeping in the theme of the quilt and keeping things interesting.
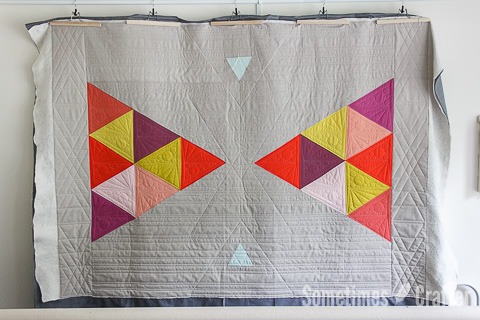
I was really pleased with how the whole top came together. I quilted larger triangles through the middle, from side to side and within the little blue triangles there is a single quilted triangle going in the opposite direction of the triangle it’s within.

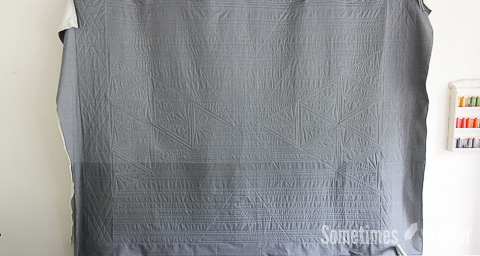
Of course the back is just as fun to look at as the front!


It was such a fun quilt to work on, and i’m so glad I had the opportunity. I especially enjoy custom quilting and look forward to the creativity involved in finding a pattern and creating it. Tomorrow I’ll share a few photos of Anna’s < > Quilt. I fell in love with it’s simplicity and can’t wait to make my own!