Adventures In Hexagons

ChristinaOctober 29, 2009

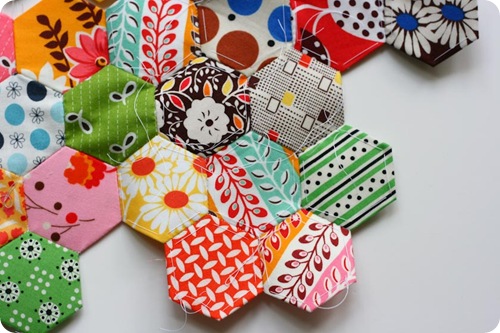
IMG_4207

I tried just about everything I could think of with these hexagons. Different papers, different stitches, different methods of attaching… So I wanted to share all of this with you to let you know what I thought of each method. And, this would be a great post for all of you to share your insights, too!

Preparing Fabric

IMG_4171

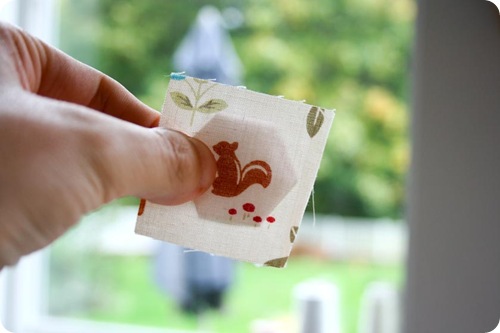
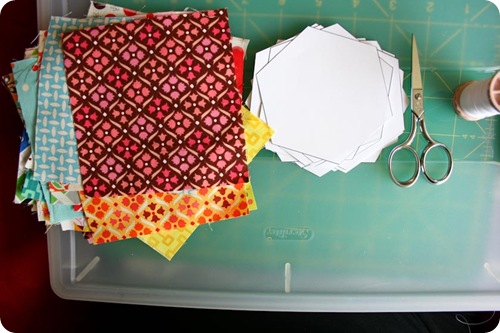
I first went with the suggestion to cut my fabric hexagons in the shape of the hexagon with a seam allowance. It got old drawing the lines around my hexagon and then cutting a seam allowance around that.

IMG_4616

Luckily, I was researching for these posts and remembered Alicia’s post on hexagons, I read it again and saw she was using squares (I only get to skim blogs and look at pictures sometimes). So now I only use squares. She referenced the website Paper Pieces and on the right side of the webpage is a link to a hexagon cutting guide (but if you follow this link, it will take you to the page where you will find a link to it at the bottom). This guide tells you how big to cut your squares based on the size of your hexagon. I’m telling you, this makes life SO much easier. And I think the back is prettier looking.

Paper Pieces

IMG_4175

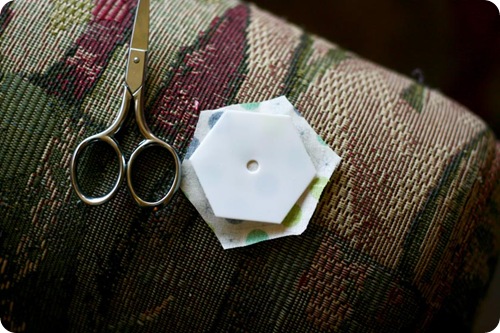
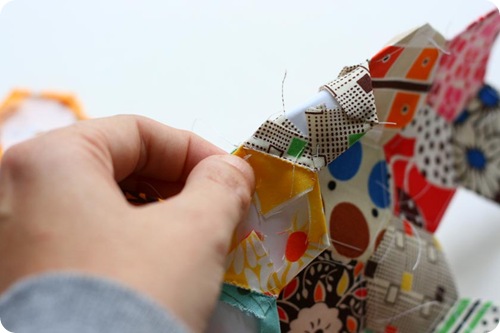
My first hexagons I used were actually not paper, they were Teflon. I found a package of these at Joann’s and thought it was a good idea. I like that they were slick and easy to remove from the fabric and that they were reusable. Very green. I like to be “green” if I can. What I didn’t like was how you had to stitch the corners of them to keep the fabric in place. I found I had to double stitch the corners to keep them down (rather than working the hex backwards, which was too much for my brain) and therefore harder for me to remove the basting thread later. I also didn’t like the fact that they were thick…thicker than paper anyways. I don’t know why that mattered to me, but it did.

IMG_4388

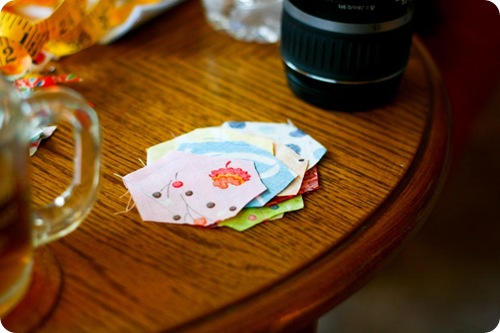
Next I moved to regular paper piecing, as explained in my tutorial. Let me tell you, this went SO much faster. While the hexes wont be reusable for long, I think you could get 2 or three uses out of them. I created a 1” hexagon sheet and went to town cutting them out myself. I know I could have bought them, but everyone locally was out of the 1” size when I was looking, and really, I didn’t mind cutting these out. Took no time at all.

IMG_4393

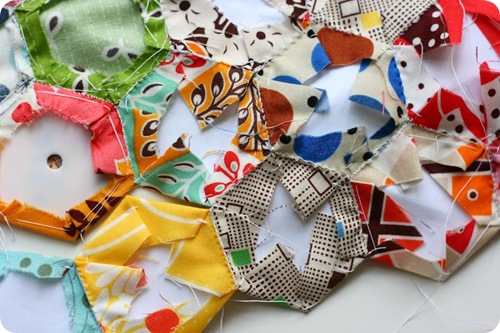
My next thought was to try freezer paper. I cut my freezer paper down to 8.5” x 11” and got it as flat as I could and fed it through the printer. The printer didn’t really like it on it’s own, but I got it to work well enough. This was awesome! I could iron these down to my pieces and not worry about the fabric shifting on me while I was sewing, thus leaving me a little short when I got around the hex. I had that happen a few times, but made it work. I worried that there would be a problem with missing the freezer paper when stitching together my hexagons, but it wasn’t an issue at all. And best of all, once I removed the basting thread, the papers just fell right out of the fabric.

IMG_4304

Another reason I really liked using the paper was for how easy it was to keep the paper hexagon in place and still sew together my multiple hexagons. The paper allowed me to bend the adjoining hexagons when I sewed my rows together. With the Teflon, I had to remove it before I could do anything, or bend it and make it work. That didn’t really work so well. But the Teflon is slightly pliable. You could try using a glue stick, but make sure it’s a fabric glue stick as I’ve read regular glue sticks can brown the fabric over time. I didn’t try this, but this could be a great option, too!

Stitches

IMG_4317

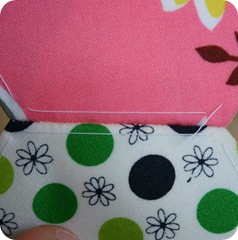
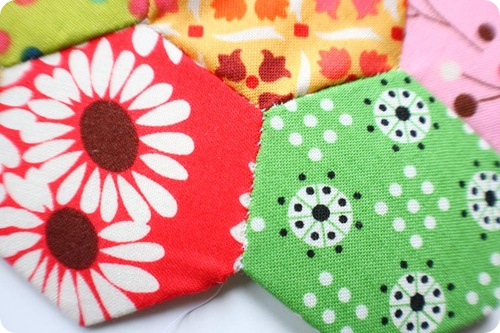
The standard for connecting hexagons is the whip stitch, but I found if I didn’t pull my stitch tight enough on the back, or keep them close enough together, when I flipped it over to the front I could see my stitches. It looked sloppy. So I thought I’d try a couple of different stitches.
IMG_4492 IMG_4496

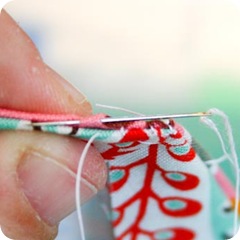
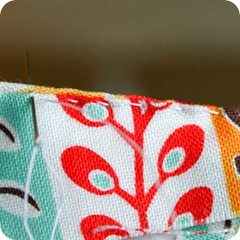
First I tried the ladder stitch. This worked great for keeping my stitches hidden and on the front it looked good. But not great. You could see the ladder effect on the front where the fabric connected to each other. While it was clean looking, it was kind of odd. Also, it was a bit of a pain to work this stitch, not as fast as a whip stitch.
IMG_4558 IMG_4564

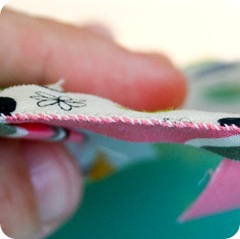
Then I decided to do a running stitch. I went in from the front to the back and then from the back to the front and pull my thread full through the two stitches on this return stitch. This went very fast. And it looked great from the front. So I had my stitch. I still worked the corners the same as the whip stitch, stitching through it twice to secure. The biggest downfall of this stitch is not being able to secure loose ends of thread as with the whip stitch. Doing the double stitch in the corner, on my second stitch I would just slip the needle through the second stitch before pulling it tight and this created a nice knot for me. This is the stitch I ultimately used and liked.
IMG_4484 IMG_4486

If you do decide to stitch with the whip stitch (it is a quick stitch) just make sure to keep your stitches close together and pull your thread tight as you go along to give a clean look on the front of your work.

Assembling

IMG_4297

I played with a few ways of assembling the hexagons. If will of course depend on the type of hexagon project your working, but there are a few directions to consider.

IMG_4300

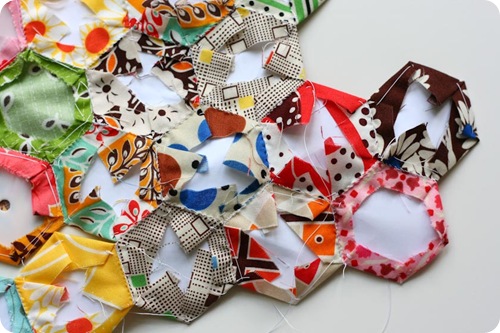
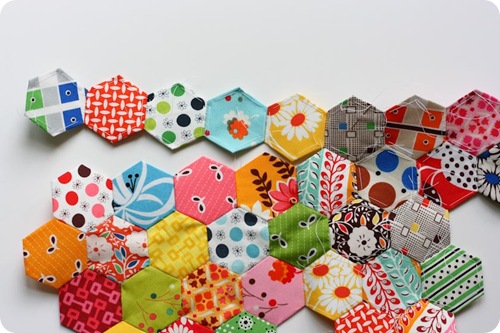
First I just did random piecing. I just started adding hexagon to hexagon, keeping it somewhat even, but no real direction.

IMG_4295

The I tried assembling the flowers, that is to say, one hexagon in the center with a hexagon on each of its sides. Now, if you will be doing hexagon flower projects, this will of course be the way you’ll want to assemble them. There are two ways to approach this. You can stitch all the hexes to the center hex first, and then stitch those hexes to each other after that. By connecting the hexes to the center hex first, you can keep a constant running stitch. When you go to connect the sides you will have to do each side individually, knotting at the end to secure. You may choose to connect two hexes to the center and then connect them to each other and continue on in that matter until you’ve worked around. Again, you will have stopping points where you have to knot and start again, but it’s all even in the end.

IMG_4294

Because I wasn’t doing flowers, but a “square” of hexagons for the block, I choose to sew rows of hexagons and then sew those rows together. Sewing the rows together went very quickly, mainly because I didn’t have to start and stop my stitching. I just continued from one hex to the next down the row. You could also do this for the flowers, you would just want to have your hexes assembled and laid out before hand so you can place everything accordingly.

Resources

IMG_4302

I came across lots of helpful sites while reading up on Hexagons. I’d like to share them here and if I come across any new links in the future I will add them as well. Let this be your hexagon resources post.

1. Posy Gets Cozy – Hexagon Piecing (Writes about her experience in hexagon piecing)
2. Postcards From Panama – Hexagon Quilt Tutorial (suggests using glue stick)
3. Craft Passion – Basic Hexagon Quilting Tutorial (links to hexagon pincushion project)
4. Thimble Blossoms – Hexagon Quilt Tutorial (Great tutorial and photos)
5. All Buttoned Up – Oh snap! That girl doesn’t baste. (Awesome alternative to basting)
6. The Jax Collection – Traditional English Hexagon Patchwork Demonstration – Video 1 and Video 2. (Great videos demonstrating how to make and connect your hexagons)
7. Incompetech – Hexagonal Graph Paper PDF Generator (generate your own hexagons in any size you need)
8. Paper PiecesHexagon Cutting Guide (how big to cut your squares of fabric and also a great spot to buy paper hexagons)

And that’s what I’ve learned so far. I have some more ideas, but we’ll have to wait to see what comes of them. You can be sure I’ll share more as I learn more. I hope that all of this information is useful to you and that you find something to make piecing these a little easier for you. Happy hexagon sewing!

————————————

The following links have been added after the original posting:

9. Texas Freckles – Hexagon Fussy Cut Template (A how-to for creating a template)
10. Modern Handcraft – A fun project to make with your hexagons – Machine Stitched Hexagons
11. Ellison Lane Quilts – A great video tutorial for making your hexagons with the back basting method (i’m a convert now).

Comments (47)

  • Annette

    October 29, 2009 at 4:14 am

    Thanks for the hints. I am working on hexagon flowers. So fun to do but always great to get new ideas. Love the running stitch idea. I’m going to try it.

  • Kristin

    October 29, 2009 at 5:02 am

    This is awesome! Thanks so much for all the helpful info. I have tried hexagon’s before but it seems like so much work, but with your tips and the links I may make this my winter project.:)

  • zarina

    October 29, 2009 at 5:31 am

    Very timely but a bit late. I have already done four flowers but there still more to come. I will give a try on your assembly method tonight – I have a purple flower to assemble.

    I love the cutting method – saves me a huge amount of time of tracing onto the fabric (which sometimes you cannot see and the seam allowance got lost) and using the scissors.

    Love ya.

  • Metanoia

    October 29, 2009 at 9:47 am

    Ok, I want to ask, what is the benefit of paper piecing with hexagons? When I knew absolutely no better when it came to piecing I created a hexagon patchwork for a costume I was working on and it came out perfectly. No paper piecing… I just cut hexagons and then machine pieced them in concentric circles from the centre out. Once the pieces were cut the whole piece went together quite quickly – no pins and no basting either… http://thequiltedhen.blogspot.com/2009/10/hexagon-skirt.html

    Any enlightenment on the whys would be great because I have not seen anything on why people actually go to all this trouble. I can see how paper piecing helps with more complicated things, but not with hexagons. *confused and intrigued*

    1. Marsha

      October 12, 2015 at 4:08 am

      Hi. I know your post is a bit dated, but I’m told, and I have found, it is the joy and relaxation of sitting and sewing by hand. Good for you finding a way that works for you. I’m still experimenting with the hexi’s and loving it. And I’m willing to give your suggestions a try too. Happy sewing!

  • ktquilts

    October 29, 2009 at 11:39 am

    The only hex project that I have ever done, I used the teflon hexes. I didn’t baste. I used an applique pin to hold the little dude in place. Thanks for the info on the stitches! I had used the ladder stitch, and found it difficult to get the corners right when sewing the second of three sides when makeing a flower. (Does that make any sense?) A whip stitch could be done more easily from the back. I may have to get these out and try them again today!!!

    Thanks so much for the info!
    Blessings,
    KT

  • Jessica

    October 29, 2009 at 12:08 pm

    Hexagons always look so fun, but so overwhelming at the same time—after reading this I need to try my hands at them!

  • Sarah

    October 29, 2009 at 12:29 pm

    Thank you, thank you, thank you for the tutorial! As soon as I got home yesterday, I pulled out fabric and started making hexes. I thought it would be much more difficult but they are so simple! I am in love. I am hoping to make a whole scrappy hex quilt. Thanks again.

  • Laura

    October 29, 2009 at 1:19 pm

    My head hurts just reading this post~ looks great, but you have MUCH MORE patience than I have!

  • Di~

    October 29, 2009 at 2:16 pm

    Thanks! oh and come see my kindle keeper! It is a lot like yours, I hope you don’t mind, I just couldn’t resist those DS fabrics.

  • sarah

    October 29, 2009 at 4:14 pm

    WOW! those look so fun…but like something that would take way more patience than i have! ;)definitely something i’ll have to catalog away for ‘someday’ though! thanks for sharing your process!

  • Giddy for Paisley

    October 29, 2009 at 4:57 pm

    You learned a ton. I think that is the most we have learned yet through our quilt along. Thanks for sharing all of that information on hexagons. Are you going to post an alternative hexagon quilt block for your mom and whom ever else wants to make the bigger size hexagons?

  • Melissa

    October 30, 2009 at 12:06 am

    Thanks for this great tutorial. I am definately going to use it!!

  • Kelly O.

    October 30, 2009 at 1:45 am

    I don’t remember where, but someone had blogged about using freezer paper also however they used it so the sticky side was out and you could just iron it in on itself and skip the basting completely…I thought I’d try that next time myself…

    This was a GREAT post–thankyou!

  • Marit

    October 30, 2009 at 8:04 am

    Thank you for putting together this wonderful tutorial / resource post about hexagons. I have just started a few small hexagon projects, and learned a lot.
    ; )

  • Chase

    October 30, 2009 at 3:37 pm

    I have a box full of 2×2 cut fabric for my hexagons. I attempt to make a quilt for myself.
    I used the similar method that shared here. I found that if my corners were trimmed it is easier. Thanks for sharing the information.

  • beautifulladybird

    October 30, 2009 at 7:20 pm

    Thank you thank you thank you for sharing this with us. Last week, I just purchsed some 1930’s reproduction fabric to have a hand sewing project but I was intimidated to start without really knowing what I am doing. I am so grateful to have everything in one place!!!!

  • Jennifer

    October 30, 2009 at 9:24 pm

    Thanks for the great info. I also found this nice tutorial recently and thought you (and the other blog readers) might be interested. I just started using her method and so far it’s a snap. Plus I conned my husband into cutting my hexes out of freezer paper for me! I’m trying your running stitch this weekend!
    http://sewmanyways.blogspot.com/2009/02/granmothers-flower-garden-paper-piecing.html

  • Sarah

    October 31, 2009 at 4:04 pm

    Wow. this is a great post! So informative and helpful. A hex quilt has been poking me in the back of my mind for a while now and I think you helped bring it to the front. Thanks for all the info!
    Sarah

  • pananani

    November 1, 2009 at 6:45 pm

    Hi – I am Carol – you linked to my blog “Postcards From Panama.” I have tried several methods – all detailed on my blog – but I must say that Inklingo is the very best. You print the cutting and sewing lines onto the back of your fabric – which you have ironed onto a piece of freezer paper so it will go through the printer. I have no affiliation with Inklingo.com – just a very satisfied customer. Check it out – you can download a LeMoyne star and instructions for free to try it out.

  • Renee

    November 1, 2009 at 9:56 pm

    This is such a helpful post – thankyou for being so thorough. I have been wanting to start a handpieced project for a little while and came upon this while trying to decide what to do. I have bookmarked it already!

  • Leahdis

    November 2, 2009 at 9:24 am

    Great Post, love how you compaired and tryed all different ways. Thanks for sharing.

  • Cristin

    November 2, 2009 at 2:01 pm

    WOW thats some great info! I now consider you the expert on hexagons1 :-) After Christmas when I have more sewing down time, I plan on making a hex quilt… maybe a baby size to start out :-) GREAT RESOURCES! Thanks!

  • Auntie Em

    November 5, 2009 at 6:25 pm

    Thank you for showing us all the options you tried. This was great!

  • jill.christine

    November 6, 2009 at 3:35 pm

    I want to make a hexagon quilt for my husband for XMAS. I am new to quilting but have some sewing experience and a serger. What I got from this is… print out hexagons on freezer paper, iron to fabric, which are cut into squares. fold, iron into shape, then whip stitch together…

  • sarah_apple

    November 10, 2009 at 1:40 pm

    My goodness. That’s how hexes are made? Zoiks! I think I’ll have to start with giant, giant hexes. Thanks for all the info…off I go to make some templates.

  • bekahdu

    March 1, 2010 at 12:47 pm

    Wow, now I’m not scared of hexagons anymore ….Yay :)

  • Liz

    March 10, 2010 at 1:48 am

    Hi Christina – this is wonderful info about piecing hexagons. I would just like to add that an even seam allowance makes hand quilting easier if you like the standard 1/4 inch inside seam lines. Using squares means there is an extra layer of fabric to quilt through in some places. This is tougher on your hands and also has an effect on the texture/appearance of the quilting.

  • cyndi

    March 25, 2010 at 1:53 am

    was just reading through this and followed the link but can’t find the guide to tell me how big to cut my squares for my hexes….i got some quilt squares at the thrift store and wanted to cut them down into 2.5 inch sq. but i don’t know what size hex to use….please email me if you can redirect or help me out. [email protected] thanks so much

  • Rachel

    May 28, 2010 at 2:01 am

    I love how you’ve shown what worked and what didn’t with PICTURES! What a resource. I’ll be linking from Stitched in Color tonight!

  • ChiliMango

    July 17, 2010 at 6:57 am

    Thanks for all the hints and tips! I’ve been wanting to try something with hexes for a while but I’ve been far too intimidated. Now I’m excited to try it out! And I’ll be sure to link to this when I write about my hexing adventures.

  • alipink

    June 5, 2011 at 7:43 am

    Thank you so much for sharing this tutorial and the links. I’m working my way up to hexagons and I know that I’ll be heading in the right direction with your informations

  • Unknown

    July 22, 2011 at 11:31 pm

    I love to make tiny hexagons for mini quilts and other projects. I do love cutting out the hex shapes, but I just use regular paper. When I baste around the fabric over the hex shape, I fold one side over at a time and finger press. I hold the center and gently turn. I do baste the folded edges. I stop and make sure the paper hasn’t slipped after the second fold. I found I got very fast at this after awhile. Just relax the hands a little so no cramping. Also, when whip stitching the covered shapes, you only need to “grab” a couple threads of the fabric on each piece. It will hold very well and you won’t see the stitches on the front of the “flower”

  • bookworm

    December 3, 2011 at 5:40 pm

    I did some without using papers. I was going for a calendar quilt with the flowers, one for each week. Lol, I got through about a month of them sewn, the rest still sitting in a baggie! You’ve inspired me to try again! I have a couple of charm packs that would be cute for a baby quilt just pieced together in rows. Thanks!

  • Mermaid Sews

    June 20, 2012 at 7:46 am

    Wow, what a great hexie post, thanks!

  • gamawinkie

    August 21, 2012 at 3:29 pm

    thanks for this information! I am excited about starting a hexie project now. Keep up the good work.

  • PeaceinPiecing

    September 28, 2012 at 8:17 pm

    Hey! We love your tutorial over here at Paper Pieces. Just wanted to let you know that we now have Acrylic Cutting Templates. They have a 3/8th” seam allowance..& they are clear for fussy cutting. Something to think about for your next piecing project!

  • Kerry

    September 30, 2012 at 7:07 am

    This is great. I’m just finishing up a quilt and thinking about scrap hexagons next so this is hugely helpful. Thanks.

  • Laurie

    November 18, 2013 at 2:58 pm

    This is an awesome tutorial!! Thank you so much!!

  • Angela

    July 17, 2014 at 1:04 pm

    Thank you for such a thorough tutorial. And I LOVE when I get a resources section!

  • Jennifer @ Ellison Lane

    July 20, 2014 at 10:45 am

    Thanks so much for linking to my tutorial! Your hexies are lovely!

  • Kézi varrás – hatszögek / Hand piecing hexagons | Nora's Quilt Blog

    September 18, 2014 at 11:27 am

    […] azért utána néztem rendesen a dolgoknak, ezt a bejegyzést (angolul van) találtam a leghasznosabbnak és innen nyomtattam (hatszög generáló […]

  • English Paper Piecing (EPP)- Try Something New Every Month – Swoodson Says

    January 5, 2015 at 5:33 am

    […] to join the hexies together. In working on this post (but after completing the project) I found this EPP post on Sometimes Crafter that is great, comparing different joining stitches, methods, […]

  • Heidi

    February 8, 2016 at 11:13 am

    Thanks for the fun post. I have been basting lots of hexies and haven’t started putting them together. Have you seen this punch (and others like it)? http://www.amazon.com/Fiskars-Hexagon-Squeeze-Punch-159090-1001/dp/B00E3FSTN8/ref=sr_1_1?ie=UTF8&qid=1454958637&sr=8-1&keywords=hexagon+fiskars+punch I use it to cut my hexes out of freezer paper really quickly and accurately. It even comes in different sizes.

  • Susan

    January 28, 2018 at 10:33 am

    I use the freezer paper method.
    I iron the shiny side down on the back side of fabric. Then tuck and stitch the hexies together.

    I also use a paper cutter from Friskers that cuts the paper into perfect hexies!

  • Hexagons Tutorial – Sometimes Crafter

    March 17, 2018 at 7:00 pm

    […] a more informative discussion on hexagons and everything I tried, please see my separate post on “Adventures in Hexagons” next posting.  There are many ways to make your hexagons, but the purpose of this tutorial is to […]

Comment Reply

Your email address will not be published. Required fields are marked *

Prev Post

Hexagons Tutorial

Next Post

Organizing & Folding Fabric