AGF Stitched – Birchen Quilt

I had this lengthy post all written up about his quilt, and using the Triangles on a Roll, and how Art Gallery Fabric and Fat Quarter Shop have teamed up to do a video series called AGF Stitched….and then the post decided not to auto save and I lost it all. I really hate when that happens. I’m going to do my best to reconstruct what I said, and ignore the fact that I spent about an hour trying to write that first post and really just want to head into bed now.

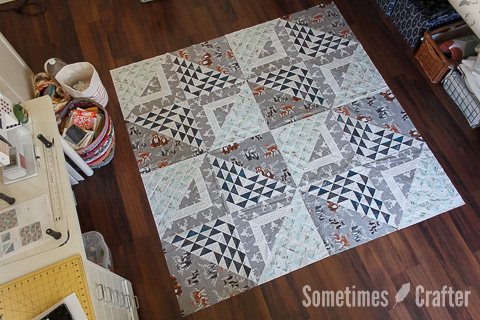
So, as I was saying, Fat Quarter Shop and Art Gallery Fabrics have teamed up and created a new series called AGF Stitched with Kimberly. Their first video (inserted below) in the series is on the making of this quilt, the Birchen Quilt. It employs the use of Triangles on a Roll, and a good thing, too since there are 336 half square triangles in this quilt top! So what are Triangles on a Roll, you ask – basically it’s a great way to foundation paper piece a ton of half square triangles all at once, in just the size you need, with no squaring of half square triangles needed. Kimberly quickly walks you through it in the video tutorial for making this quilt, but this is the basic idea: Cut your fabric slightly wider than the width of the paper and slightly longer than your piece (for this quilt top you are instructed to use 6 sections, or 12 squares). With your two half square triangle fabrics right sides together, pin the triangles on a roll to the fabric pieces. Sew on the lines, following the direction of the arrows until all the stitched lines are sewn on.

Take the sewn piece to your cutting board and cut around all four sides of the piece, on the lines, and then proceed to cut out all the triangles. I went ahead and cut down the center lengthwise, and then I kept it together and cut across until I had my 12 squares. I then proceeded to cut them along the diagonal of the squares, leaving me with 24 half square triangles.

After they’re cut, you’ll want to remove all the paper (so be sure your stitch length was set to a very short length, just as you do for any foundation paper piecing, so the paper is perforated, thus making it easy to tear away). Then, you just press your seam allowance as desired and the HSTs are all ready to use!

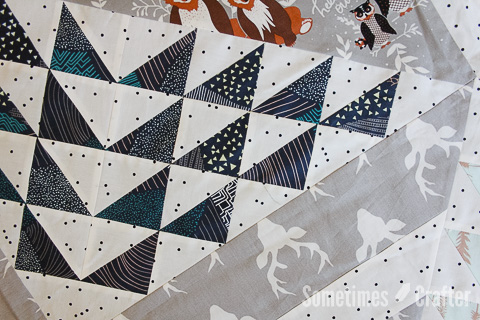
At first I wasn’t sure if I liked the Triangles on a Roll. It was a little cumbersome to sew it on the machine, and with the time spent tearing off paper I wasn’t sure if I was saving any time (I didn’t shorted my stitch length enough the first time – be sure to make it nice and short). After that first piece I went ahead and did all of the rest for my first two colorway (the minty-blue with the tan trees and the cream dot), which was another 6 sections. After I finished sewing all of these, and then cut them all out, ripped away the paper and pressed them, I began to see the value. It actually went faster, and even if it didn’t, it was wall worth not having to square all of those half square triangles! A friend asked me the other night if I would use these again, would I buy them myself – my answer was a definite yes. I will absolutely be buying these again, and can’t imagine making half square triangles any other way, especially when there is such a large amount of them. What’s really nice about the roll is that you can do as few or as many as you want at a time. You cut the length you want from the roll and match it up to your fabric. If you suffer from arthritis (I do) you will thank yourself over and over again for using these. While my hands haven’t been bothering me as much this winter, I didn’t have any pain in my hands and that was thanks to the fact that I didn’t have to square any of these HSTs. As you can see from these photos, they came out perfect, all of my points matched without any trouble.

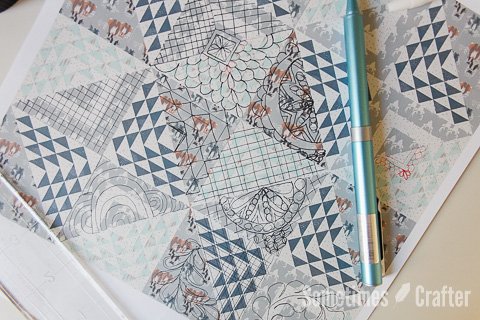
I was really hoping to have the quilting completed by today, but of course I decided to get all fancy-schmancy, never happy with something simple. This is something I usually do – print out a mock-up of the quilt top i’ll be quilting so I can doodle my ideas all over it for quilting. I love to use the computer when I can, but sometimes free-motion quilting is better. I’m employing the use of a little of both. I was able to figure out the minty-blue triangle block as well as the other half of that with the grey dear and dots, and then spent the rest of the day and evening working in AutoSketch on the digital design for the triangle that has the animal print. I am looking forward to stitching that up tomorrow.


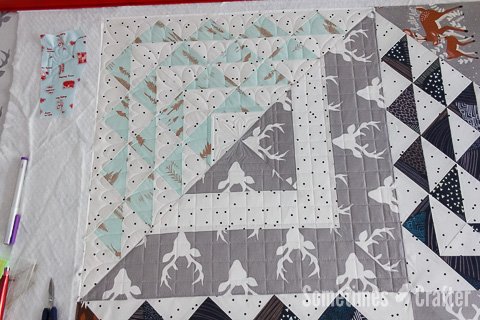
This is what I decided on so far. The navy blue blocks will have diagonal cross hatching, I think. I haven’t committed to that yet, but I like the way it looks in my sketch. The center on this block is where the digital came in, and then I free-motion quilted the hills around it in the minty-blue triangle section. The grey dear section is just simple cross-hatching, done with the channel locks on my machine. I’ll get this finished in the next few days, as I have client quilts to be quilting. I’ll post just as soon as it’s done!

I’m sure I missed some things I mentioned in my first post. I’ll remember tomorrow after this has gone live, because that’s always how it works. Don’t be scared off by the number of half square triangles in this quilt top. I am a slow quilter and I got this done in just a few days. The Triangles on a Roll really made a difference, and I really do recommend them. Fat Quarter shop provided me with the roll to make this quilt, but I will be buying more for all my future HST projects – I just love them! Art Gallery Fabric provided me with the fabric. I chose prints from the new line Hello, Bear by Bonnie Christine. I have absolutely fallen in love with these prints and will be buying more. Of course Fat Quarter Shop has the full collection, and they also have a quilt kit to make the Birchen Quilt as featured on their video. The pattern is free, so be sure to download it and check out the video for some really great tips on making this quilt top (like the tip on squaring the blocks – be sure to watch that part).
There were a few of us that participated in this “blog hop” to get the word out about AGF Stitched with Kimberly, so be sure to head on over to their blog, the Jolly Jabber, to find links to the other quilters to see their tops with the fabrics they chose – i’m really looking forward to seeing some of the completed tops that i’ve seen in the works over the last few weeks. If you love this quilt, you should make it! Do yourself a huge favor and buy the roll of triangles and then come and thank me when you still have 162 more half square triangles to make and you’re thinking to yourself: How would I have done this without this!
I’ve rounded up all the links from the post (I think) as well as embedded the AGF Stitched video for convenience. If you have any questions for me about my experience with this quilt top, or using the triangle roll, leave a comment on this post and i’ll reply there. Thanks for stopping by and I hope you’ll be back to see it all quilted up!
* Free Birchen Quilt Pattern *
* AGF Stitched with Kimberly *
* Birchen Quilt Kit *
* Triangles on a Roll *
* Art Gallery Fabric *
* Hello, Bear by Bonnie Christine *
