Sometimes Crafter

  • Home
  • About
  • Quilting
    • Price + Services
    • Designs
    • Gallery
    • Quilt Prep
    • Quilting Request
  • Blog
    • Tutorials
    • Quilting
    • All Categories
  • Contact
    • Errata
    • FAQ
  • Shop
    • Quilt Patterns
    • Bag Patterns
    • Sewing Patterns
    • My Account
    • Cart
Tutorials

Binding Perfectly Mitered Corners

January 11, 2016

Sometimes Crafter // Binding Perfectly Mitered Corners

I had a couple of people on Instagram ask me about my mitered corners on my quilts, and how I got them to turn out so “perfect”.  Perfect is of course in the eye of the beholder, but I do tend to have nicely squared corners on my binding.  It comes from years of practice and perfecting my technique.  It’s not difficult, or any big secret, so let’s break it down in photos and then you too can love your mitered corners.

First off I want to mention how I hold my quilts when i’m working on binding.  This is opposite to how i’ve seen a lot of other quilters hold their quilts.  I like to place my quilt in my lap, backing side towards my legs and then I fold up the side i’ll be working on.  So I am working on my quilt with the binding away from my body, whereas I see a lot of quilters working with the binding towards their body, meaning the quilt top is facing their lap.  I’m not sure that this really makes a difference, but it is one of the few things I know I do differently from many quilters.  It’s hard to explain in words, but I think you can get the idea from the photo.

Something else I do differently than most quilters is I use a blind stitch (vs. an invisible stitch, which really isn’t invisible in my opinion) when I stitch my binding on.  I document that stitch in this post.  Again, i’m not sure if that makes a difference, but something to try if nothing else is working for you.  So, with stitching in mind, stitching your binding along until you reach the corner.  I stitch just right up to my 1/4″ seam allowance from where I stitched the binding to the front of my quilt with my sewing machine.  I then do one extra stitch there to hold it.

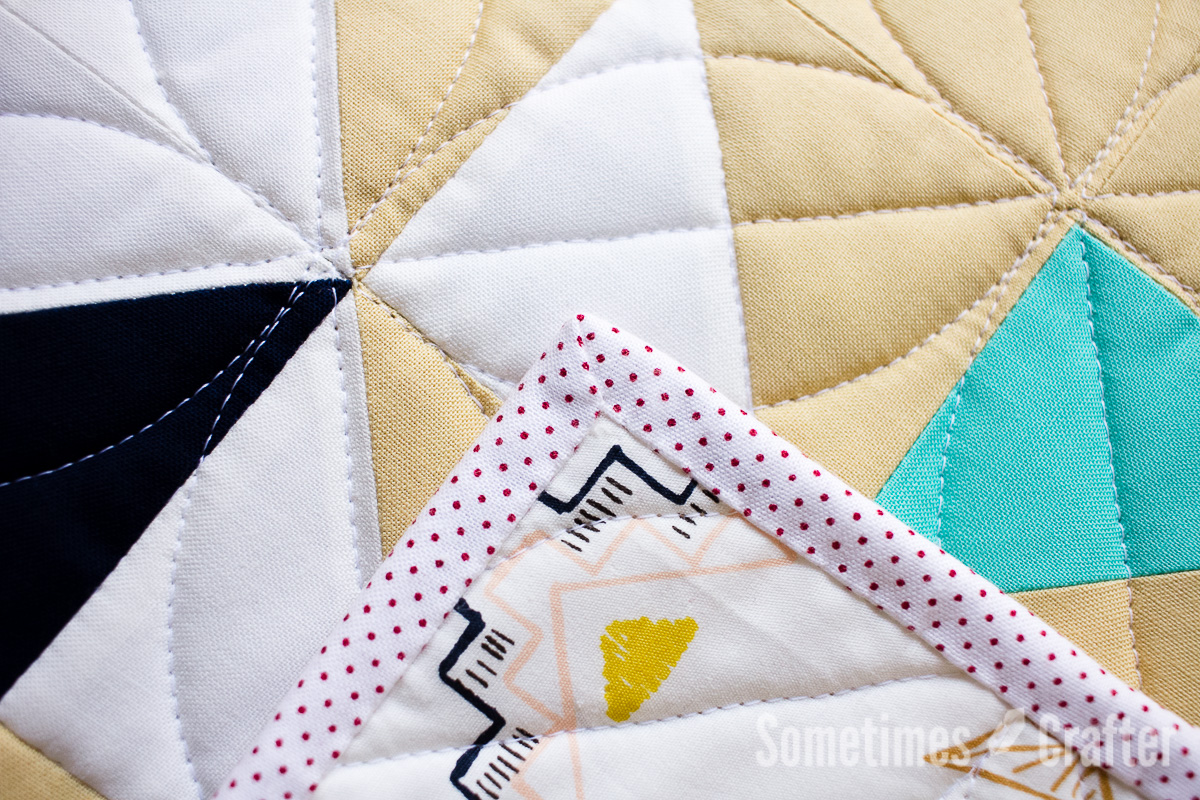
Next, I take a binding clip (you could use a pin if you don’t have binding clips) and I fold over my binding on the side somewhat close to the corner.  In this photo it’s about 2″ away from the corner, if that.  I don’t pre-clip/pin my binding around my quilt.  I typically just use this one clip and move it along a few inches as I stitch until I reach it and then I move it along again a few inches.  This clip is just me “pinning” my binding in place.  Having it folded over also helps me to form the corner without having to awkwardly manipulate the fabric.

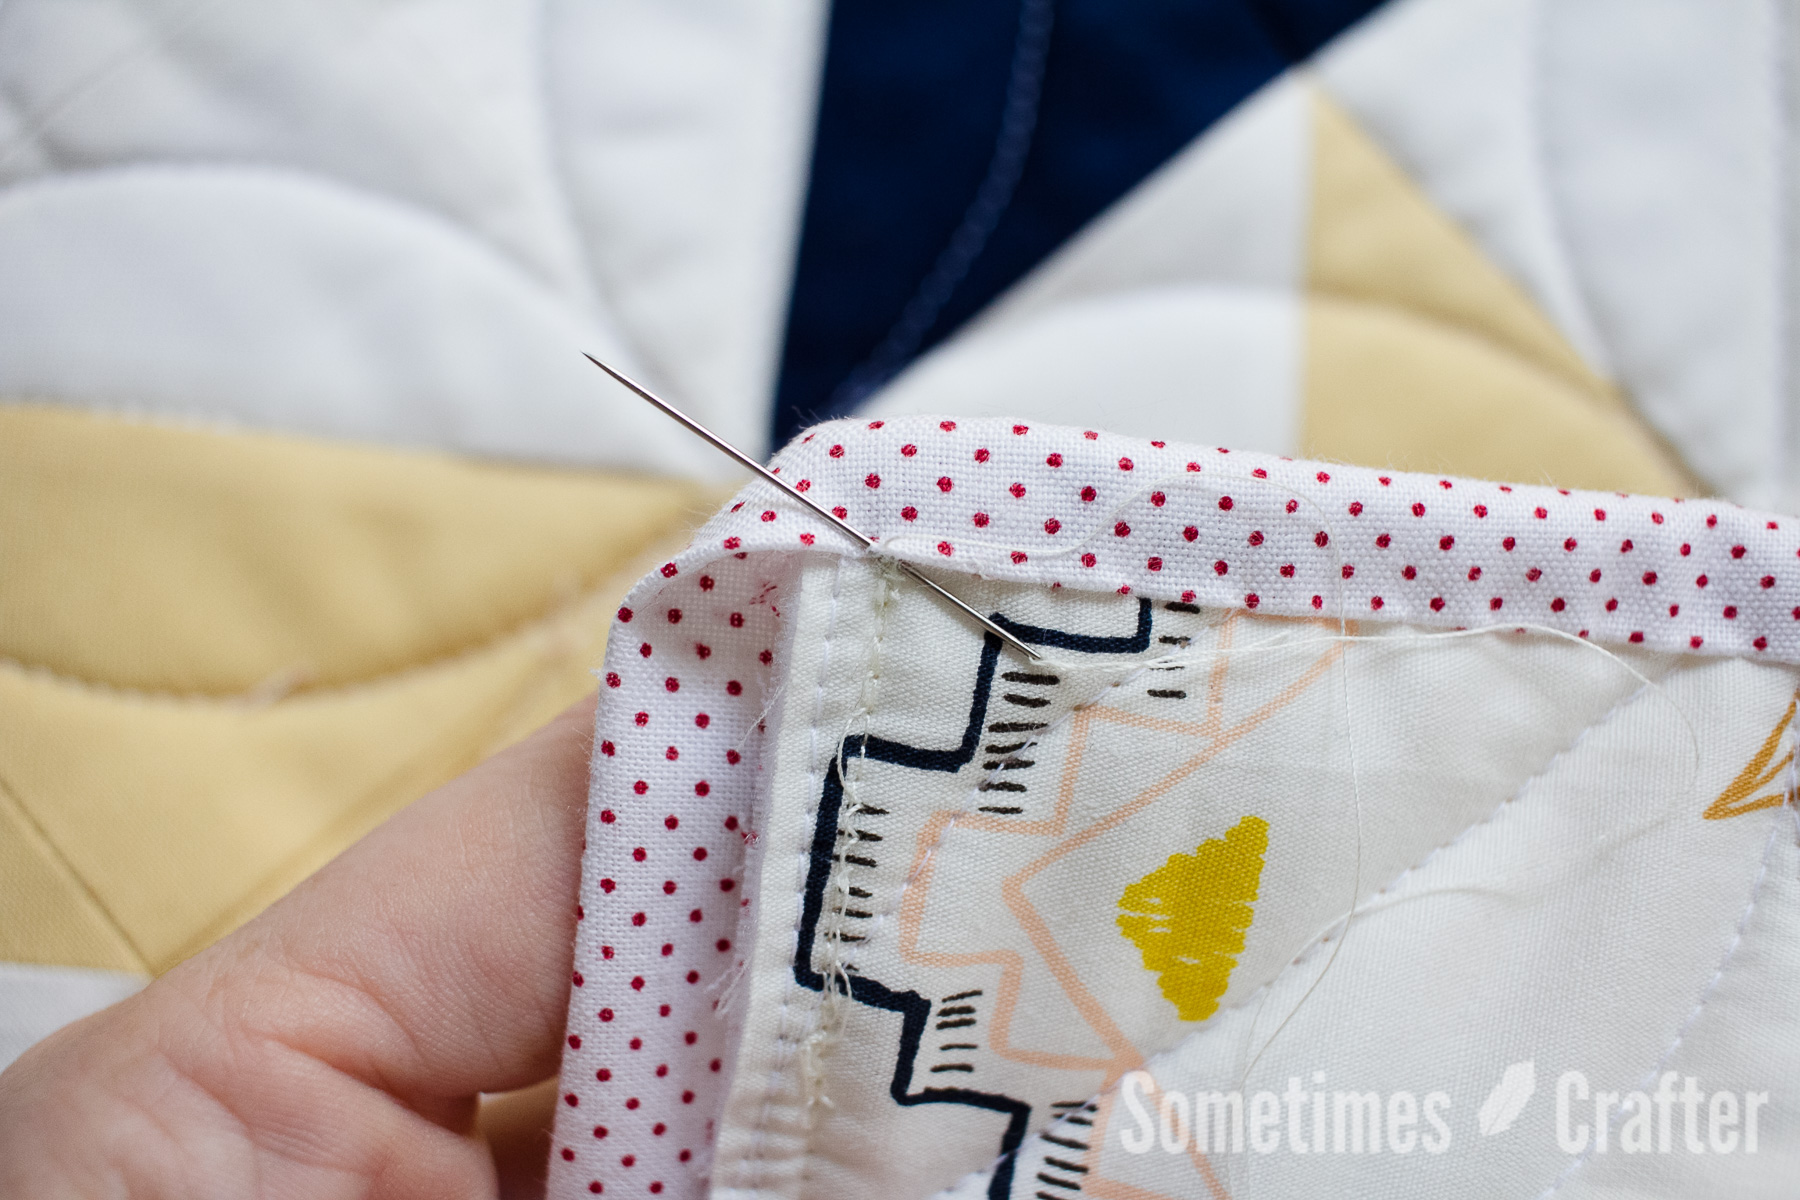
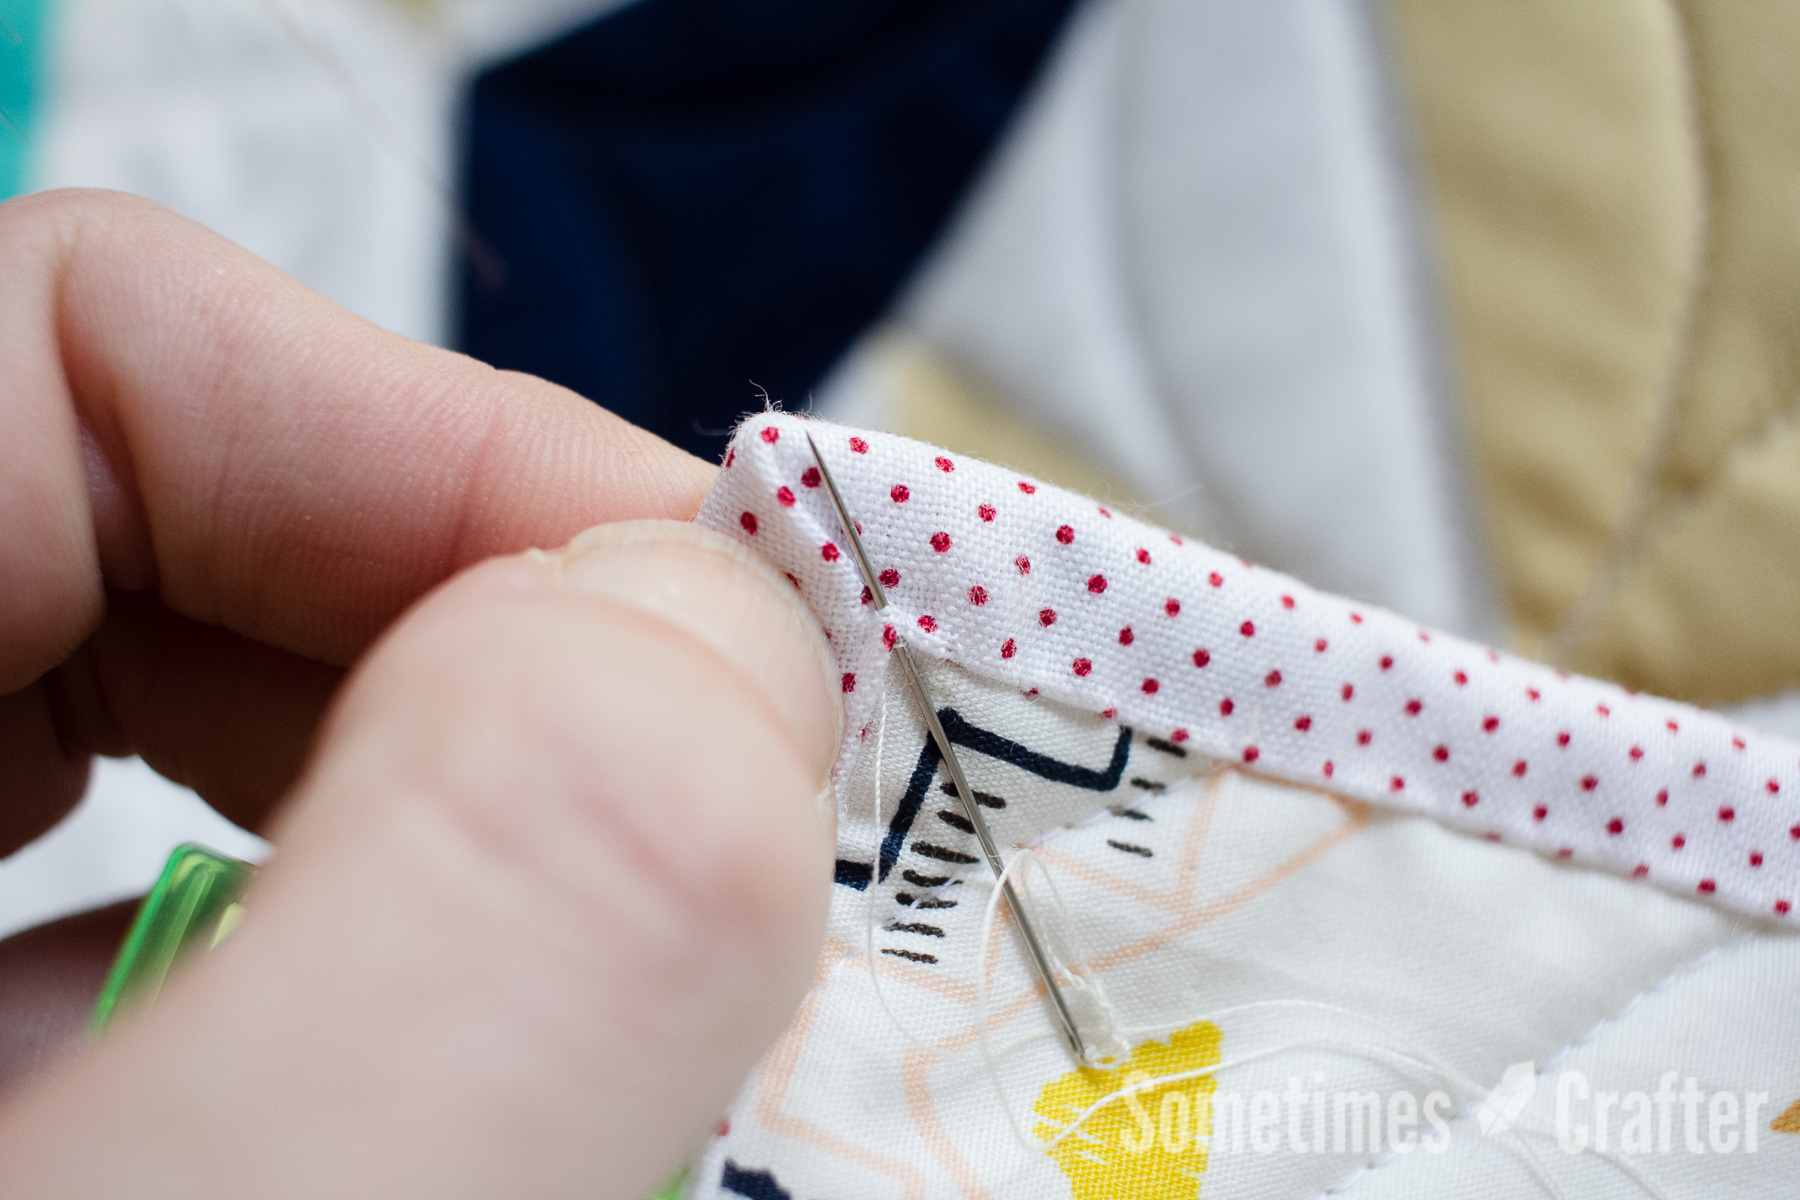
I then use the needle to push the fabric flat into the fold of the fabric.  I just place it down against the binding and then slide it over until it hits the fold and use my thumb and index finger to fold the binding on the left over this.

After its folded in there use the point of the needle to adjust/manipulate the mitered fold you just created until it matches up with the binding that’s already been stitched down so that it creates a crisp turn.

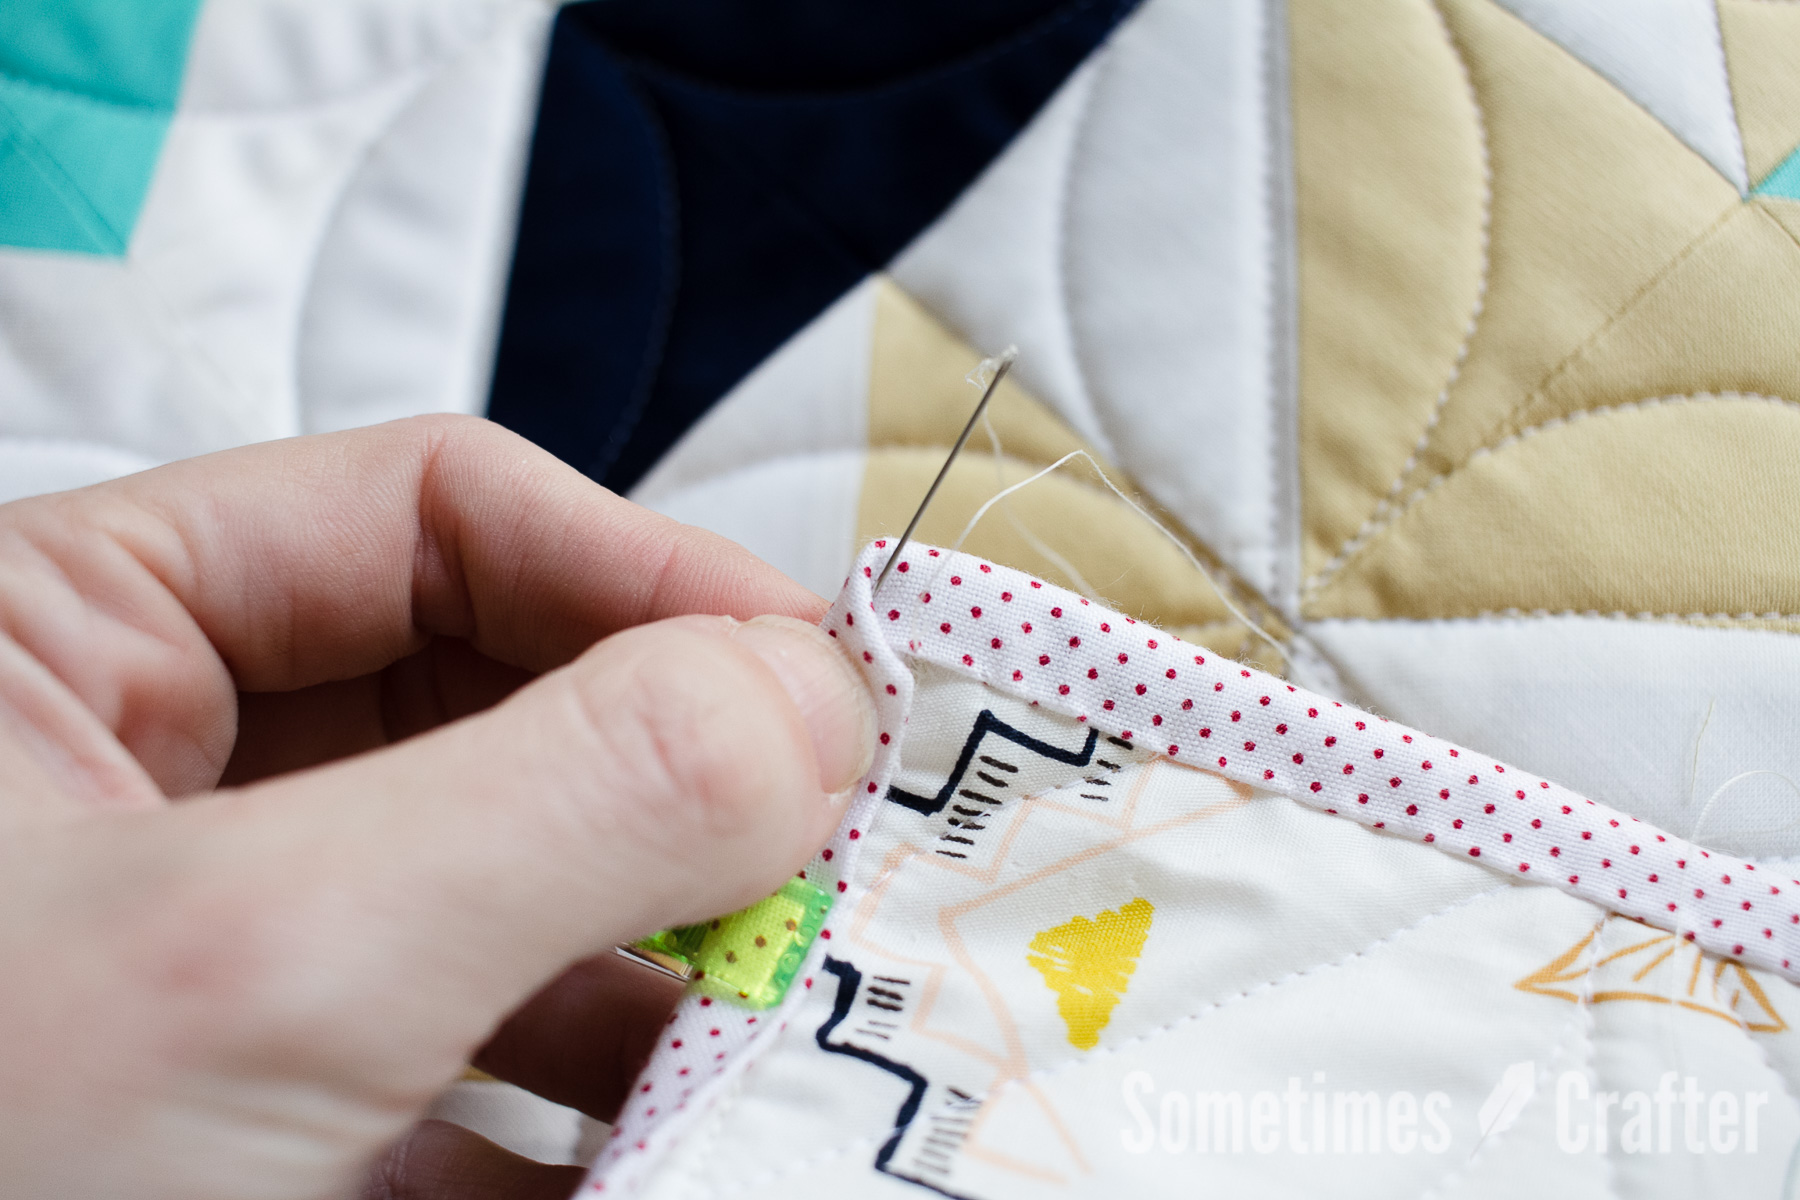
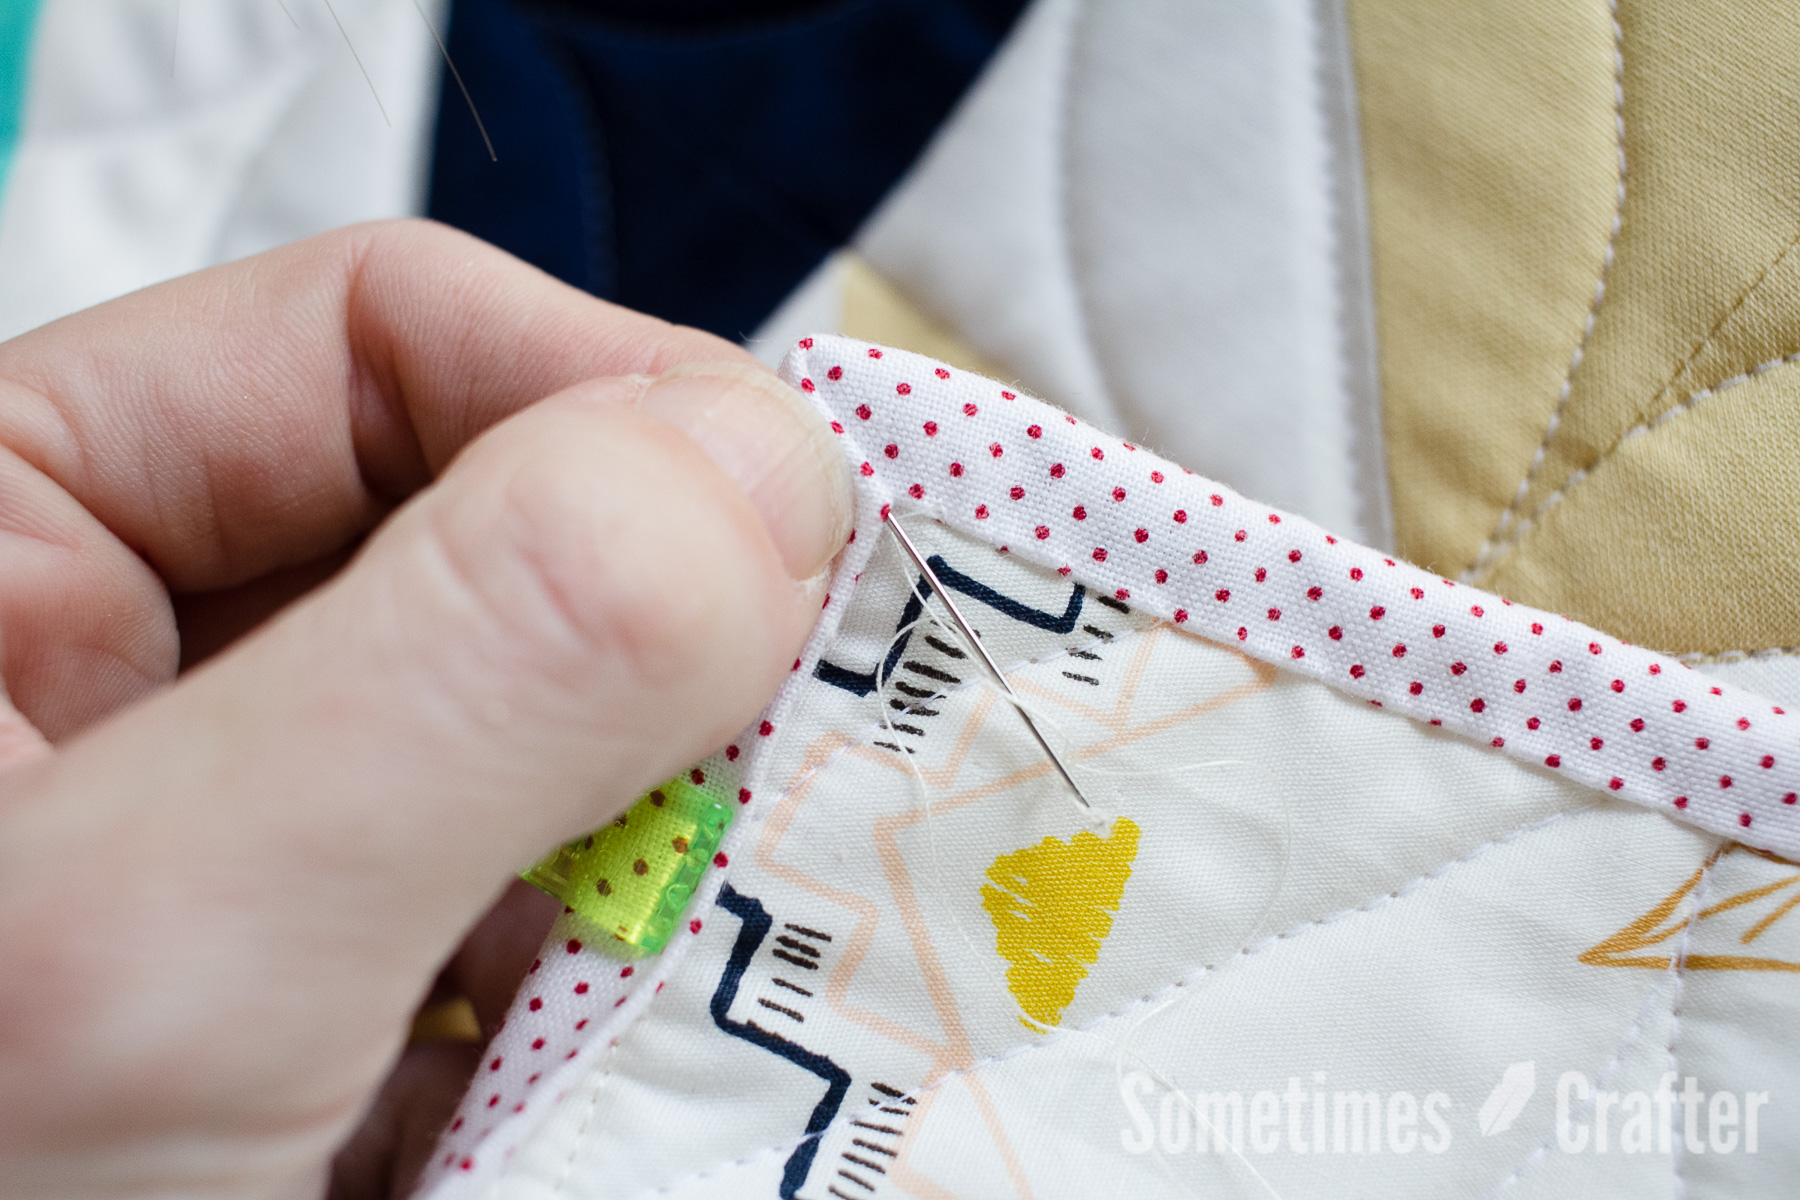
Holding the folded corner securely with your thumb (or another clip placed right at the corner point) put the point of your needle into the point of this mitered corner and go down into the backing and batting (not the quilt top) and rock back up a very small distance away through the mitered fold.  Continue up the fold, using a blind stitch in the fold and going through the binding under the fold.  You want to secure the corner.

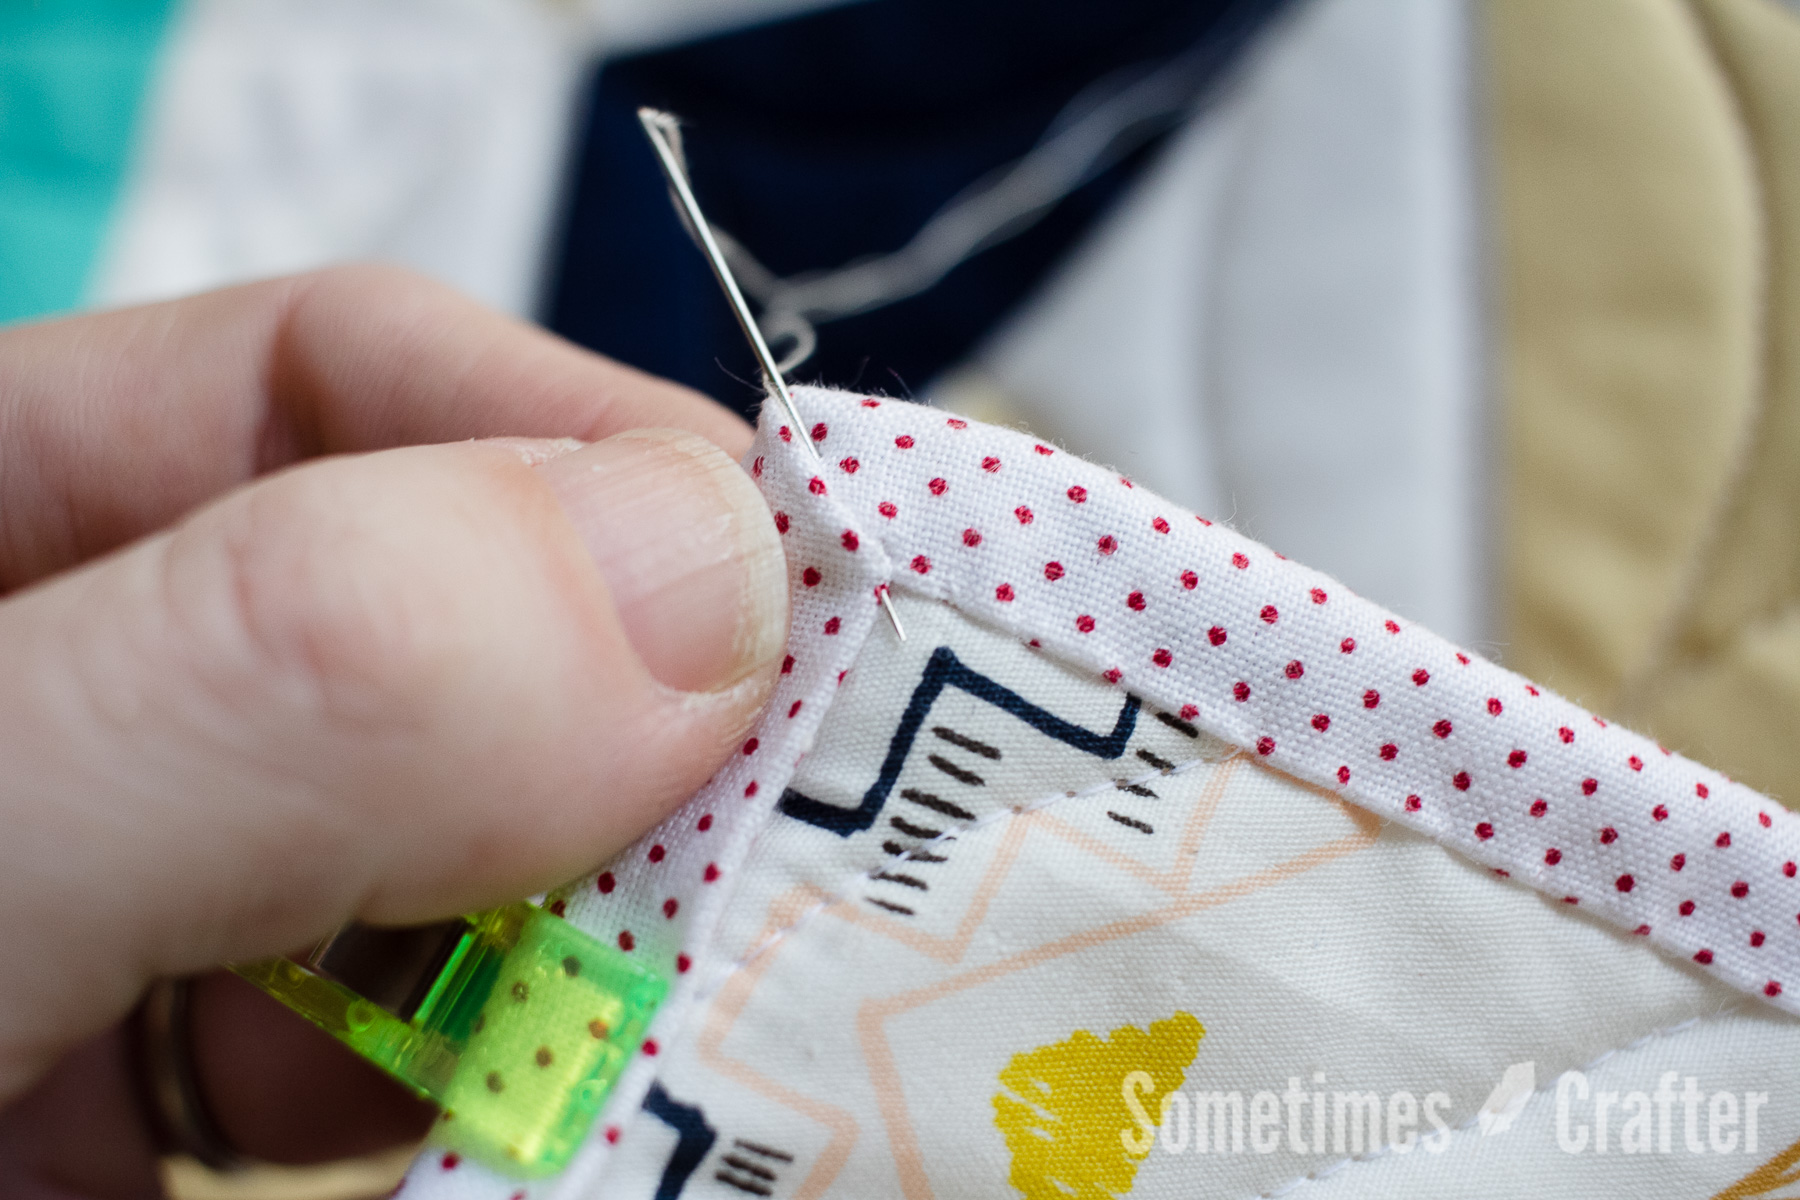
Once you’ve stitched as far as you can along that fold flip your needle around and come back through the binding out at the point where the binding meetings at that 90-degree angle.  Continue stitching down your binding until you reach your next corner.  At this point I take the time to rotate my quilt around in my lap so that I can work from right to left on my binding, instead of top to bottom as it would be oriented at this point.

So that’s it, nothing terribly tricky, just taking my time and being mindful of what i’m doing.

binding Tutorial

10 Comments

Reader Interactions

Leave a Comment Cancel reply

Your email address will not be published. Required fields are marked *

Comments

  1. Pam says

    January 11, 2016 at 5:23 pm

    I’m with you. I hold my quilts the same way – I just can’t get that hang of it any other way. I finish my corners the same way too – but it’s really tough on my thumbs!

    Reply
  2. Nancy says

    January 12, 2016 at 4:14 am

    I hold them that way too! I also do my corners exactly like you.

    Reply
  3. Margaret (margiestitcher) says

    July 11, 2016 at 9:31 pm

    I am glad to see someone else holds the quilt the way I do!!!when binding, thanks for te instructions too very helpful

    Reply
    • Natalie says

      October 9, 2018 at 8:40 pm

      I hold my quilts the same way when binding. Thanks for your great tutorials

      Reply
  4. BJ says

    January 8, 2017 at 4:01 pm

    Thx for the tutorial. I usually glue baste my quilts and sew the opposite way. My corners turn out good but I will give this a try.

    Reply
  5. Cheryl says

    December 18, 2017 at 1:09 pm

    Thank you for your clearly explained and photographed instructions. This is a great help?

    Reply
  6. Susan says

    December 25, 2017 at 8:58 pm

    Thank you for this post. It is so clear and understandable with the pictures as a guide. I am a beginner novice. I have done a few quilts, but I still struggle with techniques.

    Reply
  7. Yasmin Macan-Markar says

    March 30, 2020 at 1:34 pm

    Thank you so much for the explanation on binding , it was so reassuring.
    I do it the same way but I sometimes have a problem getting sharp mitred corner. Will keep trying

    Reply

Trackbacks

  1. Binding Tutorial Part 3 | Sometimes Crafter says:
    January 11, 2016 at 3:43 pm

    […] **An additional post with more detailed information on forming perfectly mitered corners can be found in here.** […]

    Reply
  2. CraftCrave | DigiFree | CraftCrave says:
    January 11, 2016 at 8:35 pm

    […] Binding Perfectly Mitered Corners – 1 freebie(s)? […]

    Reply
Previous Binding // Joining Ends
Next AGF Stitched // Blithe Quilt

Related Posts

Trick or Treat Tote + Pattern

Embroidery

Pin Banner Tutorial

Tutorials

Simple Photo Tote

Tutorials

Binding Tutorial Part 3

Tutorials

Primary Sidebar

Shop

Binding 101

Categories

  • Books + Mags
  • Embroidery
  • Longarm Quilting
  • Patterns
  • Quilting
  • Sampler Quilt Along
  • Sewing
  • Spaces
  • Tutorials

Never miss a post

Just stopping in for the yearly documenting-of-the Just stopping in for the yearly documenting-of-the-wrinkles. #41
Here we go...2000 is old enough to drink. Going be Here we go...2000 is old enough to drink. Going be a wild year!
2020: The year I turned 40, saw @tiesto live for m 2020: The year I turned 40, saw @tiesto live for my birthday, and then a bunch of other stuff happened that paled in comparison to both of those events. The end. #longlive2020
The yearly photo of my moms birthday "cake". My mo The yearly photo of my moms birthday "cake". My mom requested I make this Swedish Braided bread with apple pie filling for her birthday this year, instead of a cake. It smells delicious and I can't wait to dig in! #birthdaytreat #swedishbraidedbread
It took a ton of coats of glaze, but Brice's ornam It took a ton of coats of glaze, but Brice's ornament for this year is done. I decided to make his ornament this year, and while I set out to make a toilet paper roll ornament, he saw white clay and assumed goose, so I made him Lucy goose. He's quite happy, and so am I. He loves our Lucy goose.
.
I used oven-bake polymer clay (Michael's brand was what I had on hand), acrylic paint (just the craft variety...again, what I already had on hand), and a glossy glaze (Sculpey, which I don't recommend, its gotten very thin since I last used it, it took way too many coats to be the right thickness). The ornament is about 1.5"h x 1.5"w x 0.5"deep. It was really easy to make, so don't say you can't do it. You can. 
.
#goose #chinesegoose #lucyandherducklings #ornament #handmadeornaments #gooseornament #clayornaments #polymerclay #messwiththehonkyougetthebonk
Irish soda bread seemed like a holiday kind of bre Irish soda bread seemed like a holiday kind of bread to make, especially since it has currents, cranberries and sultanas inside! I don't think I've made one since I was about Brice's age! Its been too long. #holidaybread #irishsodabread
Taking advantage of my end of year time off from q Taking advantage of my end of year time off from quilting to do a little crafting. I made an ornament for Brice (which I'll share later when it's finished), and then painted these cute little canvases while my paint was out yesterday. You can see individual photos of each of them over on my other account  @christinalanecreates (grouped with the photo like this).
It gets so dark here this time of year, by afterno It gets so dark here this time of year, by afternoon I've lost all light for photos! This is another quilt quilted for @jenny.l.barrett I felt Sashy was the right amount of modern and traditional for this quilt top. I was having a hard time picking a design for this but kept coming back to this. It's a go-to design for me and I always love it on everything. I think it ended up being pretty perfect for this. #sometimescrafterlongarmquilting
Copyright © 2021 Sometimes Crafter
  • Privacy Policy
  • Disclaimer
Theme by SheShoppes