
Binding // Joining Ends
I was reviewing my binding posts (1, 2, and 3) before my binding class at Modern Domestic last month, as I wanted to direct students there for a refresher after class should they forget a step. I realized that while it’s still relevant, I don’t actually show the method i’m using now to attach the ends of my binding. It’s still the same basic idea, but I now use the Fons & Porter Binding Tool (affiliate link) to help me do it a little more efficiently. After I initially wrote those posts someone mentioned it to me and so I picked one up. I found the instructions a little hard to understand, and I know my students felt they were a little difficult to follow, so I wanted to clarify the process with simplified instructions and more photos.
Joining Binding Ends

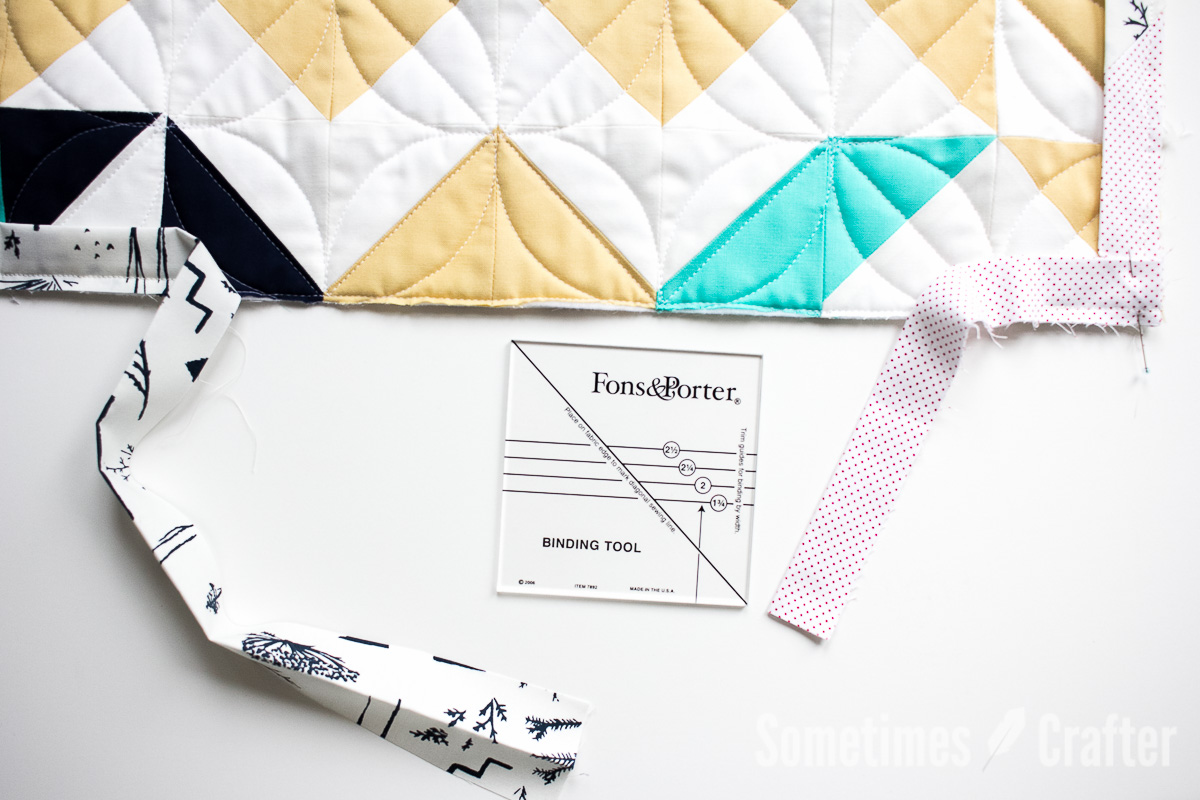
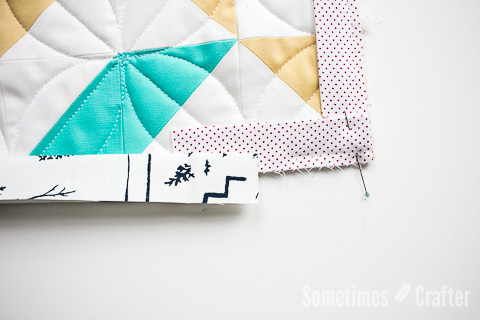
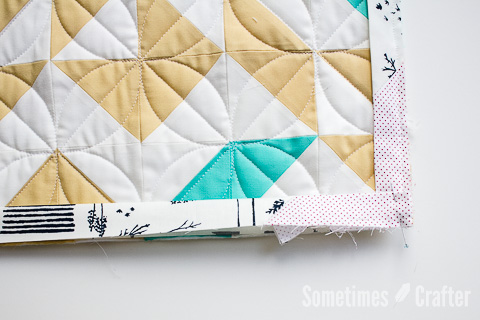
1. This process actually begins as you sew on your binding to your quilt top. You will want to be sure to leave yourself a long tail to work with when you’re ready to join the ends. I like to leave about 12″ extra, as shown on the left side of the quilt. Begin around the center of one side of your quilt and sew your binding around your quilt top as usual. When you come back to your initial side stop stitching your binding so that you have about 12″-18″ unsewn between the two sides of the binding. The pindot fabric on the right is the end of my binding. Ideally you will do this so the opening is centered on one side of your quilt, this is a mini quilt so there was not a lot of room, and it was an afterthought that I realized I needed to take photos for this post. So, when working on this method of joining your ends, please do so in the middle of your quilt top and not at a corner.
2. Begin by folding your end binding strip (the strip to the right) back on itself, so that the fold is halfway down the gap between the two binding ends.
Put a pair of scissors into the fold and cut along the fold in one quick snip.
Snipping on the fold means you will have a nice straight cut to work with in the following steps, so be sure to do the fold trick and don’t try to eyeball it.
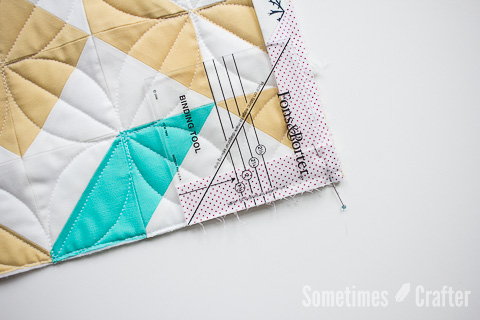
3. Now the binding tool comes into play. Lay the tool onto your binding strip you just cut (the one to the right; your ending strip) so that the bottom edge of the tool is flush with the end of your binding strip.
Here is a closer view of the tool on the binding strip. I rotated the camera here to get a better look at the tool. The right edge in this photo is the bottom edge of the quilt in the other photos. You want to be sure that the arrow on the tool is going from the bottom of the strip back towards where it is sewn down, not towards the opening you left on your top. It doesn’t matter if the tool is flush on any other side, just be sure it’s flush on the cut end of your binding strip.
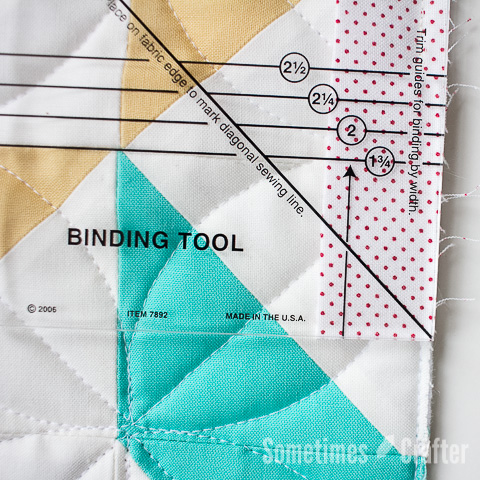
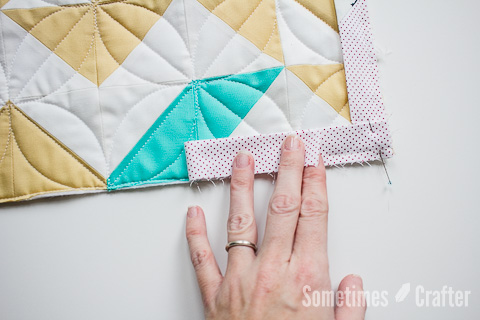
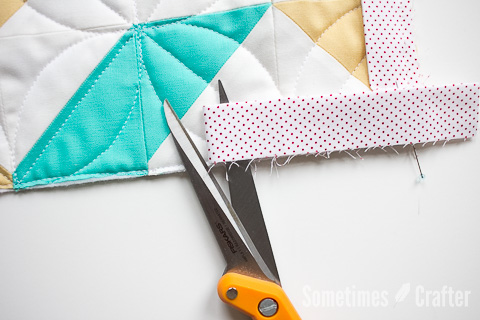
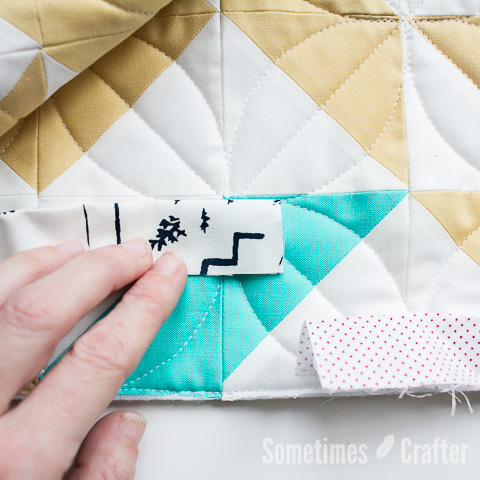
4. Now lay the starting binding strip (this is the one to the left) on to the binding tool and fold the binding back on itself so that the fold lines up with the line on the tool that is the width of your binding. This binding was 2″ wide (this is the width when I first cut my strips; it is 1″ folded in half) so I folded it at the 2″ line on the tool. Insert your scissors into the fold and cut. This fold-cut step is the same as what you did at the beginning with the other side of your binding.
This photo is rotated from the previous view to show you a clearer view of the binding folded onto the tool. When doing this step you want to make sure you binding is lying snugly against your quilt so that you have a good fit once it’s sewn together.
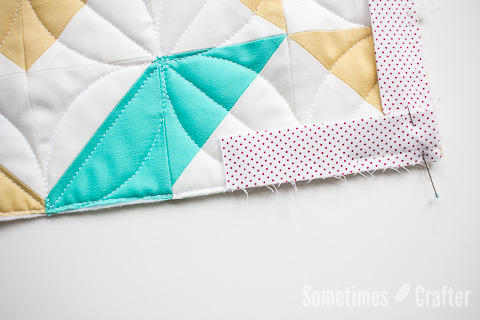
Now that your 2 pieces are cut it will look something like this. At this point you’re going to want to scrunch your quilt up a little bit at that opening so that it’s easier to work with the two pieces you’ll now be joining.
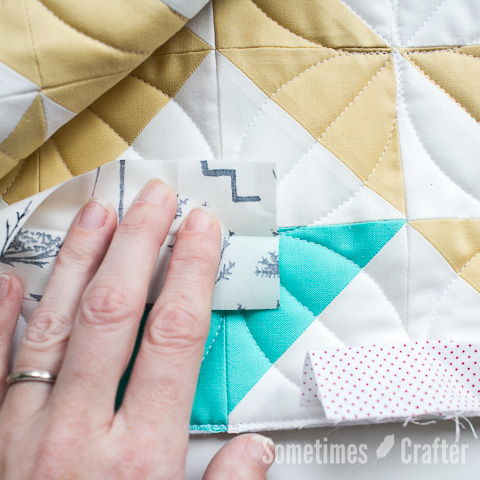
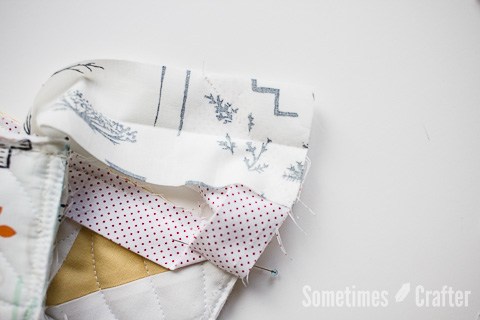
5. Lay the starting binding piece (the one to the left) on to the top, just as it laid in the previous photo (meaning, don’t rotate it, or anything funny like that). Now open it up by simply pushing the top of the folded fabric up.
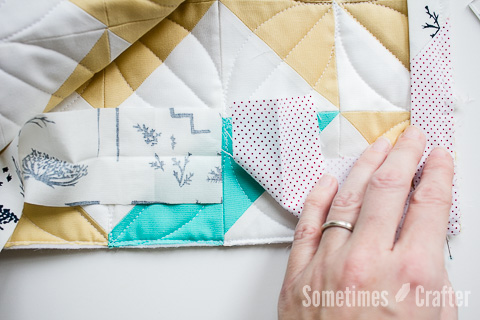
Repeat the same opening of the binding with the ending piece (the one to the right). Lay it on the quilt, open it up with the top of the folded fabric going up, and then fold it up on itself, as shown in the photo, so that the right side of the fabric is showing.

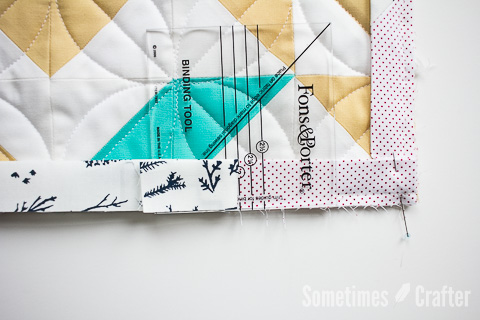
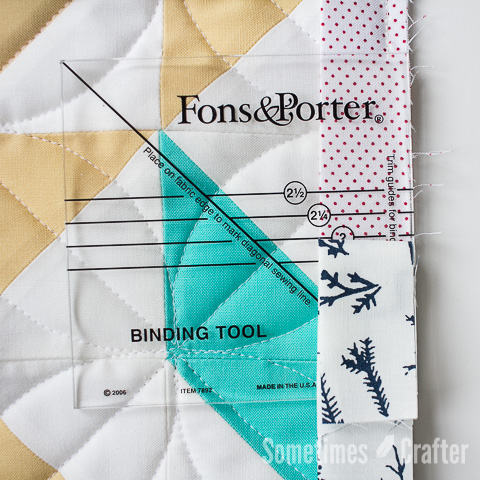
6. Lay the starting binding piece (the left side) onto the ending binding piece (the right side) matching up the raw edges on the top and right as shown in the photo. Once again using your binding tool, lay it onto the binding, orienting the tool as shown. You want the straight line on the tool to lay along the long edge of the binding, and the point of the tool to line up with the corner of the binding. Use a marking tool (I usually use a Hera marker which leaves no mark, just a crease) and mark the diagonal line on the binding.
7. Pin the binding pieces together and stitch on the diagonal line you marked. This will be easiest to do if your quilt top is scrunch up at the opening as directed earlier. Don’t trim your excess seam allowance yet!
Before trimming the excess fabric in your seam allowance away, pull your quilt top flat to be sure you sewed your binding together correctly. If you flip the direction of the fabric or the seam line you’ll know it as soon as you try to do this. If everything looks okay, then trim away your excess fabric from the seam allowance and press the seam flat (either with an iron or by finger pressing). Pin your binding to your quilt top and sew the remaining section to the top.
Your binding should lay nice and flat against your quilt and be a snug fit. If you find there is a bit too much fabric in your binding to sew down flat to the quilt top, you’ll want to rip out your stitching and go back to Step 4, making sure your binding lays snug against the quilt top and that you cut the binding at the correct measurement (2″ if it’s a 2″ binding, etc). If it’s only a little bit “loose” just pull a little on your quilt top as you sew the binding to it to help ease it in.
I hope this clears up any questions regarding the use of this tool. These are basically the same instructions that come with the tool, the only thing that I show a little differently is opening of the binding and marking it. When I first got this tool I found that to be the most complicated part to understand based on their instructions and the photos. It’s really hard to show how you are manipulating the binding in a single photo. It really is a great tool and I always use it to help me finish my quilt binding. There are ways to do this without the use of a “special” tool, it is all mathematical after all, but I just find that the right tool for the job makes the process so much more enjoyable, and this is definitely the right tool for this job.