Binding Tutorial Part 1
As promised, here is the first in a series on how I go about making, attaching and finishing my binding. In this first installment I will be walking you through how I make my binding. Remember: there is no right or wrong way, sometimes just easier and smarter. Always do what works for you. And here we go…
Directions
 |
 |
 |
 |
1. Cut enough strips of fabric, 2-1/2” wide, to go all the way around your quilt. To figure out how much you need to go around your quilt, measure the top and one side, add together and multiply by 2. This is the perimeter of your quilt. Then add 15” to be on the safe side for turning corners and finishing.
2 * (top+side) + 15 = length of binding fabric needed
OR
Top + bottom + side + side + 15 = length of binding fabric needed
Once you have this number you will want to divide by 40. Most quilting fabric is around 44″, so dividing by is 40 is a safe number and tells us how many strips we’ll need. Round up any decimals you get. (e.g. if it’s 6.36, cut 7 strips.)
length of binding fabric needed / 40 = how many strips to cut from yardage
**Edited** I cut my strips on the straight grain. Personally, I don’t see a reason to cut on the bias unless I’m going to be binding a curved edge. I think this actually makes for less frustration when it comes time to sew the binding onto the quilt top (no bias = less stretching under the foot/feeddogs, and less wrinkles in the binding fabric.)
**Edited…again** Depending on how wide you want your binding, and how snug you like it around the edge f your quilt, you may want to cut your strips wider or narrower. As of this edit, if I want 1/4″ binding on the front and back, I cut my strips 2″ wide. If I want 3/8″ binding front/back, then I cut my strips 2-1/2″ wide. If you are new to binding by hand (i.e. stitching it down to the back of your quilt by hand) you might find that you like having a wider binding strip to work with once it’s folded over. So I might suggest using 2-1/2″ wide strips and sewing it to the front of your quilt with a 1/4″ seam allowance. This will give you more fabric on the back to work with, meaning you don’t have to “wrangle it into place” quite as much.
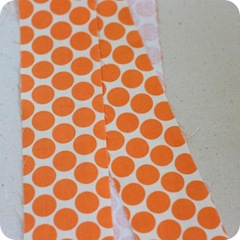
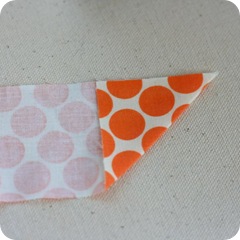
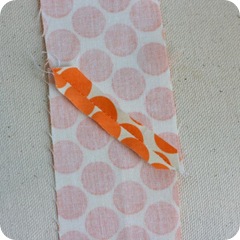
2. Starting with your first strip, wrong side of fabric facing up, fold the bottom corner of one strip up at an angle (as pictured) and lightly press. You only need to do this on one end of your strip of fabric. Repeat for all but one of your strips, working with the same end, pressing in the same direction, each time.
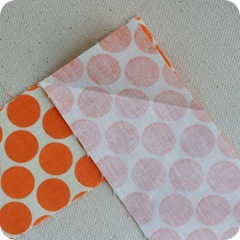
3. Open out a creased end of one of your strips and place perpendicular, right sides of fabric together, onto the end of a second strip of fabric that hasn’t been folded and pressed. The point of the crease should match up with the corner of the fabric below it and the side and top edge of top strip should match the edges of the strip below.
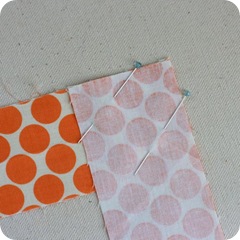
4. Pin in place with two pins towards the ends of your piece. Sew on crease, backstitching at each end.
 |
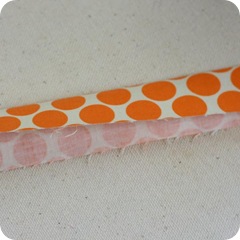 |
5. Trim your piece to a 1/4” seam allowance. Press open your seams. Normally I don’t like to press seams open, but this will create less bulk for later when hand stitching down.
6. Fold your binding in half along the length and press as you go.
These last two steps are something new to me. It made the job of sewing my binding onto the quilt SO much easier. I read about this tip years ago in one of my quilting magazine and I can’t believe it’s taken me this long to give it a go.
 |
 |
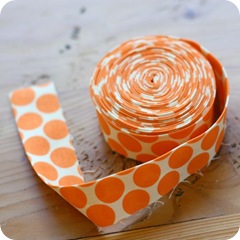
7. Roll your binding up. I made it so my center had a very small opening.
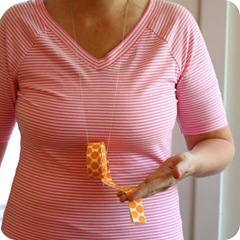
8. Using a needle and thread, I threaded the roll of binding on to the thread and tied it. Then I slipped it around my neck. Now I’m ready to sew on my binding.
The next installment will follow when I bind my next quilt, as I stopped taking photos here. Since then I decided I’d like to redo my binding tutorials and break them down into smaller posts. I feel this will be less overwhelming to a beginner. Baby steps sometimes make things easier to tackle. Until next time!
