Little Cottage Mug Rug

ChristinaMarch 26, 2011

_MG_1123

In honor of Erin’s Mug Rug Madness Week I thought I’d post about my mug rug I made last month for the Portland Modern Quilt Guild swap. I forgot all about it until I saw the adorable house mug rug that Erin posted about earlier this week. I initially wasn’t going to do the swap because I just couldn’t think of something that I liked. Then one morning, about 4am when my 2 year old decided to wake up, and I put him back to bed, I was drifting back to sleep and all the sudden had a vision of this little mug rug. Once I got up at a reasonable hour, I sketched it out and later designed the template.

_MG_1133

I not only liked the shape, but the versatility to do something with the windows and doorway. You could place novelty prints in the windows, use a wood grain print for the door, find window fabric to place in the windows… I could also see little flower boxes appliqued on, and bushes stitched on with embroidery around the base of the cottage. Someone might even be so inclined to stitch on some roof tiles or bricks on the chimney. Even better, at Christmas time make one with a string of lights on the roof and a tree peaking through the window!

I’m linking to the template so you can make your own and I REALLY hope you’ll share a photo of it in my Flickr group so I can see all the different variations. This is one of the things I love about sewing and sharing – seeing all the different possibilities.

_MG_1121-Edit

{Quick} DIRECTIONS

Download and cut out the basic shape of the Little Cottage Template.

1. Cut out a front and back (making sure to flip the template over to cut out one of the pieces, or just layer your fabrics wrong sides together and cut out both pieces at once). Also, cut out a piece of batting to sandwich inside.

_MG_0908

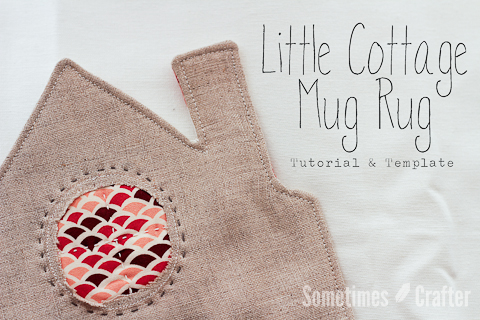
2. Embellish your cottage as you’d like, front and back if you so choose. I used an X-Acto knife to cut out the door and windows and then traced through the opening onto the fabric with a water soluble pen.
3. With right sides together (layered on your batting), stitch around the cottage (1/4” seam allowance) leaving your self an opening to turn right side out. I like to leave mine on the side, but you might like the bottom.
4. Trim the corners and turn right side out, using a knitting needle or skewer to help turn the chimney and poke out the corners. Gently.
5. Press the opening close and pin. Edge stitch around the entire cottage making sure to catch the opening and secure it close.

_MG_1128

And that’s it. Really very simple. The hardest part is deciding how to decorate it. I went ahead and did reverse applique for the doors and window because of how quickly that went, but you could do any number of things…like stitching fabric right on top like Syko does in her designs!

Little Cottage Template (PDF)

Comments (48)

  • Amy

    March 26, 2011 at 10:08 pm

    I really like this.thanks for sharing,Amy

  • Sandra

    March 26, 2011 at 10:13 pm

    thank you so much for your tutorial .. I’m going to give this a go. It’s very kind of you to share.

  • Hugbuggal

    March 26, 2011 at 10:32 pm

    Very Cute! Thank you so much for sharing your template and tutorial! :D

  • Jeni

    March 26, 2011 at 10:44 pm

    Eeek, this is so super cute! :)

  • Stray Stitches

    March 26, 2011 at 10:49 pm

    Darling mug rug. Thanks for sharing your technique.

  • Little Creatable

    March 26, 2011 at 11:54 pm

    You did a really great job with this!

  • PY

    March 27, 2011 at 1:00 am

    This is super cute! Thanks for sharing.

  • Alycia (thecuriouspug.com)

    March 27, 2011 at 1:16 am

    this is the cutest little thing i’ve ever seen! thanks for sharing :)

  • Khris

    March 27, 2011 at 2:11 am

    Super cute…thanks for another great tutorial. I have linked to you on my Freebies blog..hugs Khris

  • CraftCrave

    March 27, 2011 at 3:57 am

    Just a quick note to let you know that a link to this post will be placed on CraftCrave today [27 Mar 01:00am GMT]. Thanks, Maria

  • Simone de Klerk

    March 27, 2011 at 7:36 am

    How very cute! thank you for sharing and have a lovely Sunday.

  • Simone de Klerk

    March 27, 2011 at 7:44 am

    PS: I just went through you blog. What an incredible blog you have! You are definitely on my blogroll now (o:
    And … thank you for sharing all those wonderful tutorials (o:

  • Michele

    March 27, 2011 at 11:53 am

    So cute! Love all the hand stitching!

  • Tatkis

    March 27, 2011 at 1:02 pm

    Thank you very much for the tutorial, your house mug rug looks wonderful!

    Best wishes,
    Tatyana

  • casserole

    March 27, 2011 at 1:25 pm

    I love it!!! Your house design is so sweet, and the reverse applique and handstitching are so pretty! I linked to your tutorial on Craft Gossip Sewing:
    http://sewing.craftgossip.com/tutorial-little-cottage-mug-rug/2011/03/27/

    –Anne

  • Kristine Hanson

    March 27, 2011 at 4:18 pm

    once again, something of yours….darling!! looks great, thanks for sharing!

  • debbie

    March 27, 2011 at 4:28 pm

    It would be really fun to take a pic of ones own home and sketch the outline for a pattern. Or your friend’s home, and give it as a gift to her/him…maybe I will jump on the mug rug trolly after all. :o)
    Thanks for the inspiration.

  • Sarah @ FairyFace Designs

    March 27, 2011 at 4:31 pm

    This is just lovely, thanks for the tute! I think my mother’s day pressies are sorted now :-)

  • upstateLisa

    March 27, 2011 at 6:07 pm

    it’s adorable. I love houses!

  • Cerejeira

    March 27, 2011 at 8:46 pm

    Thanks!!!!

  • Alison Wonderland

    March 28, 2011 at 1:12 am

    Thank you so much for sharing this! I have been in love with it since you first posted pictures a little bit back.

  • a.niza

    March 28, 2011 at 2:05 am

    this is cute! Love it! thanks for sharing!

  • Rachel

    March 28, 2011 at 3:44 pm

    This is such a cute project! I love the big round window – nice detail!

  • J

    March 29, 2011 at 12:14 am

    Very cute. Now I know this is very simple but I need some clarification on the instuctions. I have my piece all cut out and the windows and doors holes cut out. Now do I put the embellished fabric on the wrong side of the front of the house and then layer it? Could you tell me in order how my layers go starting with what is laying on my mat? Thanks!

  • Christina

    March 29, 2011 at 1:20 am

    J: When I did the reverse appliqué on this I traced my door and windows onto the linen fabric, through the holes on the template, onto the right side of the fabric.. Then I pined my prints on to the backside of the linen (right side of the print to the wrong side of the linen) and stitched around the lines I drew for the doors and windows. After everything was sewn down I cut away the linen fabric within the door and windows to reveal the print, making sure to leave a small seam allowance next to my stitching. My coaster tutorial will give you a good visual on how to do the reverse appliqué.

    After the reverse appliqué was done I layered it onto my batting and did my embroidery. You could certainly do it before you layered it if you wanted.

    Let me know if anything is unclear or if you have more questions!

  • J

    March 29, 2011 at 2:15 am

    Thanks… That did help and I think what I did was to cut out my holes for the door and windows before I put the prints on it. So then does that mean that when you cut away the linen doing it the way you did that there is a raw edge on those windows and doors?

  • Magie di elfo

    March 29, 2011 at 12:07 pm

    Ciao mi chiamo Francesca ed è da molto tempo che guardo il tuo blog…lo trovo semplicemente strepitoso….molto bello i miei complimenti per questa deliziosa casetta sottotazza….bravissima…anche io se pur da poco ho fatto un blog: http//magiedielfo.blogspot.com , spero verrai a trovarmi ne sarei molto felice ciaoooo

  • Poppyprint

    March 29, 2011 at 8:44 pm

    Adorable!

  • J

    March 29, 2011 at 11:51 pm

    What is the finished size of your little mat?

  • colorchic

    April 9, 2011 at 4:03 am

    I thought this was so cute the first time I saw it! I would love for you to link up for Ribbon Jar Giveaway @ Color Chic!

  • Lizzie

    April 28, 2011 at 2:36 pm

    Thanks so much for this cute little template. I made one last night and love it and plan on making a few more of them. Lizzie

  • Léia Cook

    September 13, 2011 at 1:14 pm

    it’s adorable.Thanks so much. Bjsss

  • kfr14819

    September 17, 2011 at 11:56 am

    I have seen “trivets” that had long stick cinnamon in them – warm items placed on them created the most wonderful scent!!! That may make a nice addition to your project.

  • Jeneta

    September 13, 2012 at 8:01 am

    Gorgeous! I am definitely going to be some of these. I can picture them as little gingerbread houses for Christmas gifts!

  • holycow175

    October 25, 2012 at 9:28 am

    adorable, thank you for sharing:)

  • Marilyn in San Antonio, TX

    October 25, 2012 at 2:42 pm

    This is really cute…I’ve become a true mug rug collector. Thanks for this tut and template.

  • elnorac

    January 6, 2013 at 9:27 pm

    What a wonderful tutorial! Thank you very much! Such a versatile project!

  • C.S. Weaver

    September 27, 2014 at 8:15 am

    I made a friend something similar last Christmas – a mug mat, large enough to hold a couple cookies or a scone next to a mug of coffee or cocoa. You can find the pic of it on my blog – hint: it has a house on it.

  • Marion

    October 21, 2015 at 4:50 pm

    Too cute.

  • Cheryl Chapman

    July 12, 2016 at 6:51 am

    Love mug rugs thx 4 sharing!

  • Jessie Wasmuth

    June 29, 2017 at 7:03 pm

    This is such a cute idea..thank you for sharing..will be making out of christmas fabric real soon.

  • 22 Adorable Free Mug Rug Patterns! – Jacquelynne Steves

    August 15, 2017 at 7:55 am

    […] Cozy Little Cottage Mug Rug: […]

  • Beverly Ferree

    September 13, 2018 at 9:43 am

    I wanted a small project for fall and this is just perfect. I drink hot chocolate and this is a perfect spot to set my cup on.

  • Bonnie Thiem

    January 14, 2019 at 1:03 pm

    I love Mug Rugs. I was interested in seeing Erin’s Mug Rug Madness Week but it says my access is denied. Do you know why? Thanks for the Little Cottage Mug Rug.

    1. Christina

      January 16, 2019 at 4:03 pm

      I don’t think Erin has her blog anymore, so i’m guessing that’s why you can’t access it.

  • 10 Eye-catching Mug Rug Tutorials • kitskorner.com

    March 11, 2021 at 2:15 pm

    […] at The Sometimes Crafter has this quick and easy little house mug rug as well as a ton of other tutorials to leave you […]

  • Samantha Macrina

    June 25, 2022 at 3:55 pm

    The link to the cottage mug rug doesn’t work…

    1. Christina

      June 25, 2022 at 5:14 pm

      It’s working just fine for me…is it just not opening or going to a 404/error page? If it’s just not opening, try holding down the Control key while clicking on it with your mouse. This will force it to open in a new window. Perhaps your browser is blocking it from opening. It should just open as a PDF in your browser, but every computer is different. If you’re still having trouble you can send me an email and I’ll send you the file. :)

Leave a comment

Your email address will not be published. Required fields are marked *

Prev Post

Half Square Triangles

Next Post

Coffee Time Cross-Stitch