
Somerset Ornament Tutorial
This post originally appeared on Say Yes! to Hoboken.

I am always blown away at how quickly Christmas arrives after Thanksgiving. It seems like the wait is endless, and then after Thanksgiving I feel so rush and like there is no time for everything that has to be done. Thankfully, this little ornament works up pretty quickly, and can provide some much needed down time on a busy day, as well as be a pretty addition to a package that does double duty as a tree ornament! Of course, you could always make a few for yourself, too!

First things first, you are going to need to gather some supplies and make some fabric cuts. I suggest choosing two dark fabrics (for round 1 and 3) and one light (Round 2).
4 – 2.5” squares for your center (round 1)
8 – 2.5” squares for round 2, and round 3
1 – 4.5” square backing fabric
1 – 4.5” square of lightweight fusible interfacing
1 – 5” cut of ribbon for hanging your ornament
2 – 15” lengths of lace (or 1 – 18” length of bias binding)

1. First you will need to fold all of your squares into points. Start by folding your square in half and pressing it with an iron. Then, working with the fold at the bottom, fold one side of your rectangle up to the open side and press. Fold the other side in the same manor until you have a point, as shown in the picture. Press these really well with lots of steam to help them lay flat, as they tend to want to open back up before you have a chance to sew them down. Repeat this same process for all of your 2.5” squares.

2. Grab your square of interfacing and find the center. Place your four center points together and iron in place. I have a small applique iron and this worked perfect, but you can also carefully use the tip of your regular iron to press this. As the fabric is quite bulky all folded up, you don’t really need to worry about your iron touching the interfacing if you place it directly on top of all the pieces at once, but I like to iron once piece down at a time to make sure all the fabric is touching without spaces.
Traditionally, this ornament is assembled by sewing each of your rounds down on the sewing machine, but I liked using fusible interfacing. I felt I could be more accurate in my point spacing and I was less frustrated because the pieces were not shifting around under a machine foot. Do what ever works best for you!
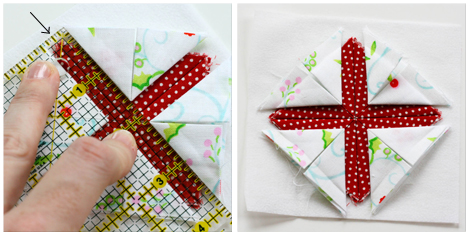
3. Now you will begin the next round by placing four of the points of your light fabric directly on top of the points from your first round. Using a ruler, line up the 1/4” mark where two pieces from round 1 come together and then move your light fabric point until it’s aligned with the edge of the ruler and centered on the piece below (what that means is to make sure the point of your lighter fabric is on the center line of your point below). Press in place. Repeat for the other three points.

4. Placing the other four points of Round 2 works similar to Step 3, only this time you will line the 1/4” mark of your ruler up with the center of the points you placed in Step 3.
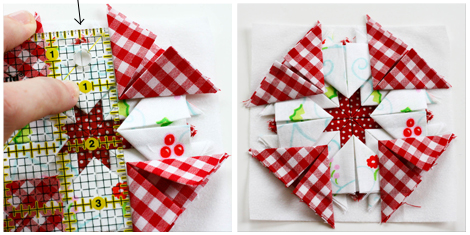
5. Round 3 is, again, worked in the same fashion as Round 2, only you will align your ruler on the 1/2” mark of your Round 2 points.
6. Repeat Step 4, using the 1/2” mark on our ruler placed on the points below, similar to Step 5. The basic constructions of your piece is now done. Give it one final press to make sure it’s securely attached to the interfacing. Then, give it a quick basting stitch, about 1/4” from the edge, on your sewing machine.
Of course the laying down of points could all be done arbitrarily, without the use of a ruler. I’ve done this a few times and really like the “wonky” quality it gives the star.
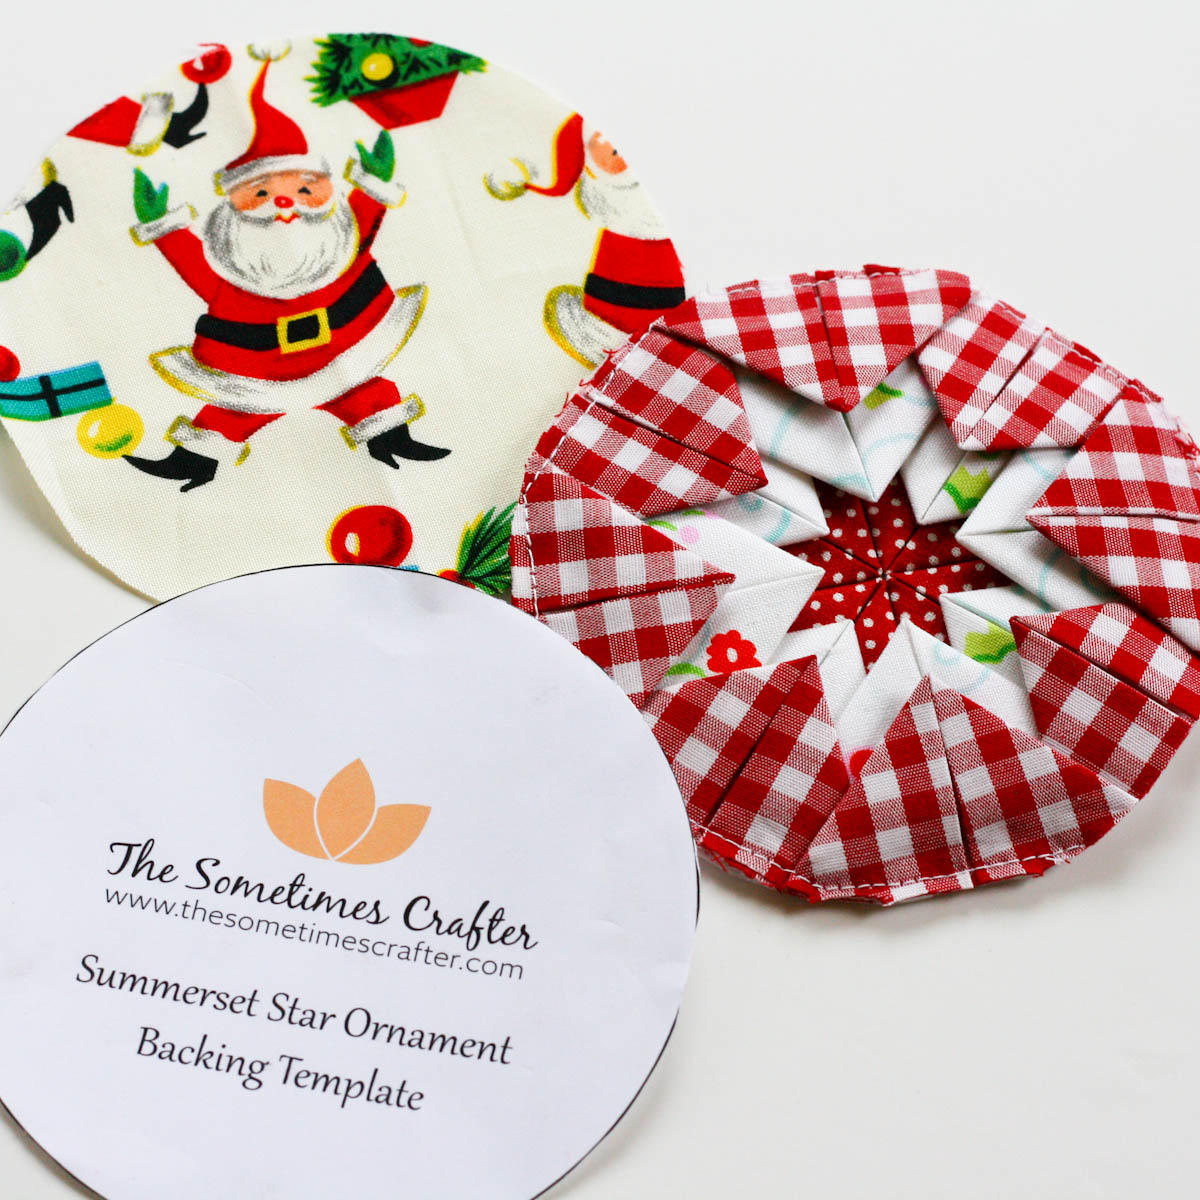
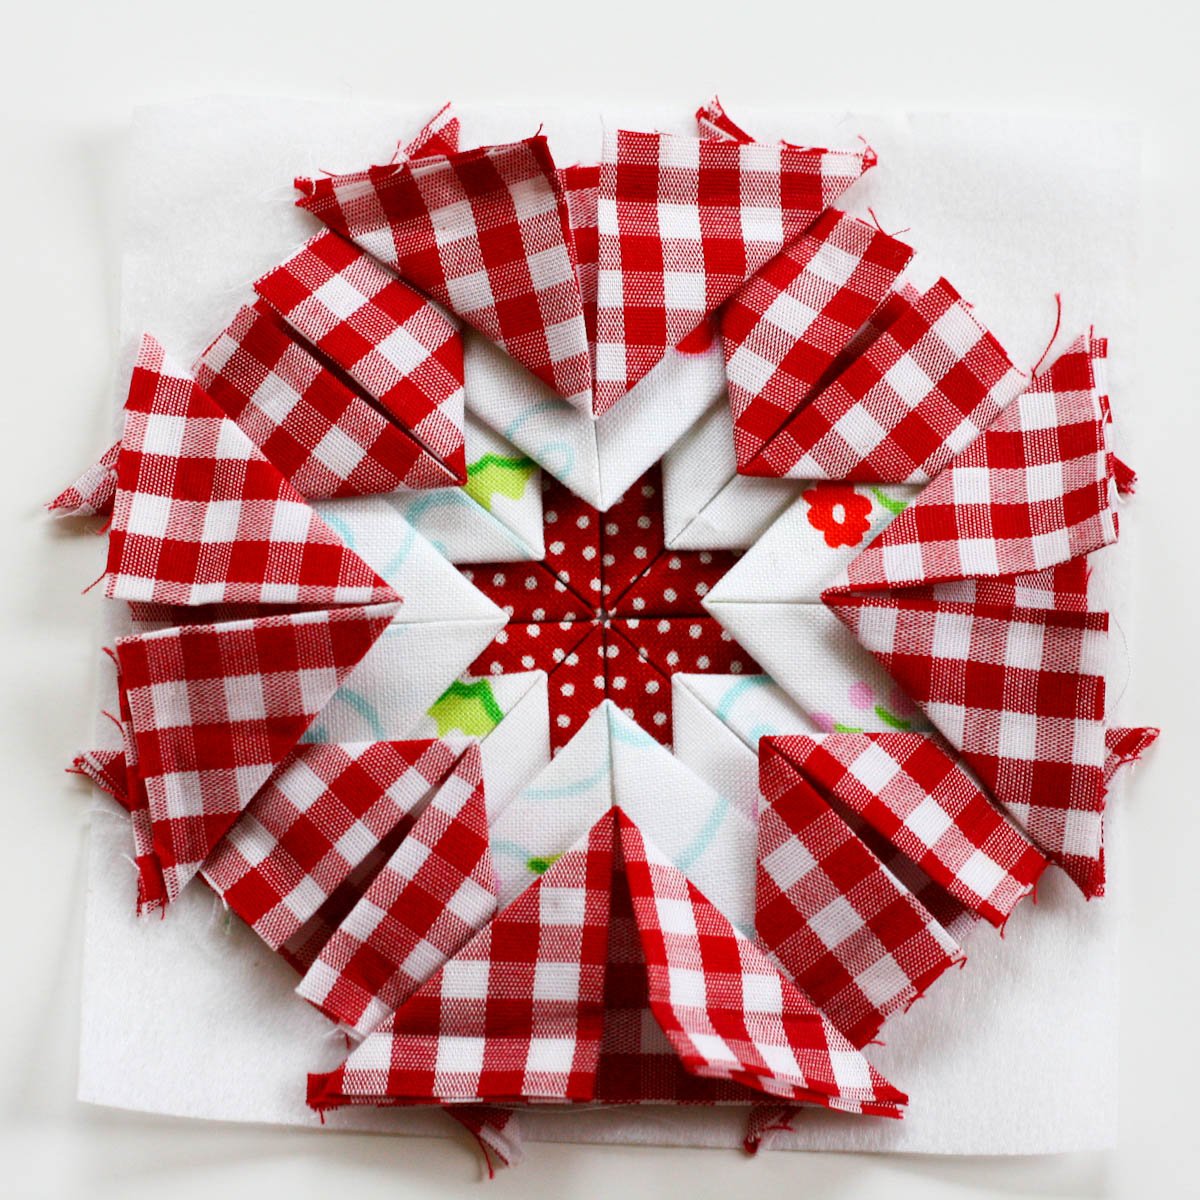
7. Trim your ornament with the template provided (link below – it’s a 4.25” circle) and also use this template to cut your backing fabric.


8. Before you put it all together, you’re going to want to secure the points in place. Using a thread that matches your fabric, stitch them down by bringing a stitch up from the backside just at the point and then back down just outside of the point of fabric. Continue around for all the points. I used red thread for Rounds 1 and 3 and white for Round 2.
9. Pin your ribbon loop in place and then your backing fabric, right side out. Attach your lace first to the back of your ornament and then to the front, either by machine or hand, making sure raw edges of the ornament are concealed between the lace. Don’t forget to fold the ends of your lace over on it self to give a clean start and finish.
If your not a fan of lace, you could always choose to use bias binding, first sewing it to the front of your ornament with a scant 1/4” seam allowance and then hand stitching it to the back. I did one with binding here.

And that’s all there is to it! If you feel as though you might get a little lost in the laying of your points, don’t worry about it. Just make your points and start laying them down and you’ll soon get a feel for it. These go so quickly and would be adorable with any number of fabric combinations! The one at the top right was my inspiration and was originally made by my aunt for my mom back in the 80’s sometime. It has always been one of my favorite ornaments on the tree and I’m so glad to be able to recreate it!