
Warning :: Very long and detailed post! Now comes the fun part – curling up on your sofa in front of the TV, with your quilt, and attaching the binding. Of course you can always stitch in the ditch on the front of your quilt to hold the backside of the binding down, but I think it looks so much nicer to hand stitch it down – and it’s really not that hard! I can usually finish it in one sitting. Which is usually a short sitting since I have a short attention span. Getting Ready :: Tying the Knot…
-
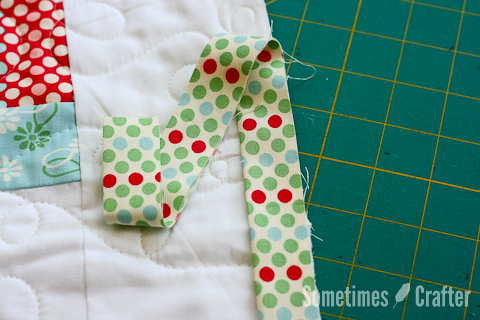
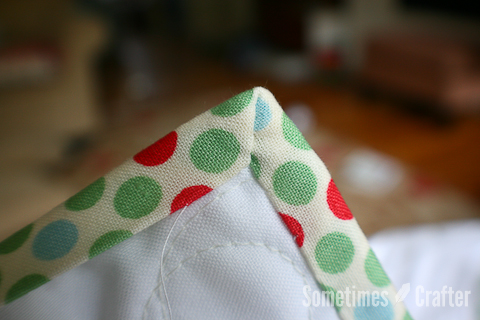
Binding Tutorial Part 2
Read moreThere are gobs and gobs of good tutorials out there on attaching your binding, but I wanted a simpler more condensed version of what I have in the sidebar already. You can find Part 1 here. Directions 1. Pick a side of your quilt, somewhere around the middle and position your binding, leaving your self a generous tail (unsewn) of your binding for later attaching to your other end. Now, there is two ways I do this next part, the first is the lazy way: 2. Stitch down the length of your binding until your a few inches from the…
-
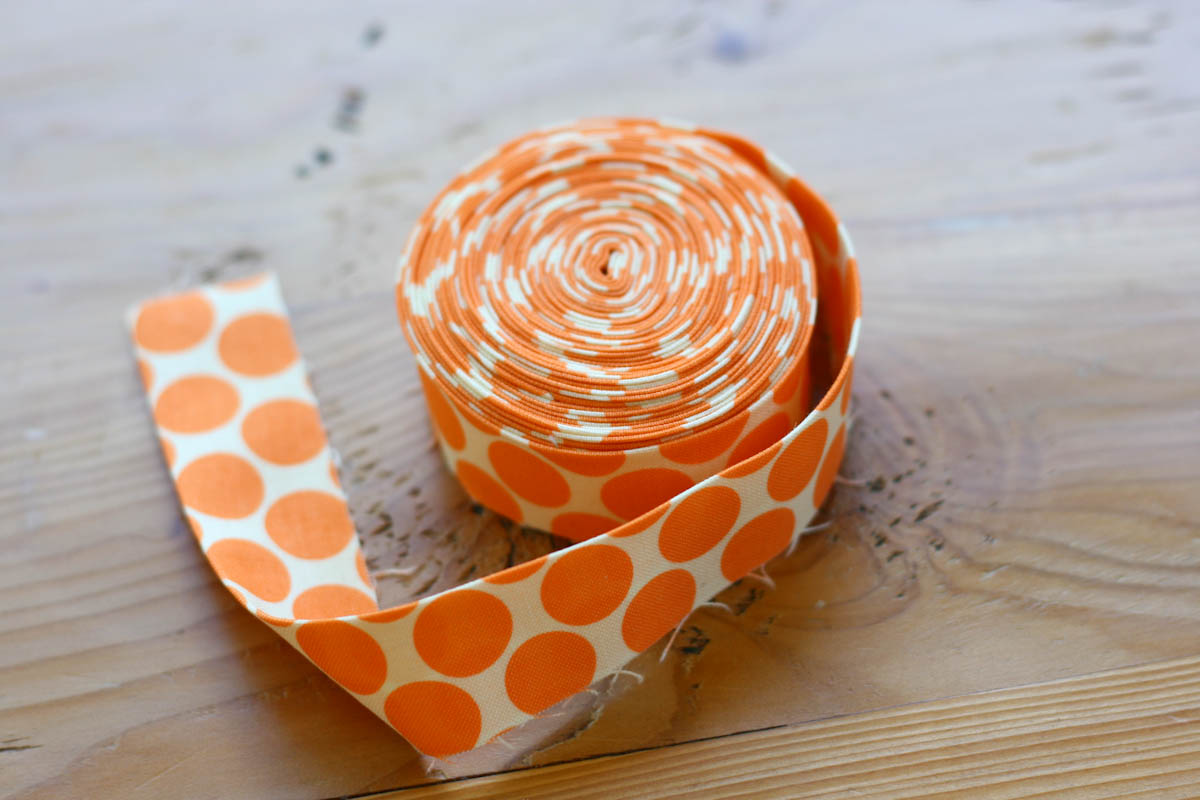
Binding Tutorial Part 1
Read moreAs promised, here is the first in a series on how I go about making, attaching and finishing my binding. In this first installment I will be walking you through how I make my binding. Remember: there is no right or wrong way, sometimes just easier and smarter. Always do what works for you. And here we go… Directions 1. Cut enough strips of fabric, 2-1/2” wide, to go all the way around your quilt. To figure out how much you need to go around your quilt, measure the top and one side, add together and multiply by 2. This…
-
Tutorial :: Improvisational Block
Read moreToday’s tutorial is not the same as the last tutorials. There is no direct way for me to tell you all how to do your improvised block, I can only lead you in the direction to free form sewing your pieces together. I created my block and at the end was very happy with it – but let me tell you, part way through I wasn’t liking it. But I just stuck with it and I’m glad I did. So the directions in this tutorial will simply explain how I went about piecing my block. First things first, go grab…
-

Fabric Scrap Basket Pressing
Read moreAs an aside to my Fabric Scrap Basket tutorial, I thought I would talk about how I get my sides so crisp and square. I press. A lot. When I first finish sewing the basket together, this is what it looks like. Very rounded from the top. Not very “basket” like in the boxy sense. First I start by folding the sides in toward the center and pressing with the iron along what would be the bottom edge. When I’m pushing the side into the center, I make sure to push it in only so much as to have the…
-
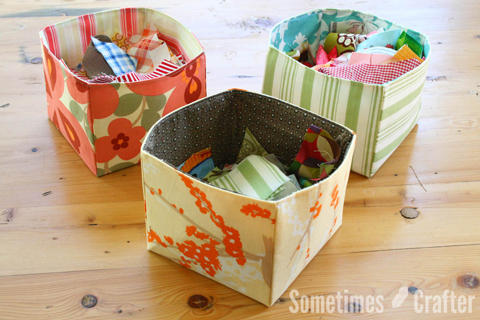
Fabric Scrap Basket Tutorial
Read moreI thought I’d share with you how to make my fabric scrap “basket”. It’s VERY simple. I whipped out another two baskets in no time at all. Now I have all of my smaller scraps organized into small, medium and large groupings. Did I even mention I’m a Capricorn and like to be organized to a fault? No? Well if this doesn’t prove it, I don’t know what will. Go ahead, make yourself a few of these today. You’ll love it so much better than your Ziploc bags. I know I do! Directions 1. You will need to gather your…
-
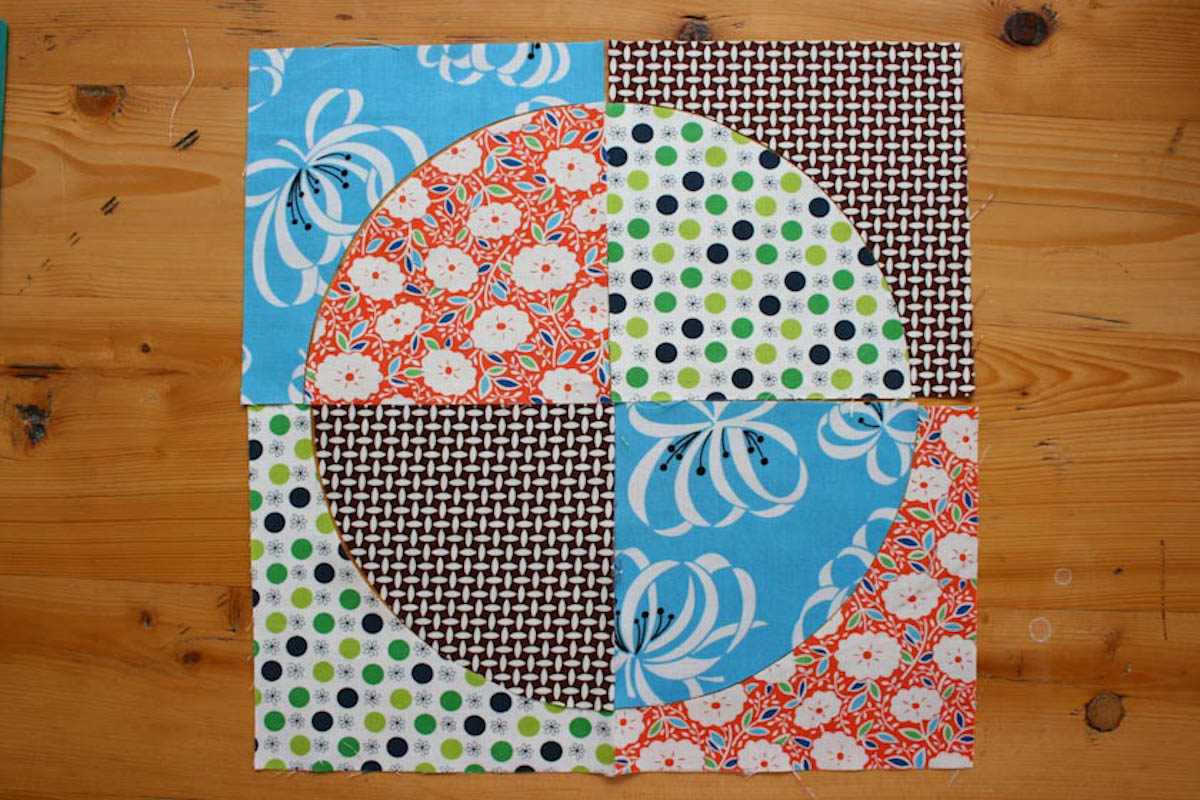
Drunkard’s Path Block
Read more**I have since ‘misplaced’ the original template file for this block, but the directions still apply for any drunkards path piecing you do!** First things first: you need to decide how many fabrics you want to use. You’ll want at least two fabrics, but no more than 8 for a block like this. (You’ll see why I say a “block like this” at the end.) Directions 1. Choose your fabrics and cut to 7 1/2” square. 2. Stack all your fabrics, lining up all edges. 3. Lay your template on top of your fabric. 4. Cut around the curve. We…
-
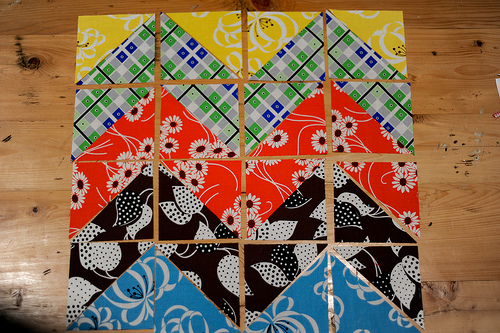
Zigzag Block Tutorial
Read moreWell, here we go! For you experienced quilters, there will be a little more info than needed. For those of you somewhat new to the game, I hope to provide ample information. Never hesitate to email should you have a question. I’m always here to help. 1. Pick out 5 complimentary fabrics and cut the following: 2. Cut your squares in half on their diagonal as shown. 3. Lay out triangles in order they will appear in block to help with the following step. 4. Match up your fabrics as follows: 5. Sew your all of your blocks together. Press…
-
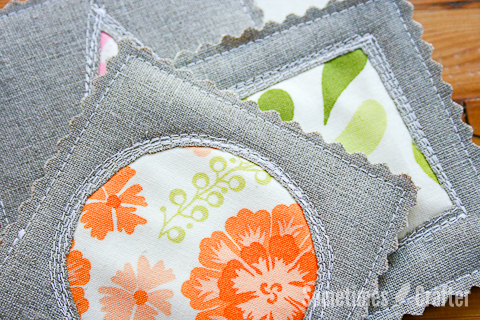
Coasters Tutorial
Read moreI made some of these for my friend for her birthday. They are so quick and easy! Directions 1. Cut out your fabric for the top and bottom, and a piece of batting to sandwich between, 4” square. Gather scraps, at least as big as the area you want to show through on top. I cut my scraps to 4” square, also. 2. Draw your design, to be cut out after sewing, on the backside of the scrap fabric. 3. Place the right side of your scrap fabric to the wrong side of the top fabric. Sew around your design 3…